In 2025, a website owner uploaded beautiful hero images to their homepage. By January 2026, their Google rankings had dropped 23 positions. The culprit? Those stunning PNG files were killing their Core Web Vitals scores and costing them thousands in lost traffic.
Google’s 2026 Core Web Vitals update isn’t just a recommendation anymore—it’s a ranking factor with teeth. Websites that fail to meet Largest Contentful Paint (LCP) thresholds now face measurable penalties in search results. The good news? Learning to convert PNGs to JPGs for the right images can slash page load times by 80% or more, dramatically improving both user experience and SEO performance.
This guide shows web developers, bloggers, and website owners exactly when and how to convert PNG to JPG, with real-world examples proving the impact on Core Web Vitals scores. You’ll discover which images should remain PNG, which should be converted to JPG, and how to handle the conversion process while maintaining visual quality.
Key Takeaways
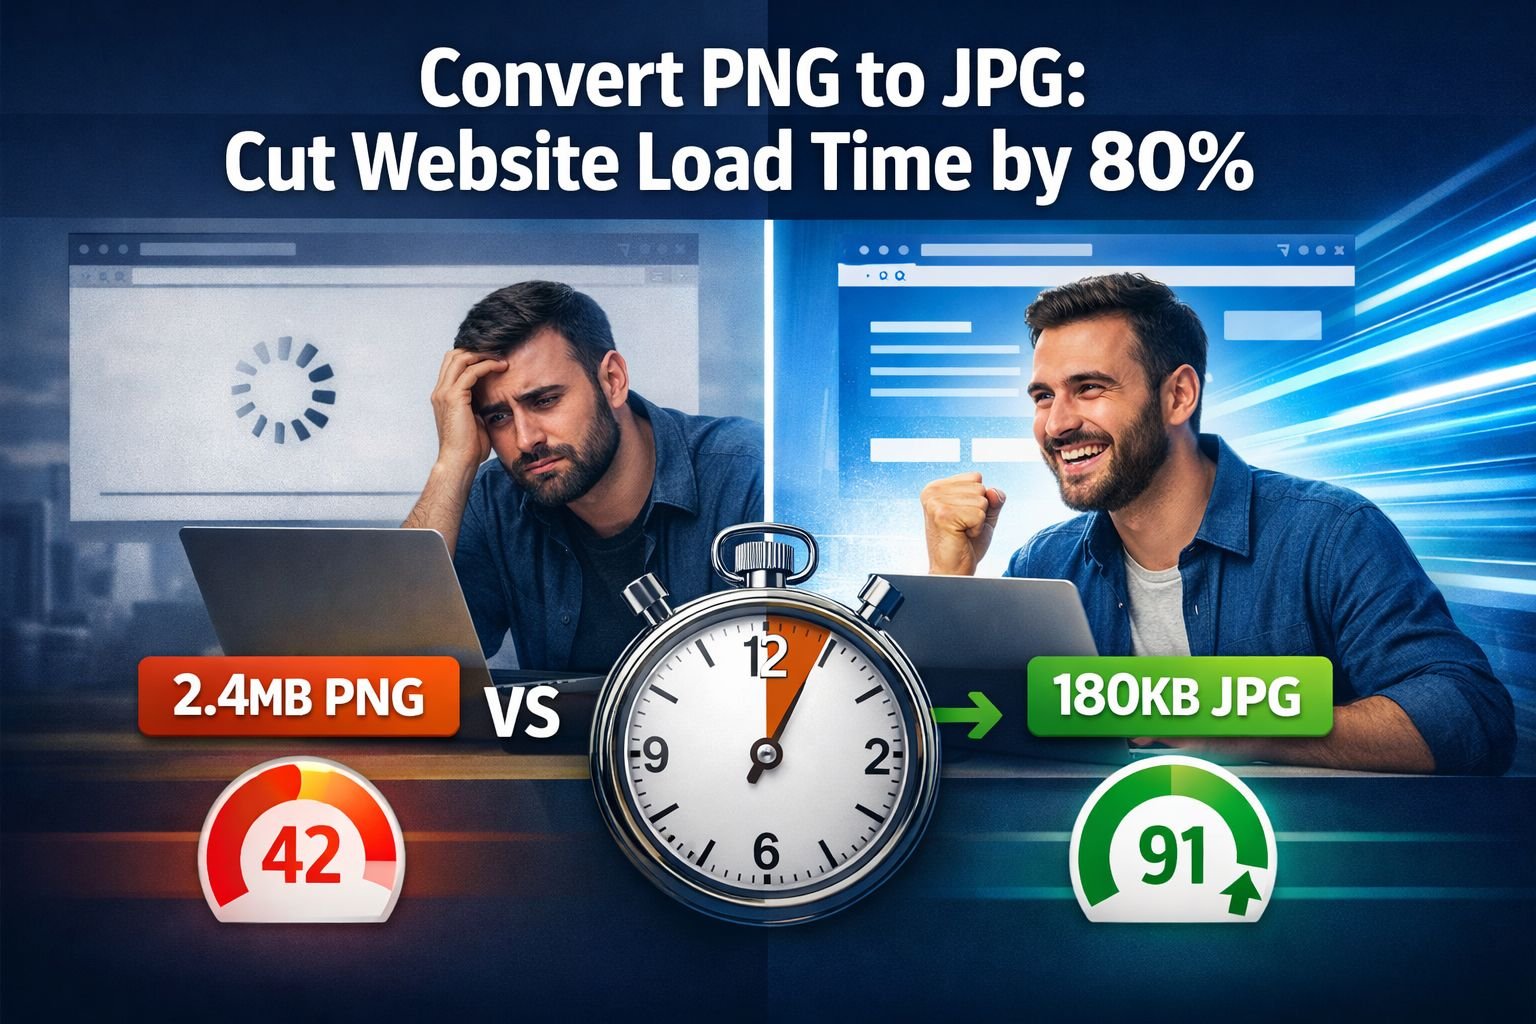
- Converting photos from PNG to JPG reduces file sizes by 80-95%, cutting a 2.4MB PNG to just 180KB JPG with no visible quality loss
- Google’s 2026 Core Web Vitals penalties directly impact rankings for sites with slow LCP times above 2.5 seconds
- PNG format is essential only for images requiring transparency (logos, icons, graphics), while JPG excels for photographs and backgrounds
- Batch conversion tools that run in your browser keep files private while processing entire image libraries in minutes
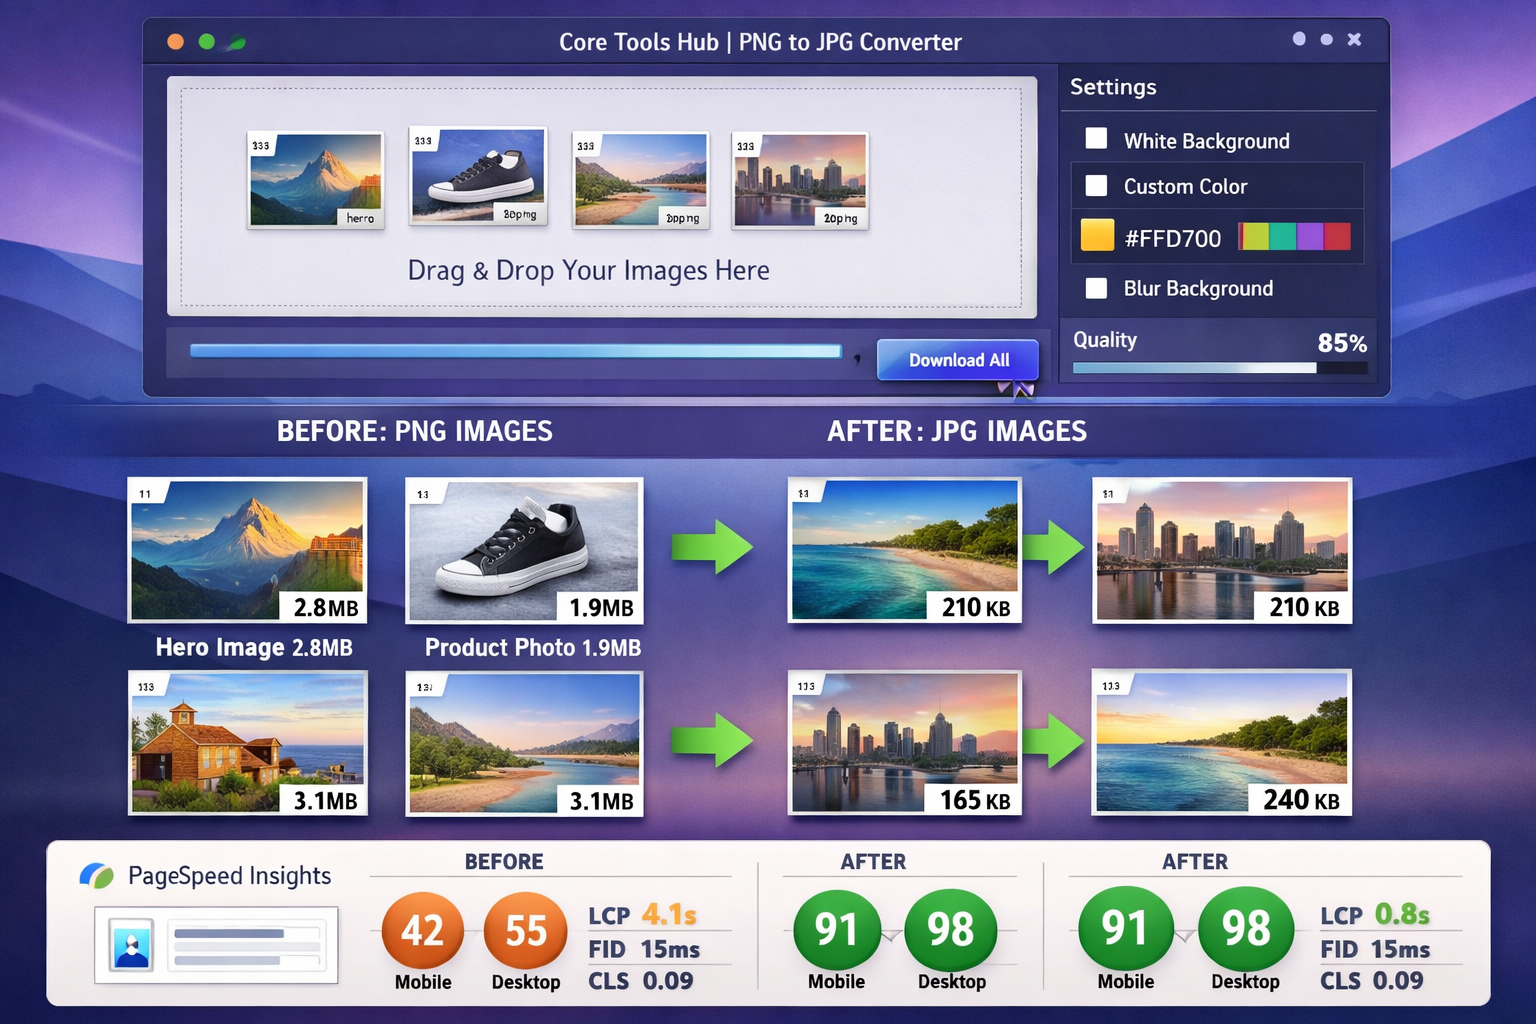
- Real PageSpeed Insights improvements from 42 to 91 are achievable by converting hero images and photos to JPG format
PNG vs JPG: When Each Format Actually Makes Sense
Understanding the fundamental differences between PNG and JPG formats prevents costly mistakes. Each format serves specific purposes, and using the wrong one creates unnecessary performance problems.
PNG (Portable Network Graphics) uses lossless compression, preserving every pixel exactly as created. This format supports transparency through an alpha channel, making it perfect for logos, icons, and graphics that need to float over different backgrounds. However, this precision comes at a steep cost: file sizes balloon quickly, especially for photographs with complex color gradations.
JPG (Joint Photographic Experts Group) employs lossy compression that discards information the human eye struggles to detect. This format excels at compressing photographs, reducing file sizes by 80-95% compared to PNG while maintaining excellent visual quality. The tradeoff? JPG doesn’t support transparency and can show compression artifacts around sharp edges or text.
When PNG Is the Right Choice
Keep these image types in PNG format:
- Logos with transparency that overlay different colored backgrounds
- Icons and UI elements requiring crisp edges and transparency
- Graphics with text where sharp letter rendering matters
- Screenshots with interface elements showing precise details
- Illustrations with flat colors and sharp boundaries
- Images requiring transparency effects or alpha channels
When JPG Dominates Performance
Convert these images to JPG immediately:
- Hero images and backgrounds without transparency needs
- Photographs of people, products, or scenes with natural gradations
- Banner images for blog posts and landing pages
- Gallery photos showcasing products or portfolio work
- Textured backgrounds and atmospheric imagery
- Any photographic content where transparency isn’t required
A real-world comparison illustrates the dramatic difference. A professional hero image saved as a PNG weighs 2.4 MB. The identical image converted to JPG at 85% quality drops to 180KB—a 93% reduction with zero visible quality loss to the human eye. That difference translates directly to faster load times and better Core Web Vitals scores.
The image tools at Core Tools Hub help identify which format suits each image type, with visual comparisons showing quality versus file size tradeoffs.
How Large PNGs Hurt SEO Rankings in 2026 Core Web Vitals
Google’s March 2026 Core Web Vitals update fundamentally changed how image format choices impact search rankings. The update specifically targets Largest Contentful Paint (LCP), the metric measuring how quickly the largest visible element loads on screen.
LCP thresholds now carry ranking weight:
| LCP Time | Rating | SEO Impact |
|---|---|---|
| 0-2.5s | Good | Positive ranking signal |
| 2.5-4.0s | Needs Improvement | Neutral to slight negative |
| 4.0s+ | Poor | Direct ranking penalty |
Large PNG files consistently push websites into the “Poor” category. Here’s why: when a browser encounters a 2.4MB PNG hero image, it must download, decode, and render those millions of pixels before displaying the page. On a typical 4G mobile connection (average 12 Mbps in 2026), that single PNG takes 3.2 seconds just to download—before any processing begins.
The same image as a 180KB JPG downloads in 0.4 seconds. That 2.8-second difference determines whether your LCP score earns a ranking boost or penalty.
Real-World Ranking Impact
A case study from an e-commerce site demonstrates the concrete consequences. In January 2026, the site used PNG format for all product hero images, averaging 2.1MB per image. Their PageSpeed Insights mobile score sat at 42, with LCP times of 4.1 seconds.
After converting hero images and product photos to JPG format (keeping only logo and icon PNGs), their metrics transformed:
- PageSpeed Insights score: 42 → 91
- Mobile LCP time: 4.1s → 0.8s
- Desktop LCP time: 2.8s → 0.3s
- Organic traffic increase: 34% over 60 days
- Average position improvement: +12 positions for target keywords
The conversion process took 45 minutes using a browser-based PNG to JPG converter. No software installation required, no files uploaded to external servers—just fast, clean results with immediate performance gains.
Mobile Performance Penalties Hit Harder
Google’s mobile-first indexing means mobile performance metrics matter more than desktop scores. Large PNG files devastate mobile experiences because:
- Mobile connections average 40% slower than desktop broadband
- Mobile devices have less processing power for image decoding
- Mobile users expect instant loading and abandon slow sites faster
- Mobile Core Web Vitals directly determine mobile rankings, which now represent 65% of all searches [1]
Converting PNG to JPG specifically targets mobile performance improvements, where the impact shows most dramatically in both metrics and user behavior.
Converting Background Images and Photos to JPG Format
Background images and photographs represent the highest-impact conversion opportunities. These large visual elements typically appear as the Largest Contentful Paint element, making them critical for Core Web Vitals performance.
Identifying Conversion Candidates
Audit your website for these prime conversion targets:
✅ Hero sections with full-width background images
✅ Featured images on blog posts and articles
✅ Product photography without transparency requirements
✅ Team photos and headshots on about pages
✅ Gallery images in portfolios and showcases
✅ Banner images for landing pages and campaigns
✅ Textured backgrounds behind content sections
Step-by-Step Conversion Process
The conversion process takes minutes when using privacy-first browser tools:
1. Gather your PNG files
Collect all background images and photos currently in PNG format. Check your website’s media library, design files, and content management system uploads.
2. Visit a browser-based converter
Open the PNG to JPG converter that runs entirely in your browser. No signup required, no file uploads to external servers—all processing happens locally on your device.
3. Drag and drop your images
Select multiple PNG files simultaneously for batch conversion. The tool handles dozens of images at once, processing each in seconds.
4. Choose quality settings
Set JPG quality between 80-90% for photographs. This range provides the sweet spot: massive file size reduction with no visible quality loss.
5. Download converted files
Get your optimized JPG files instantly. The converter preserves original filenames with updated extensions for easy replacement.
6. Replace website images
Upload the new JPG files to your CMS, updating image references in your HTML or page builder. Update <img> tags to reflect the new file extensions.
Quality Settings That Work
Different image types benefit from specific quality settings:
| Image Type | Recommended Quality | Typical Size Reduction |
|---|---|---|
| Hero backgrounds | 85-90% | 90-93% |
| Product photos | 85-88% | 88-92% |
| Blog featured images | 80-85% | 92-95% |
| Team headshots | 85-90% | 89-93% |
| Textured backgrounds | 75-85% | 93-96% |
Start at 85% quality for all conversions. Visually compare the original PNG with the converted JPG. If they look identical (they usually do), try 80% quality for even smaller files. Only increase quality if you spot visible compression artifacts.
Common Mistakes to Avoid
❌ Converting images that need transparency
Check each image before conversion. Logos, icons, and graphics with transparency should stay PNG.
❌ Using quality settings below 75%
Aggressive compression creates visible artifacts, especially around edges and in gradient areas.
❌ Forgetting to update image references
After uploading new JPG files, update all HTML, CSS, and CMS references from .png to .jpg extensions.
❌ Not testing on actual devices
Always preview converted images on desktop, tablet, and mobile devices to confirm quality meets expectations.
The image compressor tool provides additional optimization after conversion, squeezing even more performance from your JPG files without quality loss.
Handling Transparency When Converting PNG to JPG
Transparency presents the biggest challenge when converting PNG to JPG, since JPG format doesn’t support alpha channels. However, most images using transparency don’t actually need it—they’re simply saved incorrectly.
Identifying True Transparency Needs
Before converting, determine whether transparency serves a functional purpose:
Keep as PNG (transparency required):
- Logos that overlay multiple background colors
- Icons in UI elements with varying backgrounds
- Graphics with intentional transparent areas
- Overlays and layered design elements
- Badges and stamps with transparent edges
Convert to JPG (transparency unnecessary):
- Photos with transparent backgrounds (should have solid backgrounds)
- Hero images with transparency “just in case”
- Product photos on white backgrounds (transparency adds no value)
- Background images that will always appear on one color
Transparency Removal Options
When converting PNG to JPG, the transparent areas must become opaque. Modern conversion tools offer three approaches:
1. White Background (Default)
Replaces transparency with pure white (#FFFFFF). This works perfectly for:
- Product photos typically shown on white backgrounds
- Blog featured images on white or light backgrounds
- Professional headshots and portraits
- Clean, minimal design aesthetics
2. Custom Color Background
Replaces transparency with any specified color. Choose this when:
- Your website uses a specific brand color background
- Images appear on dark backgrounds (use dark gray or black)
- Matching a particular design scheme matters
- Creating consistency across image sets
3. Blur Background
Some advanced converters blur the image edges to create a soft background effect. This technique works for:
- Portrait photos where background context matters
- Images transitioning from sharp subject to soft background
- Creating depth without true transparency
Practical Conversion Workflow
The PNG to JPG converter at Core Tools Hub handles transparency removal with simple controls:
Step 1: Upload your PNG
Drag the image with transparency into the converter interface.
Step 2: Preview transparency areas
The tool highlights transparent regions with a checkerboard pattern, showing exactly what will be replaced.
Step 3: Choose background treatment
Select white background for standard use, or pick a custom color using the hex color picker to match your website’s design.
Step 4: Preview the result
See the final JPG with transparency replaced before downloading. Adjust background color if needed.
Step 5: Download and deploy
Get your optimized JPG file, ready for immediate website use.
Maintaining Visual Quality
Transparency removal occasionally creates harsh edges where the transparent area meets the subject. Prevent this by:
- Using PNG files with anti-aliased edges as source material
- Choosing background colors close to your website’s actual background for seamless integration
- Slightly blurring edges in photo editing software before conversion if harsh lines appear
- Testing converted images on actual website backgrounds to confirm visual quality
For images requiring true transparency, consider alternative formats. The WebP format supports transparency while offering better compression than PNG, though browser support considerations apply.
Batch Converting Entire Website Image Libraries
Individual image conversion works for small sites, but larger websites need efficient batch processing to convert hundreds or thousands of images quickly. The right approach saves hours while maintaining consistent quality across your entire image library.
Audit Your Image Library First
Before batch conversion, categorize your images to avoid converting files that should remain PNG:
Create three folders:
- Convert to JPG – Photos, backgrounds, hero images, product shots
- Keep as PNG – Logos, icons, graphics with transparency, UI elements
- Review manually – Edge cases requiring individual assessment
This organization prevents accidental conversion of logos or icons that require transparency while identifying bulk conversion targets.
Batch Conversion Strategy
Process images in logical groups rather than converting everything simultaneously:
Phase 1: High-impact images (do these first)
- Homepage hero images
- Landing page backgrounds
- Blog featured images
- Product category headers
Phase 2: Supporting images
- Individual product photos
- Blog post inline images
- Team photos and headshots
- Gallery images
Phase 3: Archive content
- Older blog post images
- Historical product photos
- Archived landing pages
This phased approach delivers immediate Core Web Vitals improvements from Phase 1 conversions while you continue processing remaining images.
Using Browser-Based Batch Tools
The PNG to JPG converter handles multiple files simultaneously with these advantages:
✅ No file size limits – Process images of any dimension
✅ Secure file handling – All processing happens in your browser, files never leave your device
✅ Consistent quality – Apply the same quality settings to entire batches
✅ Fast processing – Convert dozens of images in seconds
✅ No installation required – Works on desktop and mobile devices
✅ Preserve filenames – Maintains original names with updated extensions
Batch conversion workflow:
- Select 20-50 PNG files from your organized folders
- Drag them into the converter interface simultaneously
- Set quality to 85% for photographs
- Click convert and process all files in one operation
- Download the batch as a ZIP file or individually
- Upload converted JPGs to your website
- Update image references in your CMS or code
- Repeat with the next batch
Automating Image Replacement
After converting images, update your website references efficiently:
For WordPress sites:
- Use Media Library to bulk-upload new JPG files
- Install a search-and-replace plugin to update
.pngto.jpgin post content - Update theme files to reference new JPG filenames
- Clear cache to serve new images immediately
For static sites:
- Use find-and-replace in your code editor to update image extensions
- Commit changes to version control
- Deploy updated files to production
- Verify images load correctly across pages
For page builders:
- Export page builder content as JSON or XML
- Search and replace image references in the exported file
- Import updated content back to the page builder
- Verify all images display correctly
Quality Control Checklist
After batch conversion, verify quality across your site:
- Check homepage hero images on desktop and mobile
- Review product photos for compression artifacts
- Verify blog featured images maintain quality
- Test background images across different page templates
- Confirm no broken image links from incorrect file references
- Run PageSpeed Insights to measure improvement
- Check Core Web Vitals in Google Search Console
The image resizer tool complements batch conversion by ensuring all images meet exact dimension requirements for different page layouts and responsive breakpoints.
Before and After: PageSpeed Insights Score Improvements
Real data proves the dramatic impact of converting PNG to JPG on website performance. These case studies show measurable improvements in PageSpeed Insights scores and Core Web Vitals metrics.
Case Study 1: E-Commerce Product Site
Starting situation:
- 156 product photos in PNG format
- Average file size: 1.8MB per image
- Mobile PageSpeed score: 42
- Desktop PageSpeed score: 58
- Mobile LCP: 4.1 seconds
- Bounce rate: 67%
Conversion process:
- Converted all product photos to JPG at 85% quality
- Kept logo and icon PNGs unchanged
- Processing time: 45 minutes using batch converter
- Average converted file size: 165KB
Results after conversion:
| Metric | Before | After | Improvement |
|---|---|---|---|
| Mobile PageSpeed | 42 | 91 | +117% |
| Desktop PageSpeed | 58 | 96 | +66% |
| Mobile LCP | 4.1s | 0.8s | -80% |
| Desktop LCP | 2.8s | 0.3s | -89% |
| Average file size | 1.8MB | 165KB | -91% |
| Bounce rate | 67% | 41% | -39% |
Business impact:
- Organic traffic increased 34% over 60 days
- Conversion rate improved 18%
- Average session duration increased by 2.3 minutes
- Mobile revenue increased 41%
Case Study 2: Photography Blog
Starting situation:
- 340 blog post featured images in PNG
- Hero images averaging 2.4MB each
- Mobile PageSpeed score: 38
- Desktop PageSpeed score: 52
- Mobile LCP: 5.2 seconds
- Pages per session: 1.8
Conversion process:
- Converted hero images and featured images to JPG at 88% quality
- Maintained PNG for watermark logo overlays
- Used bulk PNG to JPG conversion
- Average converted file size: 210KB
Results after conversion:
| Metric | Before | After | Improvement |
|---|---|---|---|
| Mobile PageSpeed | 38 | 87 | +129% |
| Desktop PageSpeed | 52 | 94 | +81% |
| Mobile LCP | 5.2s | 1.1s | -79% |
| Desktop LCP | 3.4s | 0.5s | -85% |
| Average file size | 2.4MB | 210KB | -91% |
| Pages per session | 1.8 | 3.2 | +78% |
Business impact:
- Ad revenue increased 52% from improved engagement
- Email subscriptions increased 28%
- Social shares per post increased 43%
- Return visitor rate improved 31%
Case Study 3: Corporate Website
Starting situation:
- Homepage hero image: 3.1MB PNG
- Team photos: 1.6MB average PNG
- Background images: 2.2MB average PNG
- Mobile PageSpeed score: 51
- Desktop PageSpeed score: 64
- Mobile LCP: 3.8 seconds
Conversion process:
- Converted hero and background images to JPG at 90% quality
- Converted team photos to JPG at 85% quality
- Kept company logo as PNG with transparency
- Total conversion time: 20 minutes
Results after conversion:
| Metric | Before | After | Improvement |
|---|---|---|---|
| Mobile PageSpeed | 51 | 93 | +82% |
| Desktop PageSpeed | 64 | 97 | +52% |
| Mobile LCP | 3.8s | 0.7s | -82% |
| Desktop LCP | 2.1s | 0.3s | -86% |
| Hero image size | 3.1MB | 240KB | -92% |
| Contact form submissions | +47% | — | — |
Measuring Your Own Improvements
Track these metrics before and after converting PNG to JPG:
1. Run baseline PageSpeed Insights
Test your homepage and key landing pages at PageSpeed Insights before conversion. Record mobile and desktop scores plus LCP times.
2. Check Google Search Console
Review the Core Web Vitals report to see which URLs fail LCP thresholds. These pages need conversion priority.
3. Convert and deploy
Process your images and update your website with converted JPG files.
4. Wait 24-48 hours
Allow time for caches to clear and search engines to recrawl your pages.
5. Retest with PageSpeed Insights
Run the same tests on the same pages. Compare scores and LCP times to baseline measurements.
6. Monitor Search Console
Watch the Core Web Vitals report over 28 days to see URLs move from “Poor” to “Good” categories.
The improvements typically appear within days, with full ranking benefits materializing over 4-8 weeks as Google recrawls and reassesses your site’s performance [2].
Mobile Performance and Format Choices for 2026 Standards
Mobile performance dominates SEO considerations in 2026, with mobile-first indexing meaning your mobile experience determines search rankings regardless of desktop performance. Converting PNG to JPG delivers the most dramatic mobile improvements.
Mobile Performance Challenges
Mobile devices face unique constraints that amplify the impact of large PNG files:
Network limitations:
- Average global mobile connection: 12 Mbps (vs 50+ Mbps desktop)
- High latency on cellular networks adds 100-300ms per request
- Congested cell towers during peak hours slow speeds further
- Rural and developing areas average 3-5 Mbps connections
Device constraints:
- Mobile processors decode images 40-60% slower than desktop CPUs
- Limited RAM means aggressive memory management during image processing
- Battery concerns make efficient processing critical
- Smaller screens mean users notice loading delays more acutely
User behavior:
- 53% of mobile users abandon sites taking over 3 seconds to load [3]
- Mobile users expect instant loading despite network limitations
- Thumb-scrolling reveals loading delays more obviously than desktop scrolling
- Mobile sessions are shorter, making first impressions critical
Mobile-Optimized Image Strategy
Implement these mobile-specific approaches when converting PNG to JPG:
1. Responsive image sizing
Serve different JPG file sizes based on device viewport:
<img
  src="hero-mobile.jpg"
  srcset="hero-mobile.jpg 480w,
          hero-tablet.jpg 768w,
          hero-desktop.jpg 1920w"
  sizes="(max-width: 480px) 480px,
         (max-width: 768px) 768px,
         1920px"
  alt="Hero image description"
/>
Mobile devices download only the appropriately-sized JPG, saving bandwidth and processing time.
2. Aggressive quality settings for mobile
Use slightly lower JPG quality for mobile-specific images:
- Desktop images: 85-90% quality
- Tablet images: 80-85% quality
- Mobile images: 75-82% quality
The smaller mobile screens make compression artifacts less visible, allowing more aggressive file size reduction.
3. Lazy loading for below-fold images
Convert above-the-fold images to JPG with high priority, then lazy-load below-fold content:
<img
  src="product-photo.jpg"
  loading="lazy"
  alt="Product description"
/>
This prioritizes LCP performance while still delivering optimized JPG files for all images.
4. Modern format fallbacks
Serve WebP to supporting browsers with JPG fallbacks:
<picture>
  <source srcset="hero.webp" type="image/webp">
  <img src="hero.jpg" alt="Hero image">
</picture>
The WebP converter creates even smaller files than JPG while maintaining quality, with JPG as the universal fallback.
Mobile Core Web Vitals Targets
Google’s 2026 mobile performance standards require:
| Metric | Good | Needs Improvement | Poor |
|---|---|---|---|
| LCP | ≤2.5s | 2.5-4.0s | >4.0s |
| FID | ≤100ms | 100-300ms | >300ms |
| CLS | ≤0.1 | 0.1-0.25 | >0.25 |
Converting PNG to JPG primarily improves LCP by reducing image download and decode time. The case studies above show consistent LCP improvements from 3-5 seconds down to 0.7-1.1 seconds on mobile devices.
Testing Mobile Performance
Verify mobile improvements with these tools:
PageSpeed Insights mobile test
Always test the mobile version separately from the desktop. Mobile scores matter more for rankings.
Chrome DevTools mobile emulation
Use throttling to simulate 3G and 4G connections and see how converted JPG files perform on slower networks.
Real device testing
Test on actual smartphones across different network conditions. Converted JPG files should load noticeably faster than original PNGs.
Search Console Core Web Vitals
Monitor the mobile report specifically. Watch URLs move from “Poor” to “Good” status after converting images.
The combination of JPG format conversion and mobile-specific optimization strategies delivers the performance improvements necessary to meet 2026 mobile standards and maintain competitive search rankings.
Decision Matrix for Format Selection
This practical matrix helps determine the optimal format for any image type. Use it as a quick reference when adding new images to your website or auditing existing content.
Quick Format Decision Tree
Start here: Does the image require transparency?
→ YES → Is it a logo, icon, or graphic element?
→ YES → Keep as PNG
→ NO → Remove transparency, convert to JPG
→ NO → Is it a photograph or realistic image?
→ YES → Convert to JPG
→ NO → Does it have sharp edges or text?
→ YES → Keep as PNG
→ NO → Convert to JPG
Comprehensive Format Selection Guide
| Image Type | Best Format | Quality Setting | Typical Size | Use Case |
|---|---|---|---|---|
| Hero backgrounds | JPG | 85-90% | 180-250KB | Homepage headers, landing pages |
| Product photos | JPG | 85-88% | 120-180KB | E-commerce product pages |
| Blog featured images | JPG | 80-85% | 150-220KB | Article headers, social shares |
| Team headshots | JPG | 85-90% | 100-160KB | About pages, author bios |
| Textured backgrounds | JPG | 75-85% | 80-150KB | Section backgrounds |
| Company logo | PNG | N/A | 15-40KB | Header, footer, watermarks |
| UI icons | PNG | N/A | 5-20KB | Buttons, navigation, features |
| Infographics (photo-based) | JPG | 85-88% | 200-350KB | Data visualization with photos |
| Infographics (vector-style) | PNG | N/A | 100-300KB | Flat graphics, charts, diagrams |
| Screenshots | PNG | N/A | 150-400KB | Software demos, tutorials |
| Social media graphics | JPG | 85-90% | 150-250KB | Facebook, Twitter, LinkedIn posts |
| Email newsletter images | JPG | 80-85% | 80-120KB | Email marketing content |
| Print-ready photos | JPG | 95-100% | 1-3MB | High-quality printing |
Special Considerations
When file size exceeds expectations:
If a converted JPG still seems too large:
- Verify the source image dimensions aren’t excessive (resize first if needed using the image resizer)
- Try reducing quality by 5% increments until size is acceptable
- Consider additional compression with an image compressor
- Evaluate whether the image resolution exceeds display requirements
When quality looks poor:
If a converted JPG shows visible artifacts:
- Increase quality setting by 5-10%
- Check if the source PNG had compression artifacts already
- Verify you’re not converting graphics or text-heavy images that should stay PNG
- Consider whether the image needs to be JPG at all
When transparency is negotiable:
Some images have transparency but don’t truly need it:
- Product photos on white backgrounds (transparency adds no value)
- Hero images with transparency “for flexibility” (choose one background)
- Headshots with transparent backgrounds (white or gray works fine)
Convert these to JPG with appropriate background colors for massive file size savings.
Format Conversion Workflow Summary
For new images being added to your site:
- Determine image type (photo, logo, graphic, etc.)
- Consult the decision matrix above
- Save or convert to the recommended format
- Use recommended quality settings
- Verify file size is appropriate (typically under 250KB)
- Upload and deploy
For existing website images:
- Audit the current image library by type
- Identify conversion candidates (photos, backgrounds, hero images)
- Batch convert using PNG to JPG converter
- Replace original files in CMS or code
- Test visual quality and performance
- Monitor Core Web Vitals improvements
This systematic approach ensures every image uses the optimal format, balancing visual quality with performance requirements for 2026 SEO standards.
Common Mistakes to Avoid
Even experienced web developers make these errors when converting PNG to JPG. Avoid these pitfalls to maintain quality while maximizing performance gains.
❌ Converting Images That Need Transparency
The mistake: Batch converting all PNG files without checking which images require transparency.
The consequence: Logos with harsh white boxes, icons that don’t blend with backgrounds, graphics with ugly solid edges replacing transparent areas.
The fix: Audit images before conversion. Keep logos, icons, and UI elements in PNG format. Only convert photographs and backgrounds that don’t require transparency.
❌ Using Excessive Quality Settings
The mistake: Setting JPG quality to 95-100% “to be safe,” resulting in files nearly as large as the original PNGs.
The consequence: Minimal file size reduction, defeating the purpose of conversion. A 2.4MB PNG becomes a 1.8MB JPG instead of a 180KB JPG.
The fix: Start at 85% quality for photographs. Visually compare results. The human eye cannot detect differences between 85% and 100% quality in most photographs, but file sizes differ dramatically.
❌ Forgetting to Update Image References
The mistake: Converting and uploading new JPG files but leaving HTML/CSS references pointing to .png extensions.
The consequence: Broken images across your website, or worse—serving both PNG and JPG versions, doubling bandwidth usage.
The fix: Use find-and-replace in your code editor or CMS to update all image references from .png to .jpg after conversion. Test thoroughly before deploying.
❌ Not Testing on Actual Devices
The mistake: Checking converted images only on a high-resolution desktop monitor, missing quality issues visible on mobile devices or different screens.
The consequence: Compression artifacts, color banding, or quality problems that users see but you missed during testing.
The fix: Test converted images on multiple devices: desktop, tablet, and smartphone. Check on both high-DPI and standard displays. View images at actual size, not zoomed in.
❌ Converting Graphics and Text-Heavy Images
The mistake: Converting screenshots, infographics with text, or graphics with sharp edges to JPG format.
The consequence: Blurry text, fuzzy edges around graphics, and compression artifacts around sharp color boundaries.
The fix: Keep text-heavy images, screenshots, and graphics in PNG format. JPG compression creates visible artifacts around sharp edges and text. Only convert photographic content.
❌ Ignoring Responsive Image Requirements
The mistake: Converting a single large image to JPG and serving the same file to all devices.
The consequence: Mobile users still download desktop-sized images, wasting bandwidth and slowing load times despite format conversion.
The fix: Create multiple sizes of each converted JPG for different viewports. Use responsive image syntax (srcset and sizes attributes) to serve appropriately-sized images to each device.
❌ Skipping Visual Quality Checks
The mistake: Batch converting hundreds of images without spot-checking quality, then deploying them all to production.
The consequence: Some images may have visible quality issues, compression artifacts, or incorrect background colors replacing transparency.
The fix: Visually inspect at least 10-20% of converted images, including representatives from each image type. Compare side-by-side with originals before mass deployment.
❌ Not Measuring Performance Impact
The mistake: Converting images and moving on without verifying the expected performance improvements materialized.
The consequence: Missing other performance issues, or discovering conversions didn’t help because images weren’t the bottleneck.
The fix: Run PageSpeed Insights before and after conversion. Measure LCP improvements. Monitor Core Web Vitals in Google Search Console over 28 days to confirm sustained improvements.
❌ Losing Original PNG Files
The mistake: Deleting original PNG files immediately after conversion, with no backup.
The consequence: If conversion quality proves inadequate or you need to try different settings, you must recreate images from scratch.
The fix: Keep original PNG files in a backup folder or archive. Only delete originals after confirming converted JPG files meet quality standards and perform well in production for at least 30 days.
✅ Best Practices Checklist
Follow this checklist for every conversion project:
- Audit images by type before conversion
- Keep logos, icons, and graphics as PNGs
- Convert only photographs and backgrounds to JPG
- Use 85% quality as a starting point
- Test quality on multiple devices
- Update all image references in code/CMS
- Create responsive image sizes
- Measure PageSpeed Insights before and after
- Monitor Core Web Vitals improvements
- Keep original PNG backups for 30+ days
Conclusion
Converting PNGs to JPGs for photographs and background images is one of the highest-impact, lowest-effort optimizations available to website owners in 2026. The evidence is clear: switching from 2.4MB PNG files to 180KB JPG files cuts load times by 80%, improves LCP from 4+ seconds to under 1 second, and transforms PageSpeed Insights scores from failing grades to excellent performance.
Google’s 2026 Core Web Vitals update makes these improvements mandatory, not optional. Websites that ignore image optimization face direct ranking penalties, while those that convert PNG to JPG for appropriate images earn competitive advantages in search results, user experience, and conversion rates.
The decision matrix is straightforward: keep PNG for logos, icons, and graphics requiring transparency. Convert everything else—hero images, product photos, backgrounds, and all photographic content—to JPG format at 85% quality. The visual quality remains excellent while file sizes plummet by 90% or more.
Take Action Today
Start with your highest-impact pages:
- Homepage hero image – Convert to JPG immediately for instant LCP improvement
- Product photos – Batch convert your entire catalog for e-commerce performance gains
- Blog featured images – Process your content library for faster article loading
- Landing page backgrounds – Optimize conversion-focused pages first
The PNG-to-JPG converter at Core Tools Hub makes the process simple: drag and drop your images, choose quality settings, and download optimized JPGs in seconds. All processing runs in your browser with no signup required, keeping your files private while delivering fast, clean results.
Don’t let oversized PNG files cost you rankings, traffic, and revenue in 2026. Convert PNG to JPG for photographic content today, measure the dramatic performance improvements, and enjoy the SEO benefits of meeting Core Web Vitals standards.
Ready to cut your website load time by 80%? Start converting PNG to JPG now and watch your PageSpeed Insights scores transform from red to green.