Last updated: April 3, 2026
Uncompressed images are the single biggest reason most websites load slowly. A typical blog post with five unoptimized photos can weigh 15–25 MB, and every extra megabyte pushes visitors closer to the back button. The fix is straightforward: run those images through a reliable image compressor before publishing. But with dozens of tools available, each with different limits, privacy models, and format support, picking the right one takes some homework.
This guide benchmarks the most popular image compressor tools against real-world tasks, compares their limits and privacy guarantees, and walks through a repeatable workflow that keeps file sizes small without visible quality loss.
Key Takeaways
- Images account for roughly 50% of total page weight on most websites. Compressing them is the fastest way to improve load times and Core Web Vitals scores.
- Modern formats like WebP (approximately 97% browser support) and AVIF (approximately 95%) can cut file sizes by 25–50% compared to equivalent JPEGs.
- Most free online image compressors impose caps: TinyPNG limits files to 5 MB and 500 images/month; ShortPixel’s free tier allows 50 images/month.
- Browser-based compressors process files locally on your device, so your images never leave your computer. Server-side tools upload files to remote servers.
- Batch processing, format conversion, and quality control sliders are the three features that matter most for a repeatable optimization workflow.
- No single tool wins every scenario. The best choice depends on volume, format needs, privacy requirements, and whether you need an API.
Quick Answer
For most website owners and content creators, the fastest path to smaller files is a browser-based image compressor that supports JPEG, PNG, and WebP, offers a quality slider, and doesn’t require an account. Core Tools Hub’s image compressor checks those boxes: no signup required, no monthly caps, and all processing happens in your browser, so files stay private. For developer pipelines that need automation, TinyPNG’s API or ShortPixel’s WordPress plugin are strong alternatives.
Why Image Compression Matters for SEO, Core Web Vitals, and UX
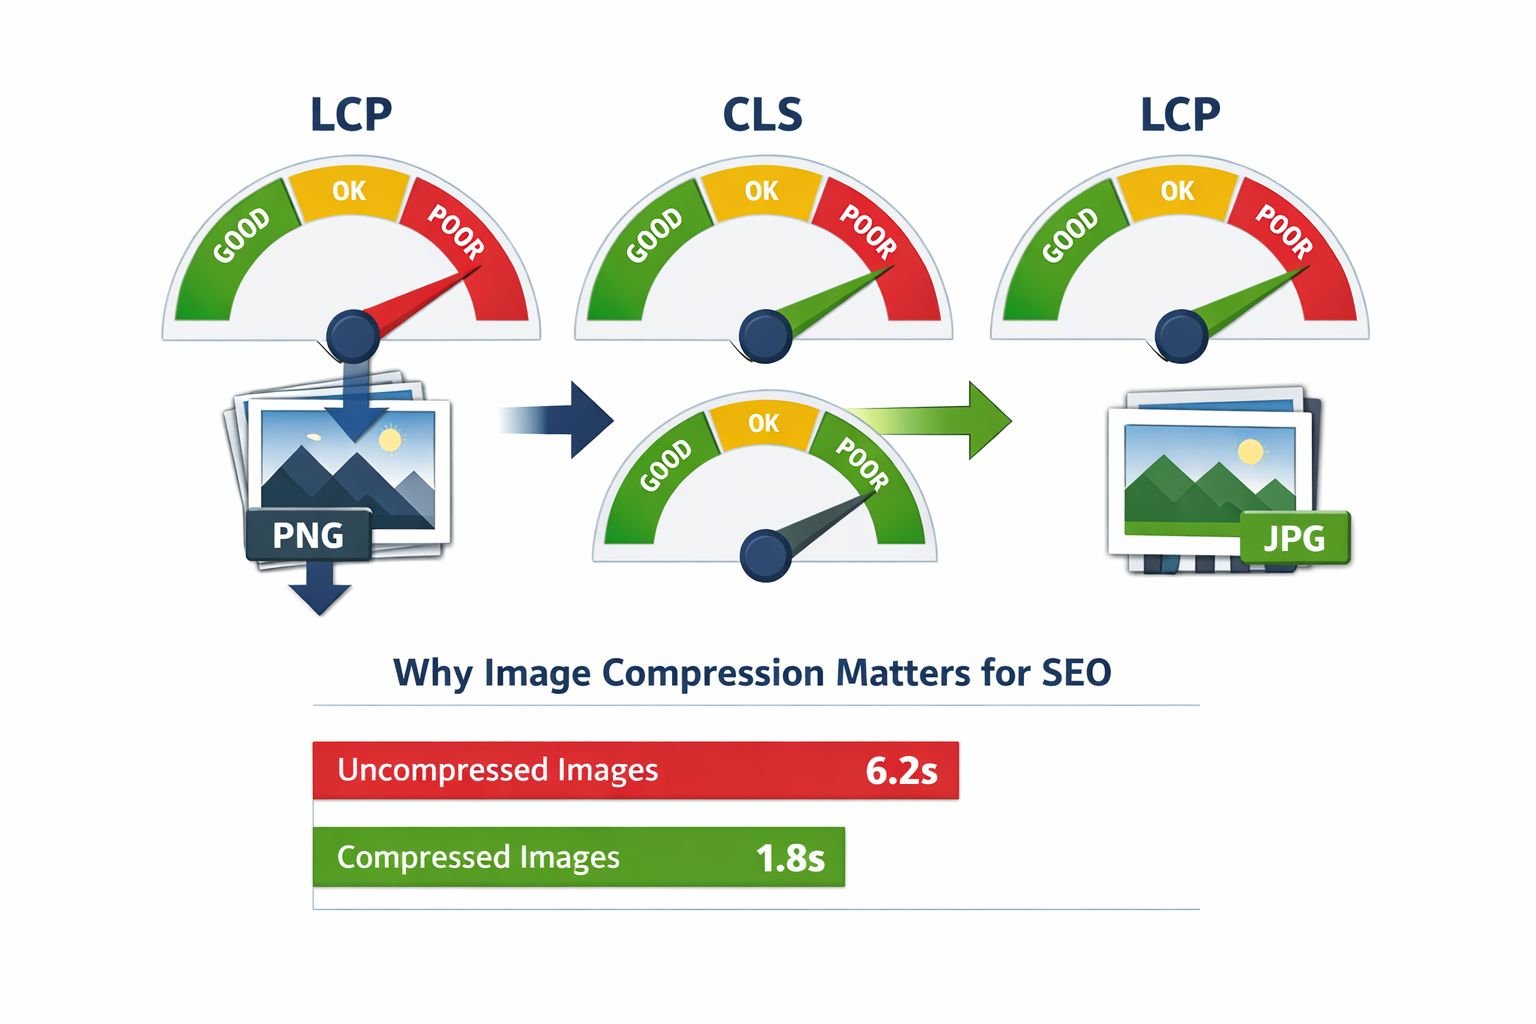
Large images directly hurt your search rankings. Google’s Core Web Vitals use Largest Contentful Paint (LCP) as a key metric, and oversized hero images are the most common cause of poor LCP scores. A page that loads in under 2.5 seconds passes; one that takes over 4 seconds fails. Uncompressed images are usually the difference.
Here’s what happens when images aren’t compressed:
- Slower page loads: A 4 MB hero image on a mobile connection can take 8–12 seconds to render.
- Higher bounce rates: Research consistently shows that load times beyond 3 seconds lead to a significant increase in visitors leaving.
- Wasted bandwidth: Visitors on metered connections (mobile data, satellite) will avoid image-heavy sites that eat their data.
- Lower crawl efficiency: Search engine bots have a crawl budget. Larger pages mean fewer pages indexed per crawl session.
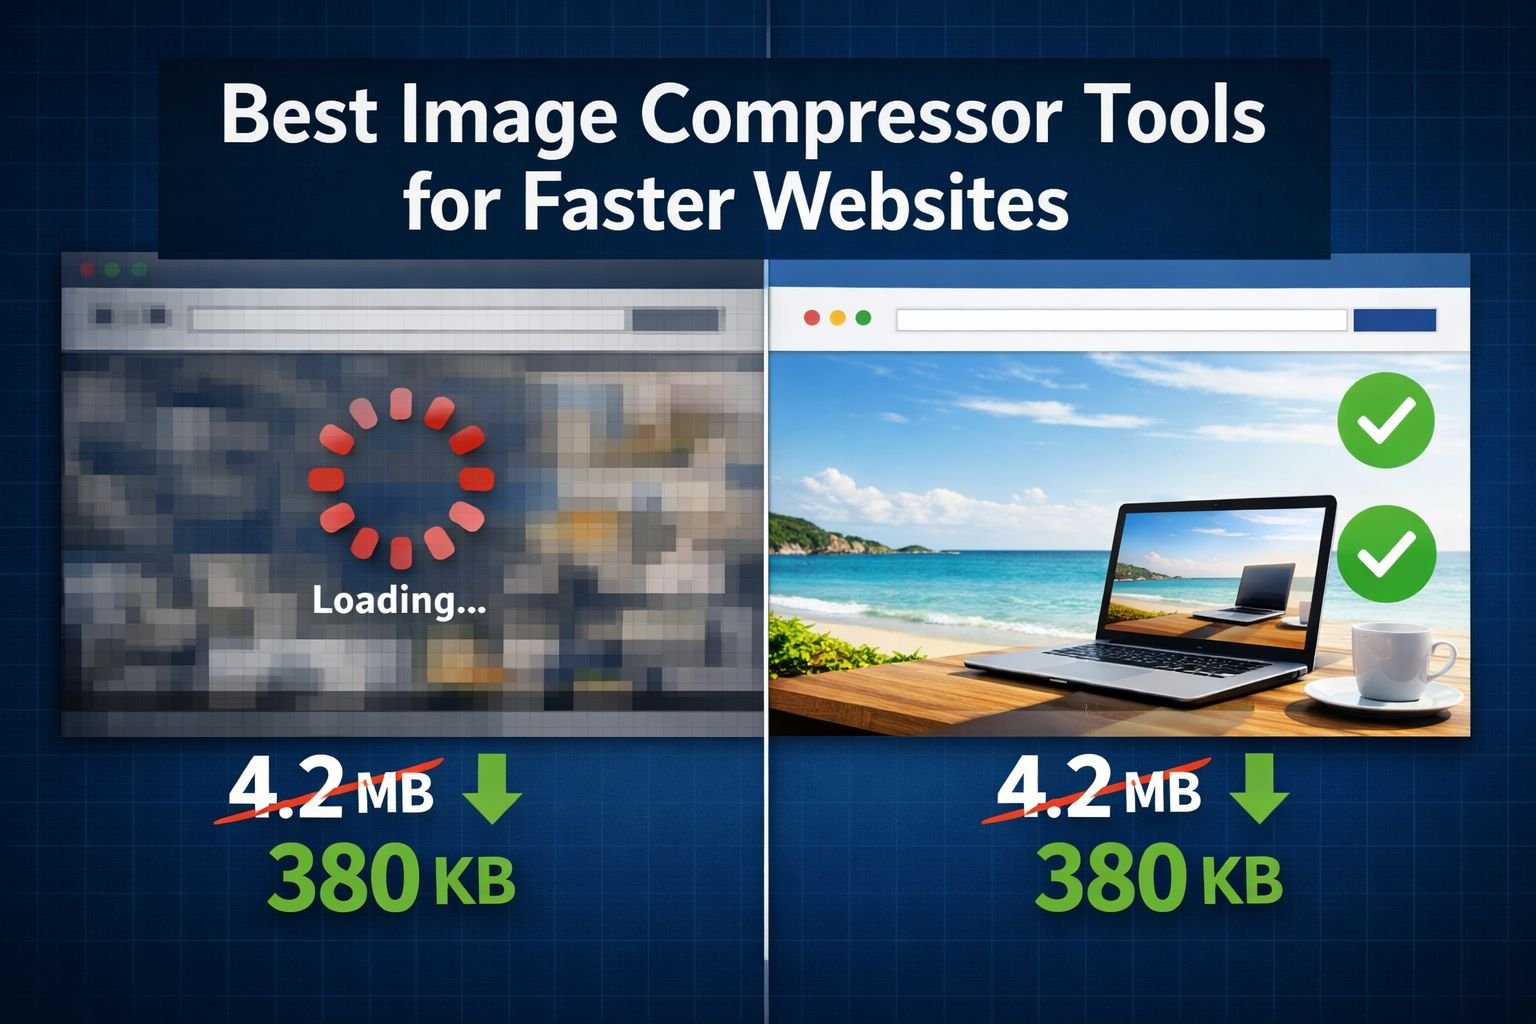
Compressing a typical 3 MB JPEG to 300–400 KB (an 85–90% reduction) usually produces no visible difference in quality on screen. That single change can drop page load time by several seconds.
For a deeper explanation of quality tradeoffs, see our guide on lossless vs. lossy formats and when size vs. quality matters.
Comparing Top Image Compressor Tools: Limits, Quality, and Cost
No two compressors offer the same combination of limits, formats, and privacy. The table below compares seven widely used tools across the features that matter most for real-world use.
| Tool | Free Tier Limits | Max File Size | Formats | Batch | Processing | API |
|---|---|---|---|---|---|---|
| Core Tools Hub | Unlimited | Browser-dependent | JPEG, PNG, WebP | Yes | In-browser | No |
| TinyPNG | 500 images/month | 5 MB | JPEG, PNG, WebP | 20 at once | Server-side | Yes |
| ILoveIMG | Limited daily use | Varies | JPEG, PNG, GIF, SVG | Yes | Server-side | Yes (paid) |
| Squoosh (Google) | Unlimited | No hard cap | JPEG, PNG, WebP, AVIF | No (single file) | In-browser | No |
| ShortPixel | 50 images/month | 10 MB | JPEG, PNG, WebP, AVIF | Yes | Server-side | Yes |
| Optimizilla | Unlimited | 20 images/batch | JPEG, PNG | 20 at once | Server-side | No |
| ImageResizer | Unlimited (ads) | Varies | JPEG, PNG, WebP | Yes | Server-side | No |
Key observations:
- TinyPNG is the most widely recommended tool, but the 5 MB file limit is a real problem for photographers and anyone working with high-resolution product images. The 500/month cap is generous for small blogs but tight for e-commerce sites with hundreds of SKUs.
- Squoosh is excellent for one-off compression with fine-grained control (it supports AVIF encoding), but it only handles one image at a time. That makes it impractical for batch work.
- ShortPixel stands out for WordPress users because of its plugin, but the 50 free images/month quickly run out during a site redesign.
- Core Tools Hub runs entirely in your browser, with no file uploads to external servers, no account creation, and no monthly caps, making it a strong fit for privacy-conscious users who need to compress images regularly.
Common mistake: Choosing a tool based only on compression ratio without checking format support. If you need WebP or AVIF output, tools like Optimizilla won’t help since they only handle JPEG and PNG.
How to Choose the Right Image Compressor for Your Use Case
Start with your workflow, not the tool. The right image compressor depends on three things: what you’re compressing, how many files you handle, and whether privacy matters.
Choose a browser-based compressor if:
- You handle sensitive images (client photos, medical documents, internal assets)
- You don’t want to create accounts or manage API keys
- You work from shared or public computers
Choose a server-side tool with an API if:
- You compress hundreds of images daily as part of a build pipeline
- You need automated WordPress or CMS integration
- Compression speed matters more than privacy
Choose a desktop app (ImageOptim, Caesium) if:
- You routinely compress files over 10 MB
- You need lossless compression specifically
- You prefer drag-and-drop without opening a browser
For most content creators, bloggers, and small business owners, a browser-based tool like Core Tools Hub’s image compressor covers 90% of their needs. No installs, no signup required, and it works on desktop and mobile.
If you also need to change dimensions before compressing, the image resizer tool lets you resize to exact dimensions first, then compress in a second step.
Step-by-Step: Compressing Images for Web, Email, and Apps
Here’s a simple step-by-step process that works for any browser-based image compressor:
- Gather your images. Collect all the files you need to compress into one folder. Remove duplicates.
- Resize first, compress second. If your images are 4000×3000 px but your website displays them at 1200×800 px, resize them to the target dimensions before compressing. This alone can cut file size by 60–70%.
- Open your image compressor. Drop files into the tool. If using Core Tools Hub, all processing happens in your browser with no uploads.
- Set quality level. For web use, 75–85% quality is the sweet spot. Below 70%, compression artifacts become noticeable on gradients and skin tones.
- Choose output format. Stick with JPEG for photographs. Use PNG only when you need transparency. For maximum savings, convert to WebP, which typically saves an additional 25–30% over JPEG.
- Download and verify. Open the compressed file at 100% zoom. Check edges, text overlays, and gradient areas for artifacts. If quality dropped too far, increase the slider by 5% and re-export.
Best Settings Quick Reference
| Use Case | Format | Quality | Target Size |
|---|---|---|---|
| Blog post images | WebP or JPEG | 80% | Under 200 KB |
| Ecommerce product photos | JPEG or WebP | 85% | Under 300 KB |
| Email attachments | JPEG | 75% | Under 500 KB total |
| Portfolio/photography | JPEG or AVIF | 90% | Under 500 KB |
| Social media uploads | JPEG | 80% | Under 250 KB |
Common mistake: Compressing an already-compressed JPEG multiple times. Each round of lossy compression further degrades quality. Always start from the original or highest-quality version. For more on preserving quality, see our guide on how to compress images without quality loss.
Privacy and Security: Are Online Image Compressors Safe to Use?
Most online image compressors upload your files to remote servers for processing. That means your images temporarily exist on someone else’s infrastructure. For personal photos, client work, or any confidential material, this is a legitimate concern.
Server-side tools like TinyPNG, ILoveIMG, and ShortPixel state in their privacy policies that uploaded files are deleted after a set period (usually 1–24 hours). But “deleted” depends on their implementation, and you’re trusting their word.
Browser-based tools eliminate this risk entirely. When compression runs in your browser using JavaScript and WebAssembly, the image data never leaves your device. There’s nothing to delete because nothing was uploaded.
Core Tools Hub’s approach is privacy-first: all processing happens in the browser, files are handled over secure protocols, and nothing is stored or transmitted. This matters especially when compressing images that contain EXIF metadata, such as GPS coordinates, camera serial numbers, or timestamps. (You can also strip that data separately with the EXIF remover tool.)
For a detailed comparison of these two approaches, read browser-based file conversion vs. cloud upload tools.
Decision rule: If the images contain anything you wouldn’t post publicly, use a browser-based compressor. Period.
How to Integrate CTH Image Tools Into a Repeatable Optimization Workflow
A one-time compression pass isn’t enough. Every new blog post, product listing, or page update introduces fresh images that need the same treatment. Building a repeatable workflow saves hours over time.
Here’s a four-step workflow using Core Tools Hub’s free browser-based tools:
- Resize all images to their display dimensions using the image resizer. For blog content, 1200 px wide is usually sufficient. For thumbnails, 400 px.
- Compress each image with the image compressor at 80% quality for web use. Check output sizes; aim for under 200 KB per image.
- Convert to WebP if your CMS and audience support it. Use the PNG to WebP converter or JPG to WebP converter for fast, clean results.
- Audit quarterly. Run your site through Google PageSpeed Insights and check which images still trigger LCP warnings. Re-compress those files.
This workflow takes about 2–3 minutes per batch of 10 images and typically reduces total page weight by 70–85%.
Edge case: If you’re migrating an existing site with hundreds of unoptimized images, work in batches of 20–30 to avoid browser memory issues on older devices. Newer machines with 8+ GB RAM handle larger batches without trouble.
Advanced Tips: WebP, AVIF, Automation, and Developer-Friendly APIs
WebP should be your default web image format in 2026. Browser support is approximately 97%, file sizes are 25–35% smaller than equivalent JPEGs, and every major CMS supports it natively. AVIF pushes savings even further (40–50% smaller than JPEG) but encodes more slowly and has slightly narrower browser support at around 95%.
When to use each format
- JPEG: Universal fallback. Use when you need guaranteed compatibility with email clients, older systems, or print workflows.
- WebP: Best general-purpose web format. Use for all website images unless you have a specific reason not to.
- AVIF: Best compression ratios. Use for hero images and large photographs where every kilobyte matters and you can accept slower encoding.
- PNG: Use only when you need transparency and lossless quality (logos, icons, screenshots with text).
For a thorough comparison of formats, see AVIF vs. WebP vs. JPEG: which format to use.
For developers: API and automation options
- TinyPNG API: Well-documented, easy to integrate into CI/CD pipelines. Free tier covers 500 compressions/month. Good for build-time optimization.
- ShortPixel API: Supports lossy, glossy, and lossless modes plus AVIF output. 50 free images/month on the free tier; paid plans start around $5/month for 5,000 images.
- Sharp (Node.js library): Open-source, runs locally, supports WebP and AVIF. Best option for full control in a server-side build pipeline.
- Browser-based workflow for non-developers: Core Tools Hub’s tools require no API keys, no command line, and no technical setup. Convert in seconds, compress without visible quality loss, and download the results.
Common mistake: Serving AVIF without a JPEG or WebP fallback. While browser support is strong, the remaining 5% of users (older Safari versions, some embedded browsers) will see broken images. Always use the <picture> element with fallback sources.
Conclusion
Image compression isn’t optional for fast websites in 2026. It’s the single highest-impact performance fix available, and it takes minutes, not hours. The right image compressor depends on your volume, privacy needs, and format requirements, but for most people, a browser-based tool with no signup and no caps is the simplest path forward.
Your next steps:
- Pick your three largest images and run them through the Core Tools Hub image compressor at 80% quality.
- Compare the before and after file sizes and visual quality.
- If you’re still using PNG for photographs, convert them to WebP using the PNG to WebP converter for an immediate size reduction.
- Build the resize-compress-convert workflow into your publishing routine so every new image is optimized before it goes live.
Fast, clean results with files that stay private. That’s the goal, and it’s achievable in a few clicks.
Frequently Asked Questions
What is an image compressor?
An image compressor is a tool that reduces image file sizes by removing unnecessary data. Lossy compression discards some visual information (usually imperceptible), while lossless compression reorganizes data without any loss of quality.
Does compressing images hurt quality?
At 75–85% quality settings, most people cannot see any difference between the original and compressed versions. Visible degradation typically starts below 60–65% quality, especially on smooth gradients and skin tones.
What’s the best free online image compressor with no sign-up?
Core Tools Hub offers a browser-based image compressor with no account required, no monthly limits, and no file uploads to external servers. Squoosh (by Google) is another solid free option for single-file compression.
How much can image compression reduce file size?
Typical reductions range from 60–90% depending on the original file, format, and quality setting. A 3 MB JPEG compressed to 80% quality often comes in at around 300–500 KB.
Is it safe to compress images online?
It depends on whether the tool processes files in your browser or on a server. Browser-based tools like Core Tools Hub keep files on your device. Server-side tools temporarily upload your images, which introduces a privacy risk.
Should I use WebP or JPEG for my website in 2026?
WebP is the better default choice. It produces smaller files at equivalent quality and has approximately 97% browser support. Use JPEG as a fallback for email and legacy systems.
Can I compress images in bulk for free?
Yes. Core Tools Hub supports batch compression in-browser with no per-image or monthly limits. TinyPNG allows batches of 20 (up to 500/month free). ShortPixel’s free tier is limited to 50 images/month.
What’s the difference between resizing and compressing?
Resizing changes an image’s pixel dimensions (e.g., from 4000×3000 to 1200×900). Compressing reduces file size by adjusting encoding quality. For best results, resize first, then compress.
Do I need to compress images if my CMS has lazy loading?
Yes. Lazy loading delays when images load, but it doesn’t reduce their file size. A 5 MB image with lazy loading still takes the same time to download once triggered. Compression reduces the actual bytes transferred.
What image file size should I target for web pages?
Aim for under 200 KB per image for standard blog and content pages. Hero images and full-width banners can go up to 300–400 KB. Keep total page image weight under 1.5 MB if possible.