You’ve just captured the perfect product photo, but the upload form rejects it: “File too large.” Or worse—you compress it, upload successfully, and discover a pixelated mess where your crisp image used to be. This frustrating cycle happens thousands of times daily to job seekers, online sellers, students, and anyone trying to share images online.
The good news? You can compress image file sizes without losing quality by understanding three simple principles: choosing the right format, applying the correct compression settings, and resizing to the actual display dimensions. Most people skip at least one of these steps and wonder why their images look terrible or still won’t upload.
This guide walks through the exact process to reduce image file sizes by 50-90% while keeping your photos and graphics looking sharp. No technical jargon, no expensive software—just straightforward steps that work every time.
Key Takeaways
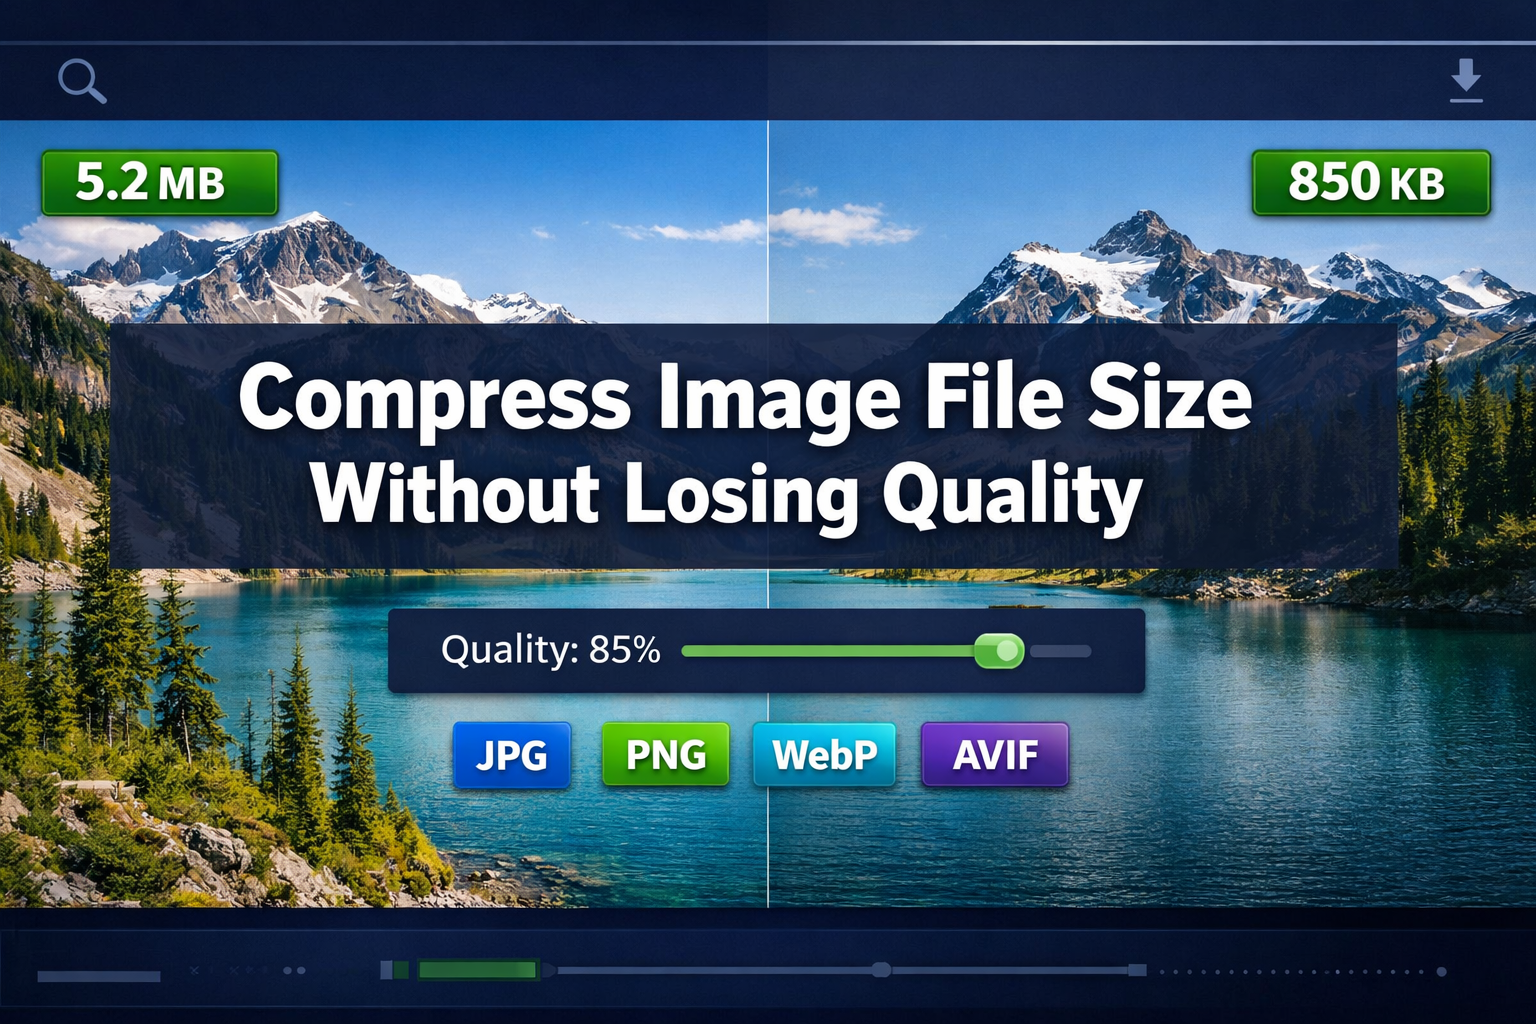
- Quality setting of 80-85% delivers invisible compression—most viewers cannot distinguish between an original and a properly compressed image at this setting
- Resizing to actual display dimensions before compressing often reduces file size more than format changes alone
- Modern formats like WebP and AVIF provide 25-35% better compression than JPEG while maintaining identical visual quality
- Lossless compression achieves 10-30% reduction for graphics and screenshots; lossy compression enables 50-90% reduction for photographs
- The three-step workflow (convert → compress → resize) delivers the biggest file size wins with zero visible quality loss
Understanding Image Compression: Lossless vs. Lossy
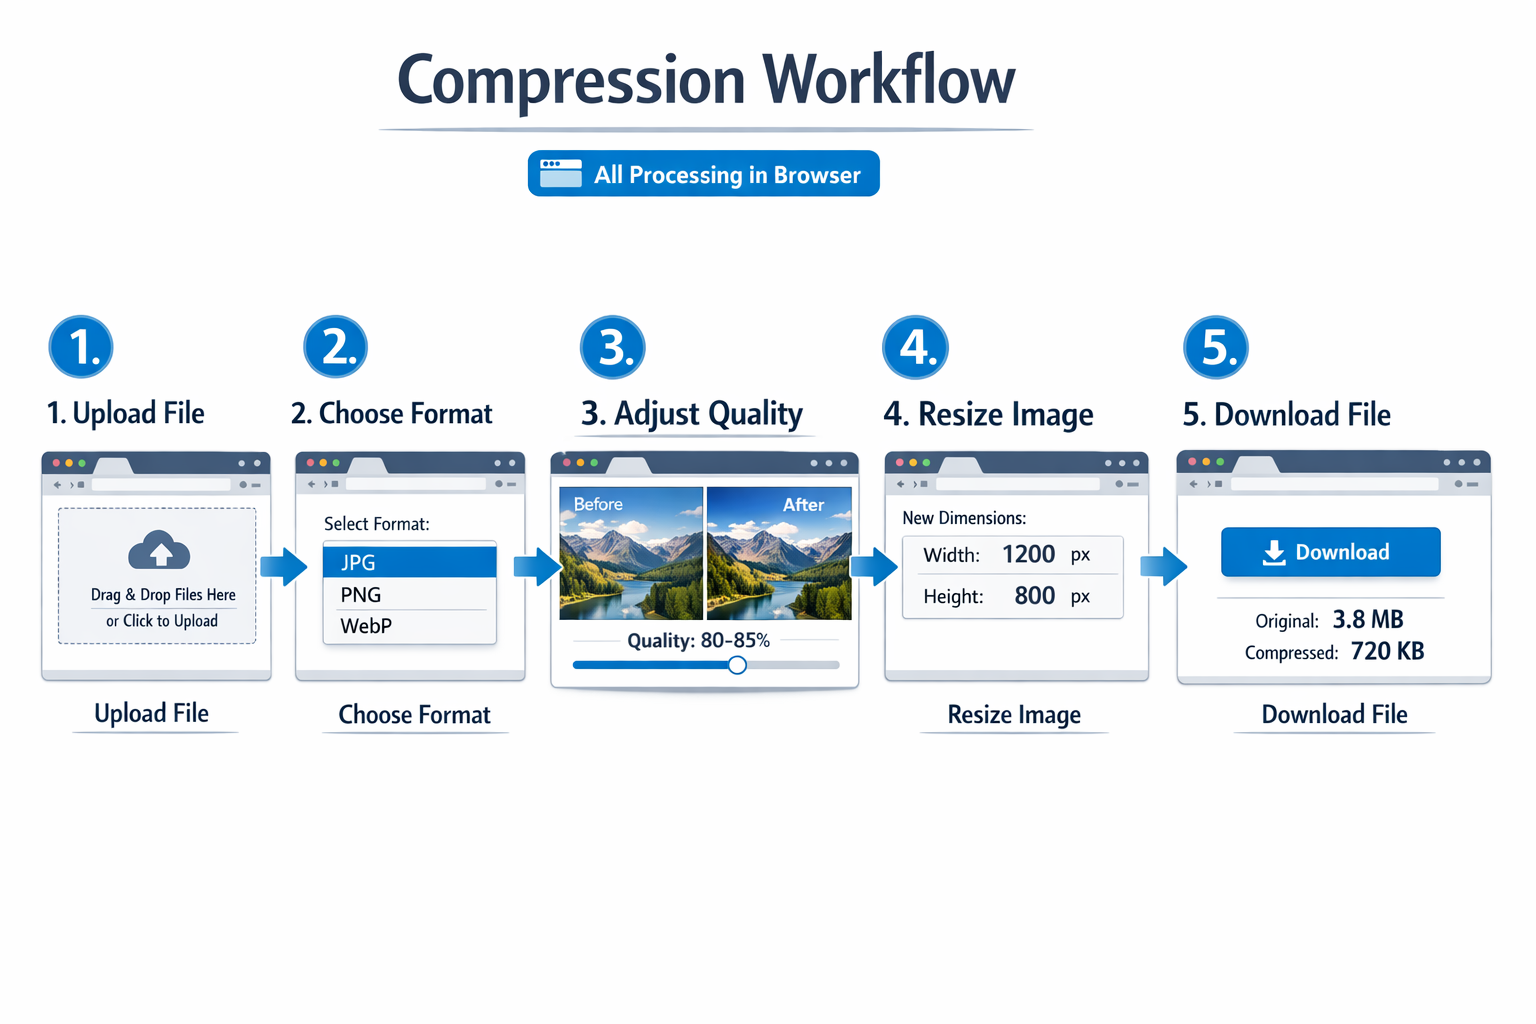
Image compression falls into two categories, and knowing which to use determines whether you’ll compress image file size without losing quality or end up with a blurry disaster.
Lossless compression works like a ZIP file for images—it reorganizes data more efficiently but preserves every single pixel exactly as it was. PNG files use DEFLATE compression (the same algorithm as ZIP files) combined with scanline filters and color palette reduction. When you decompress a lossless image, you get a bit-for-bit identical copy of the original.
The tradeoff? Lossless compression typically achieves only 10-30% file size reduction. That’s perfect for logos, screenshots, text-heavy graphics, and technical diagrams where pixel-perfect accuracy matters, but it won’t help much when you’re trying to get a 5 MB photograph under a 500 KB upload limit.
Lossy compression takes a different approach—it permanently removes informationthat your eyes won’t notice is missing. JPEG, WebP (in lossy mode), and AVIF all use sophisticated algorithms that identify and discard subtle color variations and high-frequency details that humans can’t perceive under normal viewing conditions.
The payoff is substantial: lossy compression enables 50-90% file size reduction. A well-compressed photograph can shrink from 4 MB to 600 KB with zero visible difference when viewed at normal size. The industry-standard quality setting of 80-85% sits in the sweet spot where compression artifacts remain invisible to most viewers.
Here’s the practical reality: photographs should almost always use lossy compression, while graphics with sharp edges, text, or transparency often benefit from lossless approaches.
Pick Your Target File Size by Use Case
Before you compress anything, know your destination. Different platforms and purposes have different requirements, and understanding these targets helps you compress image file size without losing quality while meeting specific upload limits.
| Use Case | Recommended File Size | Typical Dimensions | Best Format | Quality Setting |
|---|---|---|---|---|
| Website hero images | 100-500 KB | 1920×1080 to 2400×1350 | WebP, AVIF, JPEG | 80-85% |
| Website thumbnails | 20-80 KB | 400×300 to 800×600 | WebP, JPEG | 75-80% |
| Email attachments | 200 KB-1 MB | 1200×900 to 1600×1200 | JPEG, PNG | 80-85% |
| Marketplace listings (eBay, Etsy) | 500 KB-2 MB | 2000×2000 to 3000×3000 | JPEG, PNG | 85-90% |
| Form uploads (applications, insurance) | 200-500 KB | 1500×1200 to 2000×1500 | JPEG, PDF | 80-85% |
| Social media posts | 100-300 KB | Platform-specific | JPEG, PNG | 80-85% |
| Print-ready images | 2-10 MB | 3000×2000+ at 300 DPI | PNG, TIFF | 90-95% or lossless |
These targets aren’t arbitrary—they balance visual quality with practical upload limits and page load performance. A 200 KB image loads almost instantly on any connection, while a 5 MB image can take 10+ seconds on slower mobile networks.
Quick sizing tip: If you’re uploading to a website that displays images at 800 pixels wide, there’s zero benefit to uploading a 3000-pixel-wide original. Resize first, then compress—you’ll often hit your target size from resizing alone.
Choose the Best Format for Maximum Savings
Format selection dramatically affects how much you can compress an image without losing quality. Modern formats use smarter algorithms that achieve smaller files at identical visual quality compared to older standards.
Format Hierarchy for Compression Efficiency (2026)
AVIF (AV1 Image File Format) sits at the top of the compression efficiency pyramid. It excels particularly at very low bitrates, where JPEG would show heavy artifacts, making it the optimal choice for aggressive compression scenarios. An AVIF file can be 25-40% smaller than an equivalent JPEG at the same perceived quality. The catch? Browser support reached mainstream levels only recently, and some older systems still can’t display AVIF files.
WebP offers the best balance of compression efficiency and compatibility in 2026. It supports both lossy and lossless compression modes, and WebP lossless employs advanced techniques such as color caching, color indexing for small palettes, and spatial prediction to achieve higher compression ratios. Photographs compress 25-35% smaller than JPEG at identical quality, and graphics with transparency compress significantly better than PNG.
JPEG remains the universal standard for photographs. Every device, browser, and platform supports it, and modern JPEG encoders produce excellent results at quality settings of 80-85%. While newer formats beat JPEG on compression efficiency, JPEG’s universal compatibility makes it the safe default choice when you’re unsure about your audience’s technical setup.
PNG works best for graphics, logos, screenshots, and images requiring transparency. It uses lossless compression, so file sizes run larger than lossy formats, but you get pixel-perfect accuracy. For photographs, PNG files are typically 3-5× larger than equivalent JPEG files, making PNG a poor choice for photos unless you specifically need lossless quality.
Format Selection by Content Type
- Photographs: JPEG, WebP (lossy), or AVIF
- Graphics with transparency: PNG or WebP
- Simple logos and icons: SVG (vector format, infinitely scalable)
- Screenshots with text: PNG or WebP (lossless)
- Animated content: WebP or optimized GIF
Practical workflow: Start with the format you have, then use an image converter to test WebP or AVIF versions. Compare file sizes—if the modern format saves 30%+ and your audience uses current browsers, make the switch.
How to Compress Image File Size Without Losing Quality: Step-by-Step
Here’s the proven workflow that delivers maximum compression with zero visible quality loss. This process works whether you’re preparing a single image or batch-processing hundreds.
Step 1: Start with the Highest Quality Source
Never compress an already-compressed image. Each compression pass degrades quality, and artifacts compound with each generation. If you have access to the original RAW file, camera JPEG at maximum quality, or uncompressed PNG, start there.
Common mistake: Downloading an image from a website (already compressed), then compressing it again. This layered compression creates visible artifacts even at high-quality settings.
Step 2: Resize to Actual Display Dimensions
This single step often has a greater impact than format choice alone. If your image will display at 1200 pixels wide on a website, resize it to 1200-1600 pixels wide (the extra 400 pixels account for high-DPI displays).
Use the Image Resizer to set exact dimensions. Lock the aspect ratio to prevent distortion, and choose “high quality” or “bicubic” resampling if your tool offers algorithm options.
Why this matters: A 4000×3000 pixel photograph (12 megapixels) contains 12 million pixels. Resize it to 1600×1200 (1.92 megapixels), and you’ve eliminated 84% of the data before you even touch the compression settings. File size drops proportionally.
Step 3: Select Your Compression Format and Quality
Open your resized image in the Image Compressor—a privacy-first tool that runs entirely in your browser with no uploads required.
For photographs:
- Choose JPEG or WebP (lossy mode)
- Set quality to 80-85%
- Enable progressive encoding if available (images load gradually rather than top-to-bottom)
For graphics and screenshots:
- Choose PNG or WebP (lossless mode)
- Enable “optimize” or “reduce colors” if the image has limited colors
- Consider removing unnecessary metadata with an EXIF remover
Step 4: Preview and Compare
Before saving, view the compressed version at 100% zoom. Look for:
- Blocky artifacts around edges (quality too low)
- Color banding in gradients (quality too low)
- Blurry text or loss of fine detail (wrong format or over-compression)
Toggle between the original and compressed versions. If you can’t spot the difference at normal viewing distance, you’ve found the right balance.
Step 5: Save and Verify File Size
Download the compressed image and check the file size. Compare it to your target from the use-case table earlier. If you’re still over the limit, you have three options:
- Reduce quality by 5-10 points (from 85% to 75-80%)
- Resize smaller (reduce dimensions by 10-20%)
- Switch to a more efficient format (JPEG → WebP or AVIF)
Real-world example: A colleague recently needed to upload a product photo to a marketplace with a 500 KB limit. The original 3000×3000 PNG was 6.2 MB. After resizing to 2000×2000 and converting to JPEG at 82% quality, the file dropped to 420 KB—a 93% reduction with no visible quality loss.
Advanced Compression Techniques for Power Users
Once you’ve mastered the basic workflow, these advanced techniques squeeze out additional file size savings while maintaining visual quality.
Selective Compression by Region
Some tools allow you to apply different compression levels to different parts of an image. Compress backgrounds more aggressively (lower quality) while preserving detail in the subject (higher quality). This technique works particularly well for portraits where you want sharp facial features but don’t need perfect background detail.
Chroma Subsampling
JPEG uses a technique called chroma subsampling that stores color information at a lower resolution than brightness information. Your eyes are more sensitive to brightness than to color, so this results in smaller files with no visible quality loss.
The standard setting is 4:2:0 subsampling, which reduces color data by 50%. Most compression tools apply this automatically, but if you see options like 4:4:4 (no subsampling) or 4:2:2 (moderate subsampling), stick with 4:2:0 for photographs.
Metadata Removal
Digital photos contain EXIF data—camera settings, GPS coordinates, timestamps, and other metadata. This information adds 10-50 KB to the file size and may include privacy-sensitive location data.
Remove unnecessary metadata with the Image EXIF Remover before compressing. Keep copyright information if needed, but strip everything else for maximum size savings and privacy protection.
Batch Processing for Multiple Images
If you’re optimizing dozens or hundreds of images, batch processing saves hours of repetitive work. Many browser-based tools support dragging and dropping multiple files and applying the same compression settings to all images simultaneously.
Workflow for batch compression:
- Organize images by type (photos vs. graphics)
- Resize all images to the maximum display dimensions
- Apply consistent compression settings to each batch
- Spot-check 3-5 random images for quality
- Download compressed files in bulk
This approach works perfectly when preparing images for a website, online store, or digital portfolio.
Resize Plus Compress: The Biggest File Size Wins
The combination of resizing and compression delivers far better results than either technique alone. Here’s why this two-step approach delivers the biggest file-size wins.
Mathematical reality: File size scales roughly with pixel count, not dimensions. Double the width and height (2× each dimension), and you quadruple the pixel count (2 × 2 = 4). A 2000×1500 image (3 megapixels) has four times the data of a 1000×750 image (0.75 megapixels).
Practical example:
- Original: 4000×3000 JPEG at 85% quality = 3.2 MB
- Compress only: 4000×3000 JPEG at 75% quality = 2.1 MB (34% reduction)
- Resize only: 1600×1200 JPEG at 85% quality = 580 KB (82% reduction)
- Resize + compress: 1600×1200 JPEG at 80% quality = 420 KB (87% reduction)
Notice that resizing alone achieved a larger reduction than compression alone, and combining both techniques produced the smallest file with excellent quality.
When to Resize vs. When to Keep Original Dimensions
Resize when:
- You know the exact display dimensions
- The image will only appear on screens (websites, emails, digital documents)
- File size limits are strict
- You’re optimizing for page load speed
Keep original dimensions when:
- The image may be printed (maintain 300 DPI at final print size)
- Users might zoom in to see fine detail
- You’re creating a master archive for future use
- Display size is unknown or variable
Smart compromise: Save two versions—a full-resolution master for archival purposes, and an optimized web version for actual use. Storage is cheap; bandwidth and user patience are not.
Common Mistakes That Destroy Image Quality
Even experienced users make these compression errors. Avoid them to ensure you compress image file size without losing quality every time.
❌ Mistake 1: Compressing Already-Compressed Images
Each compression pass degrades quality. Downloading a JPEG from a website (already compressed at an unknown quality), editing it, and re-saving it as a JPEG compounds artifacts. After 3-4 compression cycles, even with high-quality settings, visible degradation occurs.
✅ Solution: Always work from the highest-quality source available. If you must edit a compressed image, save your edits in a lossless format (PNG) until final export, then compress once to your target format.
❌ Mistake 2: Using the Wrong Format for Content Type
Saving a photograph as PNG creates unnecessarily large files (often 3-5× bigger than JPEG). Saving a logo with text as a JPEG at low quality creates ugly artifacts around sharp edges.
✅ Solution: Follow the format selection guide—JPEG/WebP for photos, PNG/WebP for graphics with transparency or text, SVG for simple logos and icons.
❌ Mistake 3: Skipping the Resize Step
Uploading a 4000×3000 image to a website that displays it at 800×600 wastes bandwidth and slows page loading. The browser downloads the full 3+ MB file, then shrinks it for display—you get all the download time with none of the quality benefit.
✅ Solution: Resize to 1.25-1.5× the display dimensions (to account for high-DPI screens), then compress. A 1200×900 image looks identical to a 4000×3000 image when displayed at 800×600, but downloads 10× faster.
❌ Mistake 4: Setting Quality Too Low
Pushing quality below 70% for photographs or using “maximum compression” presets creates visible blocky artifacts, color banding in gradients, and loss of fine detail. You’ll hit your file size target, but the image looks terrible.
✅ Solution: Start at 80-85% quality and reduce in small increments (5 points at a time) while previewing at 100% zoom. Stop when you notice quality degradation, then increase quality by 5 points. That’s your optimal setting.
❌ Mistake 5: Ignoring Format Compatibility
AVIF and WebP offer superior compression, but some older email clients, browsers, and software can’t display them. If you send a WebP image to someone using Outlook 2016, they’ll see a broken image icon.
✅ Solution: Know your audience. For maximum compatibility, use JPEG and PNG. For modern web use where you control the platform, use WebP with JPEG fallbacks. Test on target platforms before committing to a format.
❌ Mistake 6: No Quality Check Before Publishing
Blindly applying compression settings and uploading without reviewing the result leads to embarrassing quality issues discovered only after publication.
✅ Solution: Always preview compressed images at 100% zoom and at actual display size. View on both desktop and mobile, if possible. Compare side-by-side with the original. If you can spot the difference at normal viewing distance, adjust settings.
Best Settings for Different Image Types
Different image types require different compression approaches. Use these proven settings as starting points, then adjust based on your specific requirements.
Photographs and Product Images
Format: JPEG or WebP (lossy) Quality: 80-85% Chroma subsampling: 4:2:0 Dimensions: 1.5× maximum display size Expected reduction: 60-80% from original
Photographs contain complex color gradients and natural textures that compress well with lossy algorithms. The 80-85% quality range sits in the sweet spot where compression artifacts remain invisible.
Graphics, Logos, and Icons
Format: PNG (8-bit if ≤256 colors, 24-bit if more) or WebP (lossless) Quality: Lossless or 90-95% if using lossy Dimensions: Exact display size or 2× for high-DPI Expected reduction: 10-30% from original
Graphics with sharp edges, solid colors, and text need pixel-perfect accuracy. Lossless compression preserves every detail while still reducing file size through efficient data encoding.
Screenshots and Screen Captures
Format: PNG or WebP (lossless) Quality: Lossless Color depth: 8-bit if possible (screenshots often use limited color palettes) Dimensions: Actual capture size or scaled down proportionally Expected reduction: 20-40% from original
Screenshots must include text and UI elements that remain crisp. Use lossless compression and consider reducing color depth if the screenshot uses a limited palette—this can cut file size in half with zero quality loss.
Scanned Documents
Format: JPEG (for color scans) or PNG (for black-and-white) Quality: 75-80% for JPEG Dimensions: 150-300 DPI depending on detail requirements Consider: Converting to PDF for multi-page documents using Images to PDF Expected reduction: 50-70% from original scan
Scanned documents often start at unnecessarily high resolutions (600+ DPI). Reduce to 200-300 DPI for screen viewing or 300 DPI for printing, then apply moderate compression.
The Complete Workflow: Convert → Compress → Resize
For maximum file size reduction with zero visible quality loss, follow this three-stage workflow. Each stage builds on the previous one, and the order matters.
Stage 1: Convert to the Optimal Format
Start by converting to the most efficient format for your content type and use case. If you have a PNG photograph, convert it to JPEG or WebP. If you have a HEIC file from an iPhone, convert it to JPEG for universal compatibility using the HEIC to JPG converter.
Format conversion targets:
- HEIC → JPEG (for compatibility)
- PNG photos → JPEG or WebP (for compression efficiency)
- Large GIFs → WebP or MP4 (for animated content)
- JPEG graphics → PNG (for lossless quality)
This stage alone can reduce file size by 40-60% when converting from inefficient formats.
Stage 2: Compress with Optimal Settings
Apply compression using the quality settings from the previous section. Use the Image Compressor to adjust quality while previewing results in real-time. All processing happens in your browser—no uploads, no privacy concerns, no waiting for server processing.
Set your quality target based on use case:
- Critical quality (portfolios, professional photography): 85-90%
- Standard quality (websites, social media, general use): 80-85%
- Aggressive compression (email, strict file limits): 70-80%
Preview at 100% zoom and at actual display size. Toggle between original and compressed versions to verify quality.
Stage 3: Resize to Target Dimensions
Finally, resize to actual display dimensions using the Image Resizer. This step often yields the largest reduction in file size.
Dimension targets by use:
- Website hero images: 1920-2400px wide
- Website content images: 1200-1600px wide
- Email attachments: 1200-1500px wide
- Thumbnails: 400-800px wide
- Social media: Platform-specific (usually 1080-2048px)
Lock the aspect ratio to prevent distortion, and choose a high-quality resampling method (bicubic or Lanczos, if available).
Why This Order Matters
Convert first because different formats respond differently to compression. Converting after compression can introduce additional quality loss.
Compress the second because compression algorithms work more efficiently on full-resolution images. They can analyze more data to make better decisions about what to discard.
Resize last because it’s a destructive operation—you’re permanently discarding pixels. Do it last so you can always return to the full-resolution compressed version if you need different dimensions later.
Real-world results: This three-stage workflow routinely achieves 85-95% file size reduction on photographs while maintaining visual quality indistinguishable from the original at normal viewing distances.
Quality Checks: How to Verify Your Compressed Images
Before uploading or publishing compressed images, run through this quality checklist to ensure you’ve successfully compressed image file size without losing quality.
Visual Inspection Checklist
✓ View at 100% zoom Look for blocky artifacts, especially around edges and in areas of fine detail. JPEG compression creates 8×8 pixel blocks that become visible at low quality settings.
✓ Check gradients and skies Smooth color transitions (like blue skies or gradient backgrounds) show “banding” (visible steps between colors) when over-compressed. If you see distinct bands rather than smooth transitions, increase the quality by 5-10 points.
✓ Examine text and sharp edges Text should remain crisp with clean edges. If letters look fuzzy or have colored halos, you’ve either used the wrong format (JPEG instead of PNG) or set quality too low.
✓ Review at actual display size Step back from your screen or view at the actual size the image will appear. Many compression artifacts visible at 100% zoom disappear at normal viewing distances.
✓ Compare side-by-side with original Open both versions and toggle between them. If you can’t immediately spot the difference at normal viewing distance, you’ve achieved optimal compression.
Technical Verification
File size check: Verify the compressed file meets your target size from the use-case table. If it’s still too large, revisit the resize step—dimensions have the biggest impact on file size.
Format verification: Confirm the file extension matches the intended format (.jpg, .png, .webp). Some tools save with incorrect extensions, causing compatibility issues.
Dimension verification: Check pixel dimensions match your target. Some compression tools inadvertently resize images, especially when “optimize for web” options are enabled.
Metadata check: If you removed EXIF data for privacy or file size, verify it’s actually gone using an EXIF viewer or the EXIF Remover tool.
Device and Platform Testing
Mobile preview: View compressed images on a phone screen. Mobile displays often mask compression artifacts that appear obvious on desktop monitors.
Browser compatibility: If using WebP or AVIF, test in your target browsers. While support has improved dramatically, some enterprise environments still use older browsers.
Upload test: Actually upload the compressed image to your target platform (website, marketplace, form) and verify it displays correctly. Some platforms apply additional compression, which can compound quality loss.
Troubleshooting Common Compression Problems
Even with careful technique, you’ll occasionally encounter compression challenges. Here’s how to diagnose and fix the most common issues.
Problem: File Still Too Large After Compression
Diagnosis: You’ve compressed but haven’t resized, or you’re using a format with poor compression efficiency (PNG for photos).
Solution:
- Check actual dimensions—resize to 1.5× display size maximum
- Verify format—use JPEG or WebP for photographs
- Reduce quality in 5-point increments from 85% to 75%
- Consider converting to WebP or AVIF for better compression
Problem: Visible Quality Loss and Artifacts
Diagnosis: Quality setting too low, incorrect content type format, or multiple compression passes.
Solution:
- Increase quality setting by 10 points (from 70% to 80%)
- Switch to the appropriate format (PNG for graphics, JPEG for photos)
- Start from the highest-quality source available
- Avoid re-compressing already-compressed images
Problem: Colors Look Different After Compression
Diagnosis: Color space conversion (RGB to sRGB) or aggressive chroma subsampling.
Solution:
- Ensure source and output use the same color space (sRGB for web)
- For critical color accuracy, increase quality to 90-95%
- Use PNG or lossless WebP if color precision is essential
- Check display calibration—different screens show colors differently
Problem: Image Won’t Upload to Platform
Diagnosis: Format incompatibility, file still exceeds size limit, or corrupted compression.
Solution:
- Convert to universally compatible JPEG or PNG
- Check the platform’s actual file size limit and format requirements
- Re-compress from the original source if the file appears corrupted
- Try a different compression tool—some platforms reject files from specific encoders
Problem: Compression Takes Too Long
Diagnosis: Processing very large files, using outdated tools, or server-based compression with slow internet.
Solution:
- Resize before compressing—smaller dimensions process faster
- Use browser-based tools like the Image Compressor that process locally
- For batch processing, work in smaller groups (20-30 images at a time)
- Close unnecessary browser tabs to free up processing resources