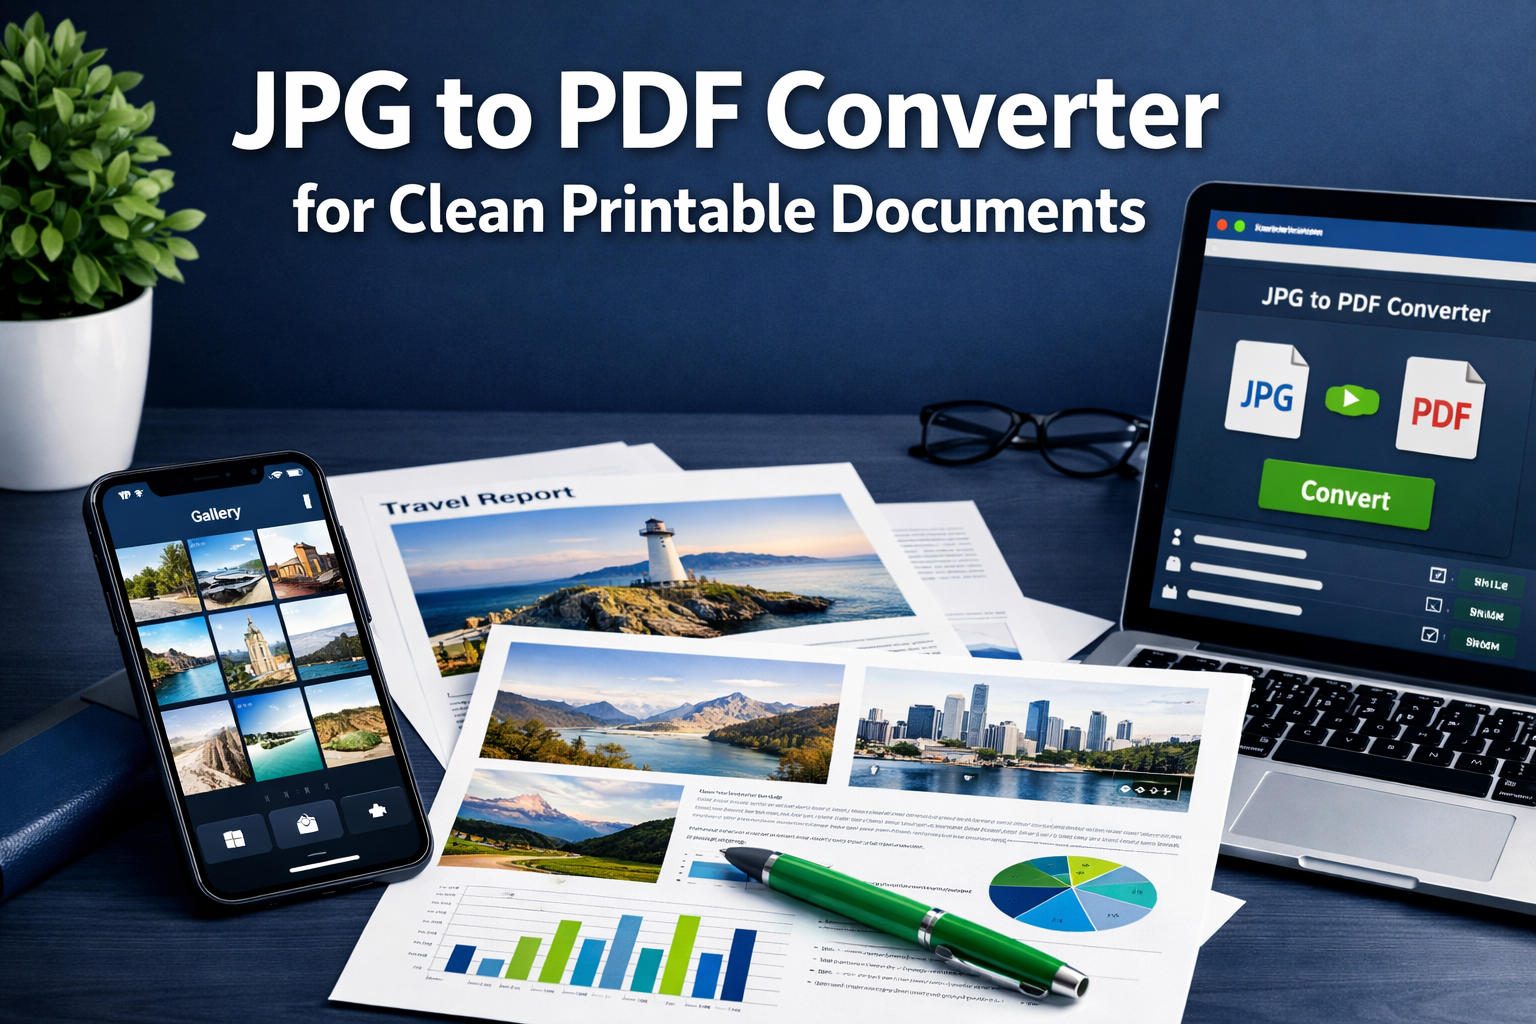
When Sarah needed to submit her apartment rental application, she had everything ready—driver’s license photo, pay stubs captured on her phone, bank statements—but the property manager wanted “one PDF file, not 12 separate photos.” She spent 20 frustrating minutes trying to figure out how to combine her images into a professional-looking document before discovering a JPG to PDF converter that solved her problem in under two minutes.
This scenario plays out thousands of times daily. Whether you’re submitting job applications, compiling receipts for reimbursement, creating photo albums for printing, or organizing scanned documents, knowing how to convert JPG images to a clean, printable PDF is an essential skill in 2026. The right approach means the difference between a professional-looking document and a messy collection of sideways, oversized images that waste paper and ink.
Key Takeaways
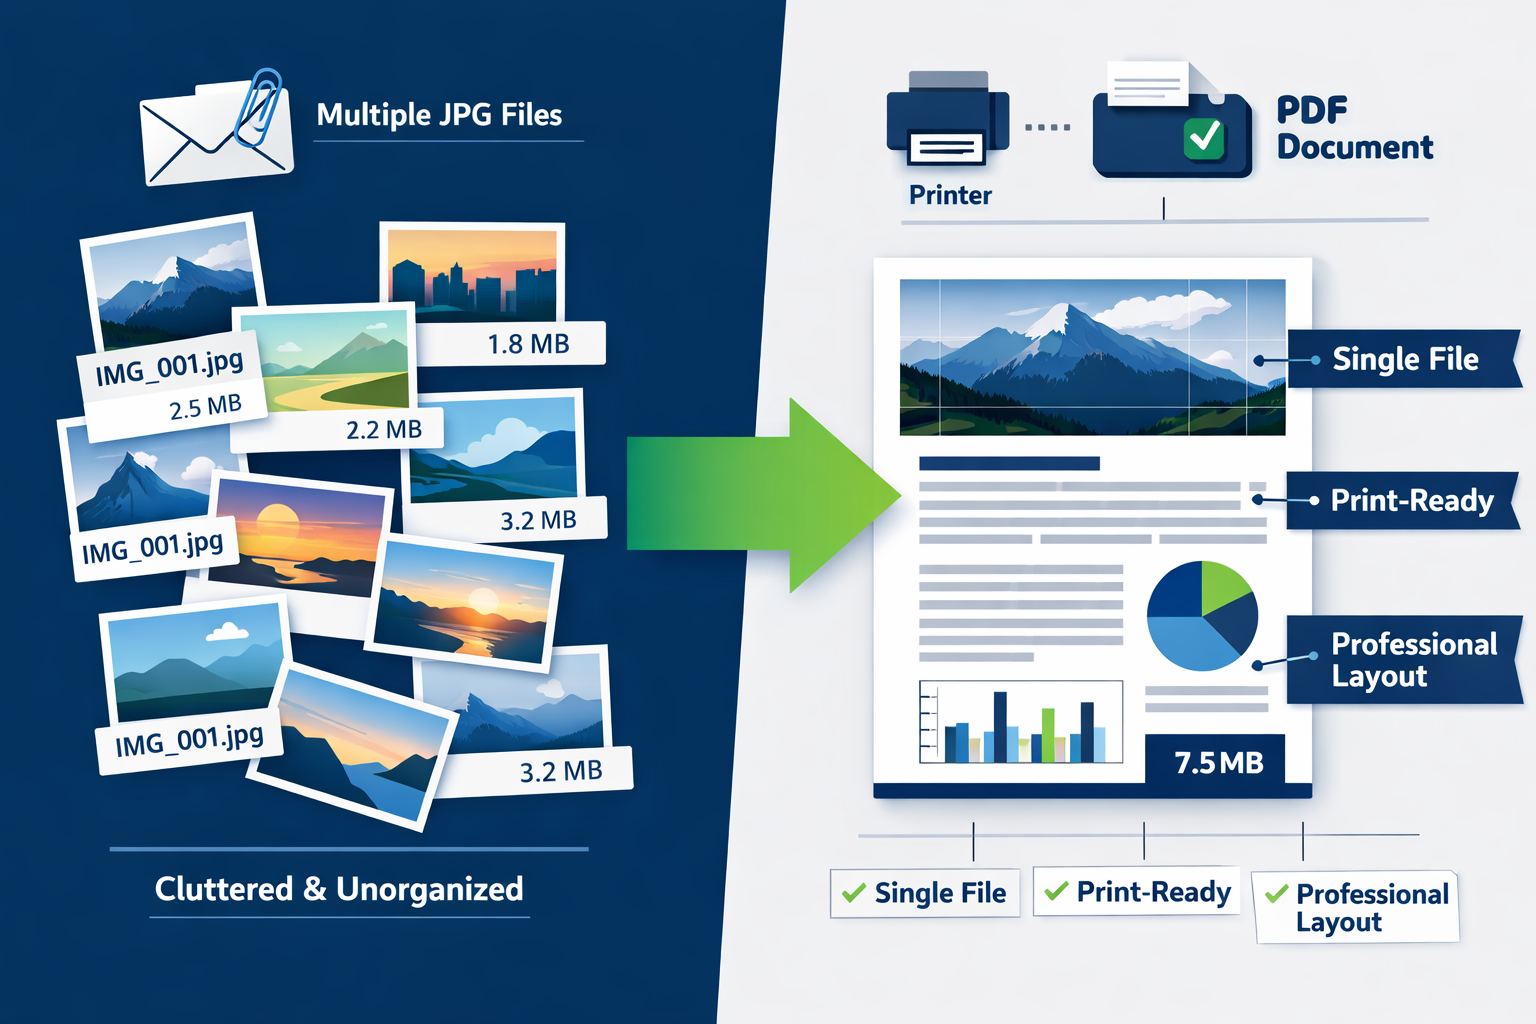
- A JPG to PDF converter transforms multiple photos into a single, organized document that’s easier to share, print, and archive than individual image files
- Page size, orientation, and margins matter—choosing Letter or A4 format with proper settings ensures your PDF prints correctly without cropping or wasted space
- Browser-based converters offer privacy-first conversion with no uploads to external servers, keeping your documents secure while delivering fast, clean results
- File size optimization is critical—compress your PDF to meet email limits (typically 10-25 MB) without sacrificing print quality
- Final quality checks prevent common mistakes like sideways pages, cut-off images, or unreadable text that waste time and materials
When JPG-to-PDF Is Better Than Sending Photos
Sending individual JPG files might seem simpler, but converting images to PDF offers significant advantages for both you and your recipient.
Professional Presentation and Organization
A single PDF document creates immediate credibility. When you submit a job application with “Application_JohnDoe.pdf” containing your resume, certifications, and ID—all properly oriented and sized—you demonstrate attention to detail. Compare that to an email with attachments named “IMG_2847.jpg,” “IMG_2848.jpg,” and “photo.jpg” that open sideways or at random sizes.
PDFs maintain consistent page ordering. Your recipient views page 1, then page 2, then page 3—exactly as you intended. With separate JPG files, there’s no guarantee they’ll open in the correct sequence, especially across different devices or email clients.
Practical File Management Benefits
Single-file convenience eliminates attachment chaos. Instead of selecting and attaching 6-10 individual photos, attach a single PDF. Email systems handle this better—many email providers limit the number of attachments per message, but rarely object to one reasonably-sized PDF.
Universal compatibility means anyone can open your document. While HEIC images from iPhones sometimes cause problems on Windows computers, and WebP files may not display in older software, PDF files open reliably on virtually every device without requiring format conversions. (If you do encounter HEIC files, our HEIC to JPG/PNG converter can help prepare them for PDF conversion.)
Print-ready formatting saves paper and frustration. A properly configured PDF prints exactly one page per sheet, with correct orientation and margins. Individual photos often print unpredictably—some tiny in the corner of a page, others spanning multiple sheets.
File Size and Email Limits
Most email providers impose attachment limits of 10-25 MB. Six high-resolution phone photos can easily exceed 30 MB. Converting to PDF—especially with light compression—typically reduces total file size by 40-70% while maintaining print quality.
Cloud storage and document management systems also prefer PDFs. Many automated workflows (such as applicant tracking systems or invoice processing software) expect PDFs and may reject or mishandle loose image files.
Understanding JPG to PDF Converter Options in 2026
The landscape of JPG to PDF converters has evolved significantly, with browser-based tools now offering capabilities that previously required desktop software.
Browser-Based vs. Desktop Software
Browser-based converters run entirely in your web browser with no installation required. You visit a website, select your images, configure settings, and download your PDF—all in seconds. These tools process files locally in your browser, meaning your images never leave your device.
This approach offers several advantages:
- ✅ No software installation cluttering your computer
- ✅ Works on any device—desktop, laptop, tablet, or phone
- ✅ Always up-to-date with no manual updates needed
- ✅ Privacy-first processing with files staying on your device
- ✅ No signup required for immediate access
Desktop software like Adobe Acrobat provides advanced features (OCR, form creation, digital signatures) but requires installation, regular updates, and often paid subscriptions. For straightforward JPG-to-PDF conversion, browser tools deliver professional results without the overhead.
What to Look for in a Converter
Not all JPG to PDF converters are created equal. The best tools share these characteristics:
Quality preservation: Your converter should maintain original image resolution without degradation. All major converters now guarantee that image quality is retained during conversion, ensuring PDFs remain suitable for printing.
Multi-format support: Beyond JPG, look for tools that support PNG, BMP, GIF, TIFF, HEIC, WebP, and SVG. This flexibility matters when working with images from different sources—screenshots (PNG), scanned documents (TIFF), or iPhone photos (HEIC).
Batch processing: The ability to combine multiple images into one PDF is essential. Quality converters let you add dozens of images, reorder pages by dragging, and remove unwanted pages before generating the final PDF.
Page size and orientation controls: Professional results require choosing the correct page size (Letter, A4, Legal) and orientation (portrait or landscape). Without these options, your images may print incorrectly.
Security and privacy: Tools that process files in your browser—rather than uploading to remote servers—offer superior privacy. When uploads are necessary, look for automatic file deletion policies (typically within 3 hours).
The Core Tools Hub Approach
Our Images to PDF tool embodies these principles with a privacy-first, browser-based approach. All processing happens in your browser—no uploads, no signup required, and no file size limits beyond your device’s capabilities. You maintain complete control over your documents from start to finish.
The tool supports all common image formats, lets you reorder pages with simple drag-and-drop, and provides precise control over page size, orientation, and margins. Whether you’re creating a 2-page document or combining 50 photos into a printable album, the process remains fast and straightforward.
Step-by-Step: Converting JPG to PDF for Printable Documents
Creating a clean, print-ready PDF from your photos requires more than just clicking “convert.” Follow this workflow for professional results every time.
Step 1: Prepare Your Images
Organize your files before starting. Rename images with descriptive, sequential names: “01_cover_letter.jpg,” “02_resume.jpg,” “03_certification.jpg.” This makes ordering pages easier and helps you spot missing documents.
Check image orientation on your device first. Rotate sideways photos to the correct orientation before conversion. While most converters offer rotation tools, fixing orientation beforehand prevents mistakes and speeds up the process.
Verify image quality by opening each file at 100% zoom. If text appears blurry or photos look pixelated before conversion, the PDF won’t improve them. For scanned documents, aim for at least 300 DPI for crisp text. Phone photos typically exceed this automatically.
Consider format conversions if needed. If you have PNG screenshots mixed with JPG photos, that’s fine—modern converters handle multiple formats. However, if you’re working with HEIC files from an iPhone and need broader compatibility, convert them to JPG first using our HEIC converter.
Step 2: Select Your Converter and Upload Images
Navigate to a reliable JPG to PDF converter. For privacy-first, browser-based conversion, use the Core Tools Hub Images to PDF tool.
Upload your images using one of these methods:
- Drag and drop files directly into the browser window
- Click to browse and select multiple files (hold Ctrl/Cmd to select multiple)
- Add files incrementally if you’re working with images from different folders
The tool displays thumbnails of your uploaded images, typically showing file names and sizes. This visual confirmation helps catch errors before conversion.
Step 3: Arrange Page Order
Drag thumbnails to reorder pages. The sequence you create here determines the final page order of the PDF. Most converters show page numbers on each thumbnail for easy reference.
Review the sequence carefully:
- Does the cover page come first?
- Are multi-page documents in the correct order?
- Did any images accidentally upload twice?
Remove unwanted pages by clicking the delete or remove icon on individual thumbnails. It’s easier to exclude images now than to edit the PDF later.
Step 4: Configure Page Settings
This step separates amateur results from professional documents.
Choose page size based on your destination:
| Page Size | Dimensions | Best For |
|---|---|---|
| Letter | 8.5 × 11 inches | US printing, office documents, forms |
| A4 | 210 × 297 mm | International standard, most of world |
| Legal | 8.5 × 14 inches | Legal documents, contracts |
| Custom | User-defined | Special projects, photo books |
US users should default to Letter size. International users typically need A4. Using the wrong size causes printing problems—images may be cropped, or pages may print with large blank margins.
Select orientation:
- Portrait (vertical): Standard for documents, forms, most text-heavy content
- Landscape (horizontal): Better for wide photos, charts, or presentations
Set margins if your converter offers this option. Standard margins (0.5-1 inch or 12-25 mm) prevent content from printing too close to page edges, which some printers can’t handle. For full-bleed photo pages, use minimal or zero margins.
Step 5: Adjust Image Fit and Quality
Image fit options determine how photos fill each page:
- Fit to page: Scales images to fit within margins, maintaining aspect ratio (recommended for mixed content)
- Fill page: Stretches images to fill the entire page, may crop edges
- Actual size: Uses original image dimensions, may result in very large or very small images on the page
Quality settings affect file size and print clarity:
- High quality (300 DPI): Best for printing, larger file sizes (2-5 MB per page)
- Medium quality (150 DPI): Good balance for most uses (500 KB-1 MB per page)
- Low quality (72 DPI): Screen viewing only, smallest files (100-300 KB per page)
For printable documents, choose high quality unless the file size becomes prohibitive. The difference between 150 and 300 DPI is noticeable on printed pages, especially for text.
Step 6: Convert and Download
Click the convert button (often labeled “Create PDF,” “Convert,” or “Generate PDF”). Browser-based tools process files in seconds to minutes, depending on the number of images and your device’s speed.
Monitor progress if the tool provides a progress bar. Large batches (20+ images) may take 30-60 seconds.
Download your PDF when the conversion completes. Save it with a descriptive name: “Rental_Application_Sarah_Chen.pdf” rather than “converted.pdf.”
Keep original images until you’ve verified the PDF meets your needs. Don’t delete source files immediately—you may need to reconvert with different settings.
Making Your PDF Printable: Page Size, Margins, and Orientation
A technically successful conversion can still produce unusable printed documents if you ignore page layout fundamentals.
Understanding Page Size Standards
Letter size (8.5 × 11 inches) dominates in the United States, Canada, and parts of Latin America. Office printers, copy shops, and document workflows in these regions expect Letter-sized PDFs. Using A4 size in a US context results in small margins or cropped content when printed.
A4 size (210 × 297 mm) is the international standard used in Europe, Asia, Africa, and most of the world. A4 pages are slightly narrower and taller than Letter. Submitting Letter-sized documents for A4 printing (or vice versa) creates formatting headaches.
How to choose:
- Check requirements first—job applications, forms, and official documents often specify required page size
- Match your printer’s default—if you’ll print the document yourself, use your printer’s standard paper size
- Consider your audience—sending documents internationally? Use A4 for broader compatibility
- When in doubt, ask—a quick email to confirm page size requirements prevents wasted time
Legal size (8.5 × 14 inches) is used in specific contexts, such as contracts, legal filings, and certain government forms. Don’t use Legal size unless explicitly required—most printers don’t have Legal paper loaded by default.
Orientation: Portrait vs. Landscape
Portrait orientation (vertical) works for:
- Text documents (letters, applications, forms)
- Standard photos (people, portraits)
- Documents with multiple paragraphs
- Anything that scrolls naturally on a phone screen
Landscape orientation (horizontal) works for:
- Wide photos (panoramas, group shots, landscapes)
- Charts, graphs, and data tables
- Presentation slides
- Before/after comparisons
Mixed orientation in a single PDF is possible, but it complicates printing. If you need both orientations, consider creating separate PDFs or rotating specific images before conversion so all pages use the same orientation.
Margin Settings That Work
Standard margins (0.5-1 inch or 12-25 mm on all sides) serve multiple purposes:
Printer limitations: Most home and office printers cannot print to the absolute edge of paper. Content placed too close to the edges gets cut off.
Binding and hole-punching: Documents that will be three-hole-punched or bound need left margins of at least 1 inch to prevent text or images from disappearing into the binding.
Professional appearance: White space around content improves readability and creates a polished look.
Handling protection: Margins prevent fingerprints and handling from obscuring important content.
Minimal margins (0.1-0.25 inch or 3-6 mm) work for:
- Photo albums where images should fill pages
- Designs with background colors or patterns
- Documents that won’t be printed (screen-viewing only)
Zero margins (full bleed) should only be used when:
- You’re certain the printer supports borderless printing
- You’re creating a PDF for screen viewing only, never printing
- You understand that content near edges may be cut off on most printers
Page Layout Best Practices
One image per page creates the cleanest, most predictable results. Each photo gets its own page, properly sized and oriented. This approach works well for:
- Document compilation (ID, resume, certificates)
- Photo albums with captions
- Scanned multi-page documents
Multiple images per page saves paper but requires careful layout:
- Use consistent image sizes for visual harmony
- Add borders or spacing between images
- Ensure text remains readable when multiple images share a page
- Test print one page before printing the entire document
Consistent sizing throughout the document creates professional results. If page 1 has a full-page image with 0.5-inch margins, use the same settings for all pages. Inconsistent margins and sizing make documents look amateurish.
Optimizing File Size Without Sacrificing Quality
A 45 MB PDF might look perfect on your screen, but it exceeds most email attachment limits and takes forever to download. Smart compression maintains print quality while creating manageable file sizes.
Why File Size Matters
Email attachment limits vary by provider:
- Gmail: 25 MB
- Outlook: 20 MB (some accounts allow 34 MB)
- Yahoo: 25 MB
- Corporate email: Often 10 MB or less
Exceeding these limits forces you to use cloud storage links, which adds friction and reduces the likelihood recipients will view your document.
Uploading forms and applications often imposes strict size limits. Job application portals might cap attachments at 5 MB. Government forms often limit uploads to 2-3 MB.
Download speed affects user experience. A 50 MB PDF takes 8-10 seconds to download on a fast connection, but 2-3 minutes on slower mobile networks. Recipients may abandon downloads that take too long.
Storage costs matter when archiving thousands of documents. A company storing 10,000 employee records at 20 MB each needs 200 GB of storage. At 5 MB each, the same records require only 50 GB.
Understanding PDF Compression
Image compression reduces file size by removing redundant data or simplifying image information. Two main types exist:
Lossless compression preserves every pixel of the original image. File sizes decrease by 10-30%, while quality remains the same. This works well for images with large areas of solid color or simple graphics.
Lossy compression discards some image data to achieve larger reductions in size (50-80%). Modern compression algorithms are sophisticated enough that quality loss remains invisible at appropriate compression levels.
Quality settings typically range from 1-100 or “low” to “high”:
- 90-100 (high): Virtually indistinguishable from original, modest file size reduction
- 70-85 (medium): Excellent quality for printing, significant size reduction (50-70% smaller)
- 50-65 (low): Acceptable for screen viewing, noticeable quality loss when printed
- Below 50: Visible artifacts, suitable only for thumbnails or temporary use
Compression Strategy for Printable PDFs
Start with optimized source images. If your JPG files are already 8-12 MB each from a high-end camera, consider compressing them before conversion to PDF. Our Image Compressor can reduce image file sizes by 60-80% with no visible quality loss, resulting in a much smaller PDF.
Use medium-high quality settings (85-90) when converting to PDF. This maintains excellent print quality while reducing file size by 40-60% compared to uncompressed PDFs.
Compress the final PDF if it still exceeds your size requirements. After creating your PDF, run it through a PDF compressor to further reduce its size without reconverting from source images.
Test print before sharing. Compression that looks perfect on screen sometimes reveals artifacts when printed. Print one page at actual size to verify quality before sending the document.
When to Prioritize Quality Over Size
Professional submissions (job applications, client deliverables, legal documents) warrant larger file sizes. A 30 MB PDF that requires cloud storage is better than a 5 MB PDF with visible compression artifacts.
Archival documents should use minimal compression. You’re creating a permanent record—prioritize quality over storage costs.
Documents with text need higher quality than pure photos. Text becomes fuzzy and unreadable at lower quality settings, while photos tolerate more compression.
Print-to-order photo books or professional printing services often specify minimum quality requirements (300 DPI, minimal compression). Follow their guidelines precisely.
File Size Benchmarks
Typical file sizes for properly optimized PDFs:
| Content Type | Pages | Target Size | Quality Setting |
|---|---|---|---|
| Text documents with photos | 5-10 | 2-5 MB | 85-90 |
| Photo album (full-page images) | 10-20 | 8-15 MB | 85-90 |
| Scanned documents (300 DPI) | 5-10 | 3-8 MB | 90-95 |
| Mixed documents (forms + photos) | 5-10 | 3-6 MB | 85-90 |
| High-quality portfolio | 10-20 | 15-30 MB | 95-100 |
If your PDF significantly exceeds these benchmarks, additional compression will likely maintain quality while reducing size.
Common Mistakes When Converting JPG to PDF
Even experienced users make these errors that compromise document quality or usability.
❌ Ignoring Image Orientation
The mistake: Uploading sideways photos and assuming the converter will automatically rotate them correctly.
The consequence: Your PDF contains pages that require rotating to view, frustrating recipients, and looking unprofessional when printed.
The fix: Rotate all images to the correct orientation before uploading to your JPG to PDF converter. Most operating systems let you rotate images in the file browser or the default photo viewer. Taking 30 seconds to fix orientation saves minutes of frustration later.
❌ Using the Wrong Page Size
The mistake: Converting with default settings without checking page size, then discovering the PDF doesn’t print correctly on the available paper.
The consequence: Images get cropped, margins appear uneven, or content doesn’t fill the page properly. Recipients may need to reconvert the document themselves.
The fix: Explicitly select Letter or A4 based on your region and use case. When submitting documents to others, ask about their preferred page size if it’s unclear.
❌ Over-Compressing Images
The mistake: Choosing “low quality” or “small file size” settings to meet email limits without checking print quality.
The consequence: Text becomes blurry and unreadable when printed. Photos show visible compression artifacts (blocky areas, color banding).
The fix: Always test print one page before sharing the entire document. If file size is a concern, compress source images first, then convert to PDF at medium-high quality.
❌ Mixing Portrait and Landscape Randomly
The mistake: Converting photos without considering orientation, resulting in a PDF that alternates between portrait and landscape pages.
The consequence: Printed documents require constant rotation to view. Digital readers must keep adjusting orientation. The document looks disorganized.
The fix: Group similar orientations together, or rotate images before conversion so all pages use the same orientation. If mixed orientation is unavoidable, place landscape pages in logical sections (e.g., all charts together).
❌ Forgetting to Reorder Pages
The mistake: Uploading images in random order based on file names or upload sequence, then converting without reviewing page order.
The consequence: Page 1 might be your ID, page 2 your diploma, page 3 your resum – a completely illogical sequence.
The fix: Use the drag-and-drop page ordering feature in your converter. Arrange pages in the sequence you want readers to view them: cover letter, resume, references, certifications, etc.
❌ Including Duplicate or Unnecessary Images
The mistake: Uploading all photos from a folder without reviewing, including duplicates, test shots, or irrelevant images.
The consequence: Your 5-page document becomes 12 pages with redundant content, wasting the recipient’s time and making you look careless.
The fix: Review thumbnails after uploading. Delete duplicates and unnecessary images before converting. It’s easier to remove images now than to edit the PDF later.
❌ Neglecting File Naming
The mistake: Downloading the converted PDF with the default name like “converted.pdf” or “document.pdf.”
The consequence: When recipients save your file, it has a generic name that provides no context. They may struggle to find it later among dozens of similarly-named files.
The fix: Rename your PDF descriptively before sending: “Application_FirstName_LastName.pdf” or “Invoice_March2026_CompanyName.pdf.” Include your name, date, or document type for easy identification.
❌ Skipping the Preview
The mistake: Converting and immediately sending without opening the PDF to verify results.
The consequence: You discover errors (sideways pages, wrong order, cut-off images) only after recipients report problems.
The fix: Always open the completed PDF and scroll through every page. Check orientation, order, image quality, and margins. Verify that text is readable and nothing is cut off. This 30-second review prevents embarrassing mistakes.
Final Quality Checks Before Sharing Your PDF
You’ve converted your images to PDF, but don’t hit “send” yet. These final checks ensure your document makes the right impression.
Visual Inspection Checklist
Open your PDF in a reader (Adobe Acrobat, Preview, browser PDF viewer) and verify:
✓ Page order is correct
- Does the document flow logically from start to finish?
- Are multi-page sections in the right sequence?
- Did any pages get duplicated accidentally?
✓ All pages display in the correct orientation
- Can you read every page without rotating your device?
- Are landscape images properly oriented?
- Do portrait pages display vertically?
✓ Images fit properly on pages
- Are images centered with appropriate margins?
- Is anything cut off at page edges?
- Do images fill the page appropriately without excessive white space?
✓ Image quality is acceptable
- Zoom to 100% or 150%—is text crisp and readable?
- Are photos clear without obvious compression artifacts?
- Do colors look accurate and vibrant?
✓ No blank or corrupted pages
- Does every page contain the expected content?
- Are there any error messages or missing images?
- Did all images convert successfully?
Test Print Verification
If your PDF will be printed, print one sample page before printing the entire document or sending to others:
Check margins: Does content appear properly spaced from page edges? Is anything cut off?
Verify orientation: Does the page print in the correct orientation without requiring manual rotation?
Assess quality: Is text sharp and readable? Are photos clear? Do colors look accurate?
Test page size: Does the content fit properly on your paper size without scaling?
If the test page reveals problems, adjust your conversion settings and reconvert. It’s faster to fix issues now than to waste paper and ink on a full print run.
File Size and Compatibility Check
Verify file size meets your requirements:
- Is it under email attachment limits?
- Does it meet any upload form size restrictions?
- Will it download quickly for recipients?
Test compatibility by opening the PDF in multiple viewers if possible:
- Does it open in your web browser?
- Does it display correctly in Adobe Acrobat Reader?
- Can you view it on your phone?
Check metadata if privacy matters. PDFs sometimes retain metadata from source images (camera model, GPS location, timestamps). If this concerns you, use our Image EXIF Remover on source images before conversion, or strip PDF metadata using specialized tools.
Naming and Organization
Use descriptive file names that identify content at a glance:
- ✅ “Rental_Application_Sarah_Chen_March2026.pdf”
- ✅ “Expense_Report_Q1_2026_Marketing.pdf”
- ✅ “Portfolio_Samples_Designer_Name.pdf”
- ❌ “converted.pdf”
- ❌ “document.pdf”
- ❌ “IMG_to_PDF.pdf”
Include dates when relevant, using YYYY-MM-DD format for proper sorting:
- “2026-03-15_Meeting_Notes.pdf” sorts chronologically
- “Meeting_Notes_March_15_2026.pdf” doesn’t sort well
Keep a copy of the final PDF in your own records before sending. You may need to reference it later or resend if the recipient loses it.
Advanced Tips: Batch Conversion and Workflow Efficiency
Once you’ve mastered basic JPG to PDF conversion, these advanced techniques save time when working with multiple documents or recurring conversion tasks.
Batch Processing Multiple Documents
The scenario: You need to create 10 separate PDFs, each containing 3-5 images—perhaps individual client reports, multiple job applications, or separate project documentation.
The efficient approach:
- Organize source images into folders—one folder per final PDF
- Name folders descriptively to match desired PDF names
- Process one folder at a time through your converter
- Download and rename each PDF immediately before starting the next
- Verify each PDF before moving to the next batch
Time-saving tip: Keep your converter tab open and use keyboard shortcuts. After downloading each PDF, press Ctrl+W (Windows) or Cmd+W (Mac) to close the download bar, then immediately drag the next batch of images into the converter window.
Creating Template Settings
If you regularly create similar PDFs (weekly reports, monthly invoices, standard applications), document your preferred settings:
Create a settings checklist:
<code>Standard Document Template:
- Page size: Letter
- Orientation: Portrait
- Margins: 0.75 inches
- Quality: 85
- Image fit: Fit to page
- File naming: [Type]_[Date]_[Name].pdf
</code>
Save this checklist where you’ll reference it (desktop sticky note, phone note app, printed reference card). Consistent settings ensure all your documents have uniform formatting.
Combining PDF Conversion with Other Tools
Workflow 1: Phone Photos → PDF → Compressed PDF
- Take photos with your phone (receipts, documents, whiteboards)
- Transfer to computer or use mobile browser
- Convert JPG to PDF using Images to PDF tool
- Compress the PDF using Compress PDF tool to meet email limits
- Send or upload the final compressed PDF
Workflow 2: Multiple PDFs → Single Combined Document
- Convert different image sets to separate PDFs (resume photos → resume.pdf, certificates → certificates.pdf)
- Use Merge PDF tool to combine into one comprehensive document
- Reorder pages if needed using Reorder PDF tool
- Final quality check and send
Workflow 3: PDF → Individual Images (for editing)
- Convert JPG to PDF as usual
- Discover you need to edit one image
- Use PDF to Images tool to extract individual pages as images
- Edit the specific image
- Reconvert to PDF with the corrected image
Mobile Conversion Tips
Converting JPG to PDF on phones and tablets requires slightly different techniques:
Organize before starting: Mobile browsers handle file selection differently. Have all images in one easily accessible folder before beginning.
Use landscape orientation on your phone when working with the converter interface. The extra horizontal space makes drag-and-drop reordering easier.
Check file sizes: Mobile data plans and slower connections make large uploads and downloads painful. If working with many high-resolution images, consider compressing them first or using WiFi.
Preview on mobile: If recipients will view your PDF primarily on phones, preview the final document on your phone to ensure readability. Text and images that look fine on a desktop may be too small on mobile screens.
Automating Repetitive Tasks
For users who convert JPG to PDF frequently with identical settings, some advanced options exist:
Browser bookmarks: Bookmark your preferred converter with settings pre-configured (if the tool supports URL parameters).
Keyboard shortcuts: Learn your operating system’s shortcuts for file selection, window management, and downloads to speed up the conversion process.
Folder templates: Create pre-named folders for common document types. When starting a new project, copy the template folder and drop images into it.
Batch renaming: Use your operating system’s batch rename feature (F2 on Windows, Enter on Mac) to quickly rename multiple images with sequential numbers before conversion.
Real-World Example: Six Photos to One Printable PDF
Let’s walk through a concrete example that demonstrates the entire process.
The Scenario
Marcus needs to submit a vendor application to sell at a local farmers market. The application requires:
- Completed application form (2 pages, scanned with phone)
- Business license (1 page photo)
- Food handler’s certificate (1 page photo)
- Product liability insurance (2 pages, photographed)
He has six separate JPG images on his phone that need to become one professional PDF document.
Step-by-Step Execution
1. Preparation (2 minutes)
Marcus transfers the six photos from his phone to his computer. He renames them for clarity:
- IMG_2847.jpg → 01_Application_Page1.jpg
- IMG_2848.jpg → 02_Application_Page2.jpg
- IMG_2849.jpg → 03_Business_License.jpg
- IMG_2850.jpg → 04_Food_Handler_Cert.jpg
- IMG_2851.jpg → 05_Insurance_Page1.jpg
- IMG_2852.jpg → 06_Insurance_Page2.jpg
He opens each image to verify they’re right-side-up and legible. Image 04 is sideways, so he rotates it using his computer’s photo viewer.
2. Conversion (1 minute)
Marcus navigates to the Core Tools Hub Images to PDF tool and drags all six images into the browser window. Thumbnails appear showing all six images in the correct order (thanks to his sequential naming).
He configures settings:
- Page size: Letter (US-based farmers market)
- Orientation: Portrait (all documents are vertical)
- Margins: 0.5 inches (standard for printed documents)
- Quality: High (needs to be readable when printed)
- Image fit: Fit to page (ensures nothing is cut off)
He clicks “Create PDF” and waits 15 seconds while the tool processes his images.
3. Quality Check (1 minute)
Marcus downloads “converted.pdf” and immediately renames it to “Vendor_Application_Marcus_Chen.pdf.”
He opens the PDF and scrolls through all six pages:
- ✓ Pages are in correct order
- ✓ All text is readable at 100% zoom
- ✓ Nothing is cut off at page edges
- ✓ All pages display in portrait orientation
- ✓ File size is 4.2 MB (well under the 10 MB upload limit)
4. Test Print (2 minutes)
Since this document will be reviewed by market organizers who may print it, Marcus prints page 1 on his home printer. The application form prints clearly with appropriate margins. Text is crisp and readable.
Satisfied with the quality, he uploads the PDF to the farmers market application portal.
Before and After Comparison
Before conversion:
- 6 separate JPG files
- Total size: 18.3 MB
- File names: IMG_2847.jpg through IMG_2852.jpg
- No guaranteed viewing order
- Difficult to email (exceeds most attachment limits)
- Would print unpredictably (possibly multiple images per page, or one image across multiple pages)
After conversion:
- 1 PDF file
- Total size: 4.2 MB (77% smaller)
- File name: Vendor_Application_Marcus_Chen.pdf
- Guaranteed page order
- Easy to email or upload
- Prints predictably (one page per sheet, correct orientation)
The entire process took Marcus under 10 minutes, including preparation and quality checks. The professional presentation increased his chances of application approval and demonstrated attention to detail.
Troubleshooting Common JPG to PDF Issues
Even with careful preparation, occasional problems arise. Here’s how to diagnose and fix the most common issues.
Problem: PDF File Size Is Too Large
Symptoms: Your PDF exceeds email attachment limits or upload form restrictions.
Causes:
- Source images are very high resolution (12+ megapixels from modern cameras)
- Too many pages in one PDF
- Quality settings set too high for the intended use
- Images weren’t compressed before conversion
Solutions:
- Compress source images first using an image compressor before converting to PDF
- Lower quality settings to 80-85 (still excellent for printing) during conversion
- Compress the final PDF using a PDF compression tool
- Split into multiple PDFs if you have 20+ pages—use logical divisions (part 1, part 2)
- Remove unnecessary pages that don’t add value to the document
Problem: Images Look Blurry or Pixelated in the PDF
Symptoms: Text is difficult to read, photos lack detail, or images appear fuzzy when zoomed.
Causes:
- Source images were low resolution to begin with
- Excessive compression during conversion
- Images were upscaled (made larger than the original resolution)
- Quality settings are set too low
Solutions:
- Check source image quality before conversion—if the original JPG is blurry, the PDF will be too
- Increase quality settings to 90-95 during conversion
- Avoid upscaling—don’t try to make small images fill large pages
- Rescan or retake photos if originals are inadequate
- Use higher resolution when photographing documents (most phones default to high resolution, but check settings)
Problem: Pages Print in Wrong Orientation
Symptoms: Portrait pages print in landscape orientation (or vice versa), requiring manual rotation.
Causes:
- Images have incorrect orientation metadata
- Converter didn’t respect image orientation
- PDF viewer or printer driver is rotating pages automatically
Solutions:
- Rotate images before conversion using your computer’s photo viewer
- Explicitly set orientation in converter settings rather than relying on automatic detection
- Check PDF in multiple viewers—the problem may be viewer-specific
- Use “Print as Image” option in your PDF reader to override automatic rotation
- Reconvert with explicit orientation settings if the problem persists
Problem: Images Are Cut Off at Page Edges
Symptoms: Parts of photos or text don’t appear in the PDF, particularly near page borders.
Causes:
- Margins set too small or zero
- “Fill page” setting is cropping images
- Page size doesn’t match image aspect ratio
- Printer has unprintable margins that extend into your content
Solutions:
- Increase margins to at least 0.5 inches on all sides
- Use “Fit to page” instead of “Fill page” for image fit setting
- Add white borders to source images before conversion if they must fill the page
- Check printer specifications—most can’t print closer than 0.25 inches from edges
- Reconvert with adjusted settings after identifying the cause
Problem: PDF Won’t Upload to Form or Email
Symptoms: Upload fails, error messages about file type or size, or email bounces back.
Causes:
- File size exceeds limits
- File name contains special characters
- PDF is corrupted
- Upload form has restrictions on PDF features
Solutions:
- Reduce file size through compression
- Rename file to remove spaces, special characters, or very long names (use underscores instead of spaces)
- Try a different browser if uploading through a web form
- Verify PDF opens correctly on your device before uploading
- Contact recipient to confirm file size limits and accepted formats
- Use cloud storage link (Google Drive, Dropbox) if file must remain large
Problem: Colors Look Different in PDF vs. Original Images
Symptoms: Photos appear washed out, oversaturated, or have incorrect color tones in the PDF.
Causes:
- Color space conversion during PDF creation
- Display calibration differences
- Compression artifacts affecting color data
- PDF viewer rendering differences
Solutions:
- Use higher quality settings (90+) to minimize color compression
- Check PDF in multiple viewers—the issue may be viewer-specific
- Verify on multiple devices—your monitor may not be calibrated correctly
- Accept minor variations—some color shift is normal when converting between formats
- Use “Print as Image” when printing to preserve colors more accurately
Privacy and Security Considerations
When converting personal documents, photos, or sensitive information to PDF, privacy matters.
Browser-Based Processing Advantages
Privacy-first converters like Core Tools Hub’s Images to PDF tool process files entirely in your browser. This means:
✓ Your files never leave your device. No uploads to remote servers means no opportunity for interception, storage, or unauthorized access.
✓ No account required. You don’t provide email addresses, passwords, or personal information that could be compromised in a data breach.
✓ No file retention. Since files aren’t uploaded, there’s nothing to delete. Your documents exist only on your device.
✓ Works offline. Once the tool page loads, you can disconnect from the internet and still convert files (though you need a connection to initially load the page).
This approach is ideal for sensitive documents: tax forms, medical records, legal documents, financial statements, or any content you wouldn’t want stored on third-party servers.
Upload-Based Converter Risks
Traditional online converters that require uploading files to their servers introduce several risks:
Data breaches: If the service is hacked, your uploaded files could be exposed.
File retention: Even with deletion policies, you must trust that files are actually deleted when promised.
Metadata exposure: Uploaded files may retain metadata (GPS locations, timestamps, device information) visible to the service.
Terms of service: Some free converters claim the right to use uploaded content for “service improvement” or other purposes.
Third-party access: Cloud-based services may use third-party processors or storage, expanding the number of entities that could have access to your files.
Best Practices for Sensitive Documents
When converting confidential or sensitive images to PDF:
1. Use browser-based tools that process files locally whenever possible.
2. Remove metadata from source images before conversion using an EXIF remover tool if photos contain location data or other sensitive information.
3. Check file names don’t reveal sensitive information (avoid names like “SSN_Card.jpg” or “Bank_Statement_March.jpg” if files might be accidentally shared).
4. Verify HTTPS connection if you must use an upload-based converter—look for the padlock icon in your browser’s address bar.
5. Read privacy policies to understand how services handle your data, how long files are retained, and who has access.
6. Use incognito/private browsing when converting sensitive documents to prevent browser history and cache from retaining file information.
7. Clear browser cache after conversion if you’re concerned about temporary files.
8. Password-protect PDFs containing highly sensitive information (requires additional PDF tools beyond basic conversion).
Corporate and Compliance Considerations
Organizations handling regulated data (HIPAA for healthcare, GDPR for EU personal data, FERPA for education records) should:
Establish clear policies about which tools employees may use for document conversion.
Prefer on-premise or browser-based tools that don’t upload data to external servers.
Audit tool usage to ensure compliance with data handling regulations.
Train employees on secure document handling practices.
Document your processes to demonstrate compliance during audits.
For organizations with strict compliance requirements, browser-based conversion tools that process files locally offer the simplest path to compliance since data never leaves the organization’s control.
Conclusion: Creating Professional PDFs from Photos
Converting JPG images to clean, printable PDFs is a fundamental skill in 2026—one that saves time, reduces frustration, and creates professional impressions. Whether you’re submitting job applications, compiling receipts, organizing scanned documents, or creating photo albums, the right approach transforms scattered image files into polished, organized documents.
The key principles are straightforward:
Choose the right page size (Letter or A4) based on your region and intended use. This single decision prevents countless printing problems.
Configure orientation and margins thoughtfully. Standard margins (0.5-1 inch) ensure your content prints correctly on any printer and looks professional.
Optimize file size intelligently. Balance quality and size to meet email limits while maintaining print clarity. Medium-high quality settings (85-90) work for most purposes.
Review before sharing. A 30-second quality check catches orientation errors, wrong page order, or quality issues before recipients see them.
Use privacy-first tools when converting sensitive documents. Browser-based converters that process files locally offer superior security compared to upload-based services.
The Core Tools Hub Images to PDF tool provides everything you need: browser-based processing for privacy, support for multiple image formats, precise control over page settings, and fast conversion in seconds. No installation, no signup, no uploads—just straightforward conversion that keeps your files secure and delivers clean, printable results.
Your Next Steps
- Gather the images you need to convert and organize them with clear, sequential names
- Visit the Images to PDF tool and upload your images
- Configure page settings (size, orientation, margins) based on your intended use
- Create your PDF and review it carefully before sharing
- Compress if needed using the PDF compression tool to meet size requirements
- Save a copy for your records before sending
With these techniques, you’ll create professional, printable PDFs that make strong impressions and serve their intended purpose—whether that’s landing a job, getting approved for an apartment, organizing business records, or simply sharing photos in a clean, accessible format.
Start converting your images to professional PDFs today with Core Tools Hub’s privacy-first, browser-based converter.