
Last updated: March 6, 2026
Key Takeaways
- Most PDFs grow large because of embedded images, fonts, and metadata — not the text itself.
- Lossless compression reduces file size without changing visual quality; lossy compression trades some quality for much smaller files.
- For job portals and email, a target of 1–5 MB is usually safe; government and academic portals often cap at 5–10 MB.
- Browser-based tools like Core Tools Hub’s PDF Compressor process files locally — no files are uploaded to a server.
- Blurry compressed PDFs are almost always caused by overly aggressive image downsampling, not by compression itself.
Quick Answer
To compress a PDF without losing quality, use a tool that lets you choose a “low” or “lossless” compression setting rather than the default “maximum.” For most documents, reducing image DPI to 150 and keeping text as vector data will cut file size by 40–70% with no visible quality loss. For scanned PDFs, use medium compression and check the output before submitting anywhere important.
Why Do PDFs Get So Large in the First Place?
A PDF’s file size is almost never driven by the words on the page. Text in a properly built PDF is vector data — it takes up almost no space. The real culprits are embedded images, fonts, color profiles, metadata, and revision history that accumulate when a file is edited multiple times.
Common reasons a PDF is too big:
- High-resolution photos or screenshots embedded at print quality (300 DPI or higher), when screen quality (72–150 DPI) would look identical on a monitor
- Uncompressed or lightly compressed images saved as TIFF or PNG before being placed into the PDF
- Duplicate embedded fonts — some export tools embed the same font multiple times
- Revision layers and metadata left behind by design software like Adobe InDesign or Microsoft Word
- Scanned pages saved as large raster images rather than optimized image+text layers
A single full-page photograph at 300 DPI can easily add 2–5 MB to a PDF. Multiply that across a 20-page portfolio, and you have a 60 MB file that no job portal will accept.
When you must compress: Most email clients cap attachments at 20–25 MB. Job portals typically require PDFs under 5–10 MB. Government and university submission portals often enforce a strict 5 MB limit. If your file exceeds those thresholds, compression is not optional.
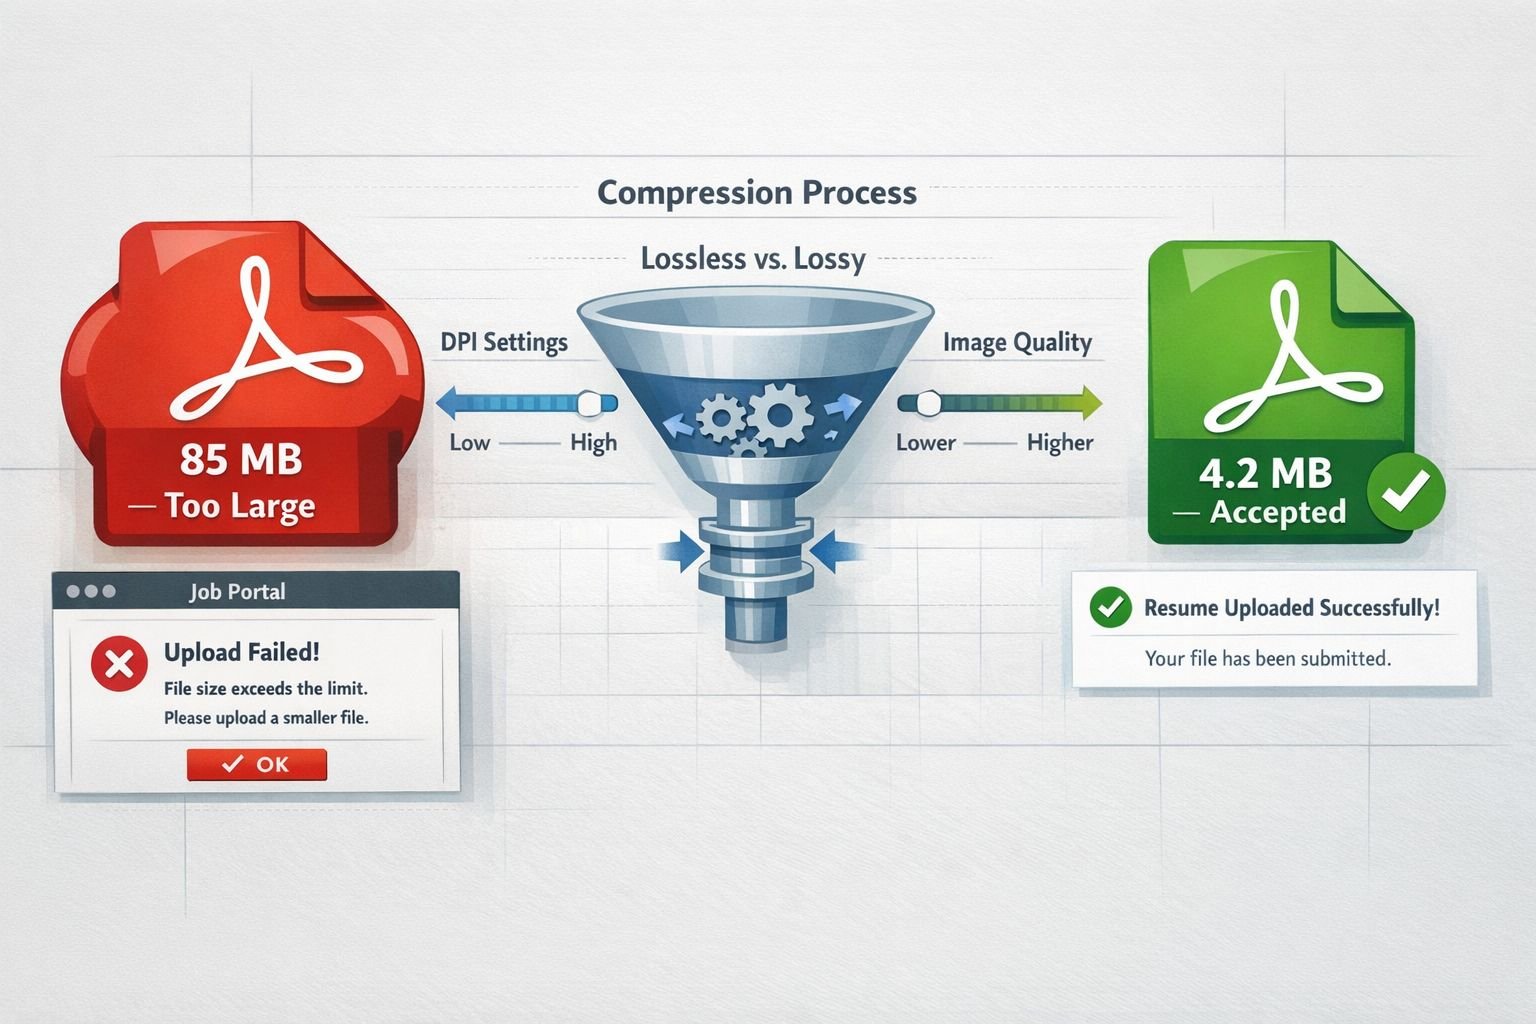
Lossless vs. Lossy PDF Compression: What’s the Difference?
Lossless compression reduces a file’s size without discarding any data. The document looks identical before and after. Lossy compression achieves greater size reduction by permanently removing some image data — if pushed too far, it results in the blurry, pixelated output that frustrates so many users.
Understanding which type to use is the single most important decision in this process.
Lossless compression
- Removes redundant data, duplicate fonts, and hidden metadata
- Re-encodes images using more efficient algorithms (like Flate/ZIP or, soon, Brotli — more on that below)
- Typical size reduction: 10–40% for text-heavy PDFs, up to 60% for documents with compressible images
- Best for: contracts, legal documents, academic papers, anything where text clarity is non-negotiable
Lossy compression
- Resamples (downscales) embedded images to a lower DPI
- Applies JPEG compression to photos at a chosen quality level
- Typical size reduction: 50–90%
- Best for: portfolios, presentations, scanned documents, anything where the visual is important but pixel-perfect accuracy is not
How mixed-content and scanned PDFs behave differently
A mixed-content PDF (text + photos, like a resume with a headshot) needs careful handling. The text layer should be kept lossless, while images undergo lossy reduction. Most good compressors do this automatically.
A scanned PDF is entirely made of raster images — there is no text layer. Every page is essentially a photograph. Aggressive compression on a scanned PDF will blur handwriting and make small print hard to read. For scanned documents, medium compression (150 DPI output, 75–80% JPEG quality) is the safe ceiling.
Step-by-Step: How to Compress PDF Online Without Losing Clarity
For most users, a browser-based tool is the fastest path. Here is a straightforward workflow that works for email attachments, portal uploads, and archive copies.
What you need: The PDF file, a browser, and about two minutes.
Step 1: Check your file size and content type
Before compressing, right-click the file and check its size. Also open it and scroll through — is it mostly text, mostly images, or scanned pages? This tells you which settings to use.
Step 2: Open a browser-based PDF compressor
Go to Core Tools Hub’s PDF Compressor. No account needed, no software to install. All processing runs in your browser, so your file never leaves your device.
Step 3: Upload your PDF and choose a compression level
Drag your file into the tool or click to browse. Select a compression level:
- Low / Lossless — for text documents, contracts, forms
- Medium — for mixed documents, most job applications, email attachments
- High — for large image-heavy files where some quality reduction is acceptable
Step 4: Download and check the output
Download the compressed file. Open it and zoom in on any images or small text. If it looks good at 100% zoom, it will look good when printed or viewed on a portal. If the text looks blurry, go back and use a lower compression setting.
Step 5: Verify the file size meets your target
Check the new file size. If it’s still too large, consider splitting the PDF into smaller sections or removing some pages before recompressing.
Best Settings for Text-Heavy, Image-Heavy, and Scanned PDFs
There is no single “best” compression setting for every PDF. The right choice depends on what is inside the document.
| Document Type | Recommended Setting | Target DPI | Expected Size Reduction |
|---|---|---|---|
| Text-only (contracts, reports) | Lossless | N/A | 10–40% |
| Mixed (resume, proposal) | Medium | 150 DPI | 40–70% |
| Image-heavy (portfolio, brochure) | Medium–High | 96–150 DPI | 60–85% |
| Scanned documents | Medium | 150 DPI | 40–65% |
| Archival copies | Lossless | Original | 10–30% |
Compress PDF for specific destinations
For email (under 20 MB): Medium compression, 150 DPI images. This almost always gets a 30–50 MB document under the threshold without visible quality loss.
For job portals (under 5 MB): Medium to high compression. If your resume has no photos, lossless is usually enough. If it includes a headshot or design elements, use medium with 96–120 DPI.
For government/academic portals (under 5–10 MB): Lossless first. If the file is still too large, step up to the medium setting. Never use maximum/aggressive compression on official documents — blurry text on a government form can cause rejection.
For long-term archives: Always use lossless. Lossy compression is permanent — you cannot recover the discarded image data later.
A note on the upcoming Brotli compression standard
The PDF Association is advancing a Brotli compression filter specification for integration into PDF 2.0 (ISO 32000-2), with a summer 2026 release targeted. Brotli promises 10–25% smaller files compared to the current Flate/ZIP standard, with no quality loss. Prototypes already exist in MuPDF (version 1.26.0) and Ghostscript. For now, most tools still use Flate — but this is worth watching if you regularly work with large document archives.
How to Compress PDF Files in Bulk for Big Projects
Compressing one file at a time works fine for occasional tasks. For larger projects — a 50-page client report, a semester’s worth of scanned notes, or a full portfolio — batch compression saves significant time.
When batch compression makes sense:
- You have more than five PDFs to reduce
- All files are going to the same destination with the same size limit
- You are preparing an archive of documents from a completed project
Batch workflow using browser tools
Some browser-based tools support multiple file uploads in a single session. For a clean workflow on complex documents:
- Merge first—if related documents need to stay together, use a PDF merge tool to combine them into a single file before compressing. This avoids compressing the same fonts and metadata multiple times across separate files.
- Compress the merged file — apply medium compression once to the combined document.
- Split if needed — if the destination has a per-file size limit, use a PDF splitter after compression to divide it back into sections.
This merge → compress → split workflow consistently produces smaller results than compressing individual files separately, because shared fonts and resources are deduplicated once rather than preserved across every file.
Desktop tools for large batches
For batches of 20+ files or files over 100 MB each, desktop software handles the load more reliably than browser tools. PDFelement and Adobe Acrobat Pro both support folder-level batch compression with custom settings. PDFgear’s desktop version offers free lossless batch modes and is a strong option for users who do not want a subscription.
Fixing Blurry Text or Artifacts After Compression
Blurry output after compression is the most common complaint — and it is almost always caused by one of three things.
Cause 1: Image DPI was set too low If the compressor downsampled images to 72 DPI or lower, photos and graphics will look soft on screen and terrible in print. Fix: recompress from the original file at 96–150 DPI.
Cause 2: JPEG quality was set too aggressively. Some tools default to 40–60% JPEG quality to maximize size reduction. At those levels, photos develop visible compression artifacts (blocky patches, color banding). Fix: Use a tool that lets you set JPEG quality to 75–85%.
Cause 3: You compressed an already-compressed file. Compressing a PDF that was already compressed by another tool compounds quality loss. Always compress from the original source file, not a previously compressed copy.
Quick fix checklist for blurry PDFs
- Go back to the original, uncompressed source file
- Choose “low” or “medium” compression, not “maximum”
- Set image output to at least 150 DPI
- Set JPEG quality to 75% or higher
- Check the output at 100% zoom before submitting
- If the file is still too large, consider extracting specific pages and compressing only the sections that need it
If the original file is a scanned document and the output still looks blurry, the source scan may have been low-resolution to begin with. In that case, rescanning at 300 DPI and then compressing to 150 DPI output will produce a much cleaner result.
Privacy-First Compression Strategies for Sensitive Documents
Not every PDF should be uploaded to a cloud server. Tax returns, medical records, legal contracts, and HR documents all carry personal or confidential information. Sending those files to a third-party server — even a reputable one — introduces risk.
The privacy spectrum of PDF compression tools:
| Tool Type | Where Processing Happens | Privacy Risk |
|---|---|---|
| Browser-based (client-side) | Your device only | Minimal — file never leaves browser |
| Cloud-based (server upload) | Company servers | Moderate — depends on retention policy |
| Desktop software | Your device only | Minimal — no network required |
When to use a client-side browser tool
Tools that process files entirely in your browser — like Core Tools Hub’s PDF Compressor — never upload your file to any server. All compression happens locally using JavaScript. This makes them the right choice for:
- Tax documents and financial statements
- Medical or insurance records
- Legal contracts and NDAs
- HR documents and employment records
- Any file containing personal identification numbers
You can verify this behavior by turning off your internet connection after the page loads — the tool will still work, because no server communication is involved. For more on how Core Tools Hub handles data, see the privacy policy.
When server-based tools are acceptable
For non-sensitive files — a class assignment, a product brochure, a public report — tools like Smallpdf, iLovePDF, or PDF24 are perfectly reasonable. They offer generous free tiers and handle the compression server-side. Just be aware that most retain uploaded files for a period (typically 1–24 hours) before deletion.
Removing metadata before sharing
Compressed PDFs still retain metadata: author name, creation software, edit history, and, sometimes, GPS data from embedded images. If you are sharing a document publicly or with a client, stripping this metadata is good practice. The Image EXIF Remover on Core Tools Hub handles this for image files, and many PDF compressors include a “remove metadata” option worth enabling.
Tool Comparison: Best PDF Compressors in 2026
Choosing the right tool depends on your priorities: privacy, compression quality, free usage limits, or batch capability.
| Tool | Processing | Free Limit | Lossless Mode | Batch | Best For |
|---|---|---|---|---|---|
| Core Tools Hub | In-browser | Unlimited | Yes | Limited | Privacy, quick compression |
| PDFgear | In-browser + desktop | Unlimited | Yes (low/medium) | Desktop only | Free lossless, no account |
| Smallpdf | Server | 1 task/hour | Auto-optimized | Paid | Casual email use |
| iLovePDF | Server | 2 tasks/hour | Limited | Paid | Quick online compression |
| Adobe Acrobat | Server + desktop | Subscription | Yes (custom) | Yes | Professional, custom settings |
| PDFelement | Desktop | Free tier | Yes | Yes | Batch lossless workflows |
| PDF24 Tools | Server | Unlimited | Yes | Yes | Free cloud-based batch |
Choose Core Tools Hub if: privacy is a priority, you want no account or signup, and your files are under the browser processing limit.
Choose PDFgear if you need free lossless compression with more control over settings and are comfortable with a desktop app for batch work.
Choose Adobe Acrobat if you need the most granular control over compression settings and already have a subscription.
Choose PDF24 if: you need free, unlimited, cloud-based batch compression and your documents are not sensitive.
Common Mistakes When Compressing PDFs
Even experienced users run into these problems. Avoiding them saves time and frustration.
Mistake 1: Compressing a file that’s already been compressed. Each compression pass on a lossy file further degrades its quality. Always work from the original source.
Mistake 2: Using maximum compression for everything. “Maximum” settings prioritize file size over quality. For most use cases, medium compression hits the right balance.
Mistake 3: Not checking the output before submitting. A 2 MB file that’s unreadable is worse than a 6 MB file that’s clear. Always open the compressed PDF and check it at full zoom before uploading anywhere.
Mistake 4: Compressing a PDF when the real problem is unnecessary pages. If a 30-page document has 10 blank pages or appendices you don’t need, removing those pages first (using a page extractor) will reduce file size without any quality tradeoff.
Mistake 5: Ignoring the source format If you are creating a PDF from Word or InDesign, export settings matter enormously. Exporting at “screen quality” from the source produces a smaller, better file than exporting at “print quality” and then compressing it.
FAQ
Q: Can I compress a PDF without any quality loss at all? Yes — lossless compression removes redundant data, duplicate fonts, and metadata without touching image quality. Text-heavy PDFs typically shrink 10–40% with zero visible change. Image-heavy PDFs may need some lossy reduction to hit strict size limits.
Q: What is a good target file size for a job application PDF? Most job portals accept PDFs up to 5 MB. A well-formatted resume with no photos should compress well under 1 MB. If yours is larger, check whether it contains embedded images or was exported at print quality from Word or a design tool.
Q: Why does my PDF look blurry after compression? Almost always because the image DPI was set too low (under 96 DPI) or JPEG quality was set below 70%. Recompress from the original file using medium settings: 150 DPI and 75–80% JPEG quality.
Q: Is it safe to use an online PDF compressor for sensitive documents? It depends on the tool. Server-based tools upload your file to their servers. Browser-based tools that process files locally (like Core Tools Hub) never send your file anywhere. For sensitive documents, use a client-side or desktop tool.
Q: How much can I reduce a scanned PDF without making it blurry? For scanned documents, medium compression at 150 DPI output is the safe limit. This typically reduces file size by 40–65%. Going below 150 DPI on a scanned page will visibly soften text, especially small print.
Q: What is the difference between Smallpdf and iLovePDF? Both are server-based tools with similar free tiers (limited tasks per hour). Smallpdf focuses on ease of use and auto-optimization for email. iLovePDF offers slightly more format flexibility. Neither is ideal for sensitive documents because both upload files to their servers.
Q: Can I compress a PDF on my phone? Yes. Browser-based tools work on mobile browsers. Open the tool on your phone’s browser, upload the file, and download the result. No app installation needed.
Q: What is Brotli compression, and will it affect my PDFs? Brotli is a newer compression algorithm being added to the PDF 2.0 standard, expected in summer 2026. It promises 10–25% smaller files compared to the current standard (Flate/ZIP) with no quality loss. Most current tools do not yet support it, but it will gradually appear in PDF software over the coming years.
Q: Should I compress a PDF before or after merging files? Compress after merging. Merging first allows the compressor to deduplicate shared fonts and resources across all pages, resulting in a smaller output than compressing each file separately.
Q: What file size limit should I expect for government portal uploads? Most government and academic portals enforce a 5–10 MB limit per file. Some older systems cap at 2–3 MB. Check the portal’s instructions before compressing — it is easier to target the right size the first time than to recompress repeatedly.
Q: Does compressing a PDF make it load faster? Yes. Smaller PDFs open faster in browsers and PDF viewers, especially on mobile connections. This matters for PDFs shared as links or embedded in web pages.
Q: Can I compress a password-protected PDF? Most tools require you to remove the password protection before compressing. If you own the document, unlock it first, compress it, and then reapply protection if needed.
Key Takeaways
- PDF file size is driven by images, not text. Reducing image DPI from 300 to 150 cuts image data by 75% with no visible difference on screen.
- Lossless compression is always the first choice for text documents, contracts, and archival copies. Use lossy only when lossless does not hit your size target.
- Medium compression at 150 DPI is the reliable setting for most real-world use cases: job applications, email attachments, and portal uploads.
- Scanned PDFs need careful handling. They are entirely image-based, so aggressive compression quickly blurs text. Stay at medium settings.
- Always compress from the original file, not a previously compressed copy.
- Browser-based tools that run locally are the right choice for sensitive documents — your file never leaves your device.
- The merge → compress → split workflow consistently produces smaller results for multi-document projects than compressing files individually.
- Check the output at 100% zoom before submitting anywhere important. A blurry PDF that gets rejected costs more time than a careful compression check.
- Brotli compression is coming to PDF 2.0 in 2026, promising 10–25% additional size reduction with no quality loss — worth watching for archive workflows.
- Removing unnecessary pages before compressing is often the fastest way to reduce file size without any quality tradeoff.
Conclusion
Compressing a PDF without losing quality is not complicated once you understand what is actually making the file large. Images are almost always the cause. The fix is to choose the right compression level — lossless for text, medium for mixed content, and careful medium for scanned pages — and always work from the original source file.
For most everyday tasks, a browser-based tool handles this in under a minute with no account, no software, and no risk of your file being stored on someone else’s server.
Next steps:
- Check your PDF’s file size and content type before compressing.
- Use Core Tools Hub’s PDF Compressor for a fast, private, in-browser compression — no signup required.
- If your document consists of multiple files, merge them first, then compress them once.
- If the file is still too large after compression, extract only the pages you need, then recompress.
- Always open the compressed file and check it at full zoom before submitting.
For a full overview of available PDF tools — including splitting, rotating, and reordering pages — visit the Core Tools Hub PDF Tools collection.