Last updated: March 13, 2026
Key Takeaways
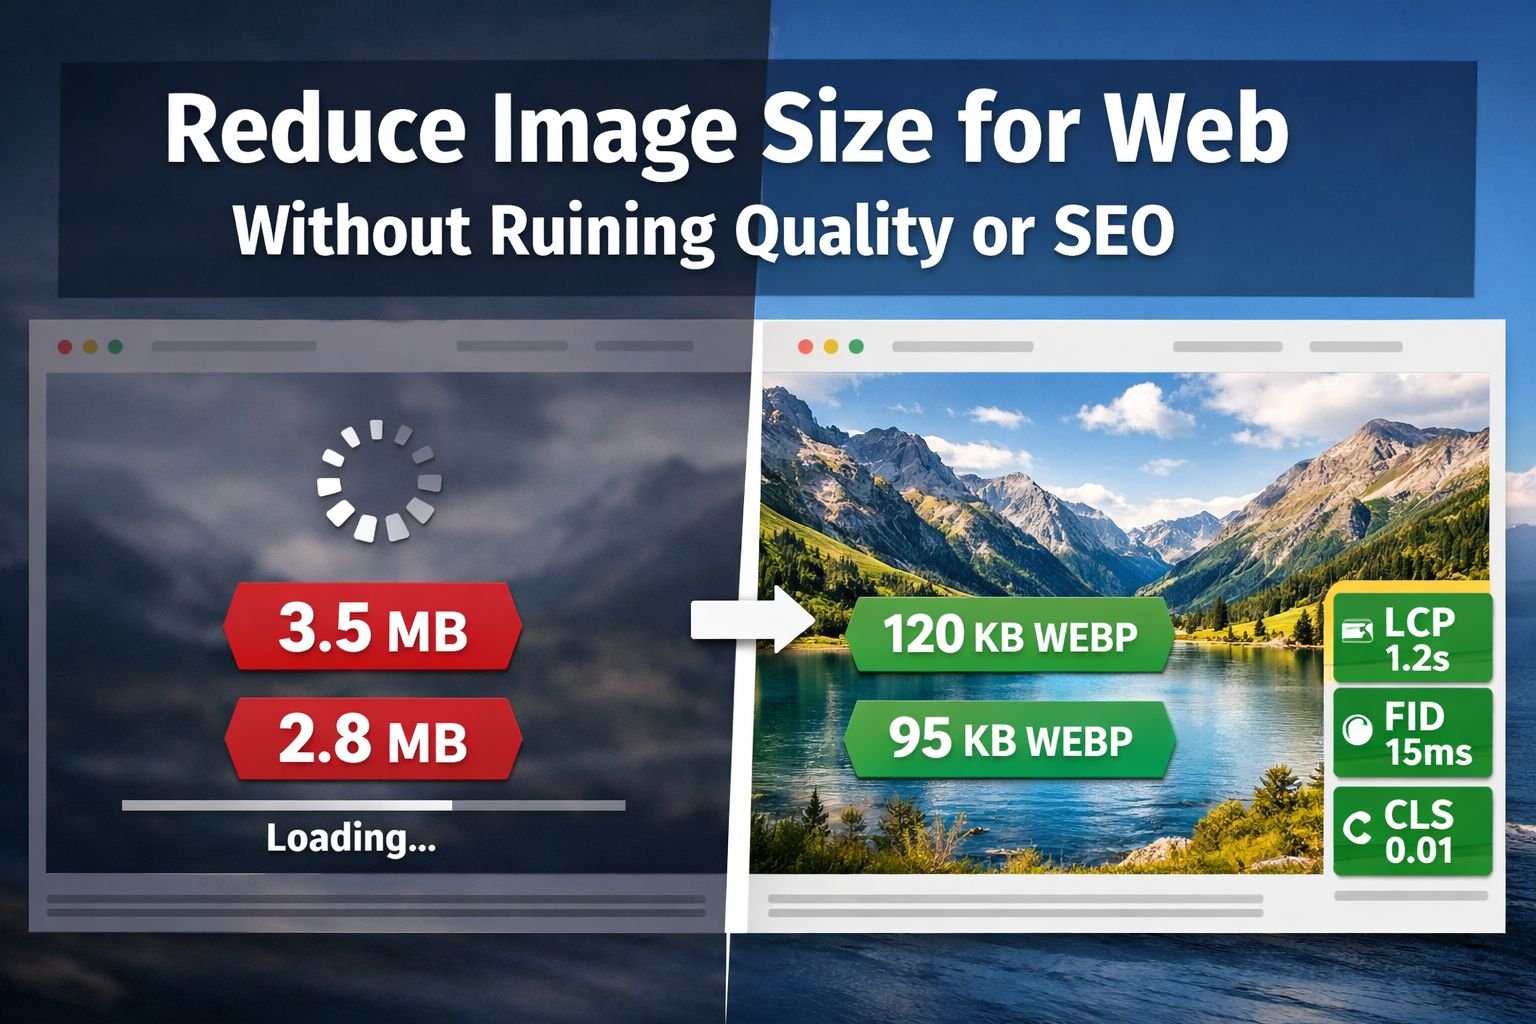
- Images are typically the largest assets on any webpage. Reducing image size is one of the fastest ways to improve load speed and pass Core Web Vitals.
- You can cut file size by 60–80% using lossy compression at quality level 75–85 with barely any visible difference for most web images.
- Modern formats like WebP and AVIF deliver significantly smaller files than JPEG or PNG at equivalent visual quality. AVIF is roughly 60% smaller than JPEG; WebP offers 90%+ browser support as a reliable fallback.
- Updated Core Web Vitals thresholds (effective January 2026) tighten LCP to under 2.0 seconds, making image optimization more critical than ever.
- Privacy-conscious tools that process files entirely in your browser — no uploads, no accounts — are a practical choice for compressing sensitive images without exposing them to third-party servers.
Quick Answer
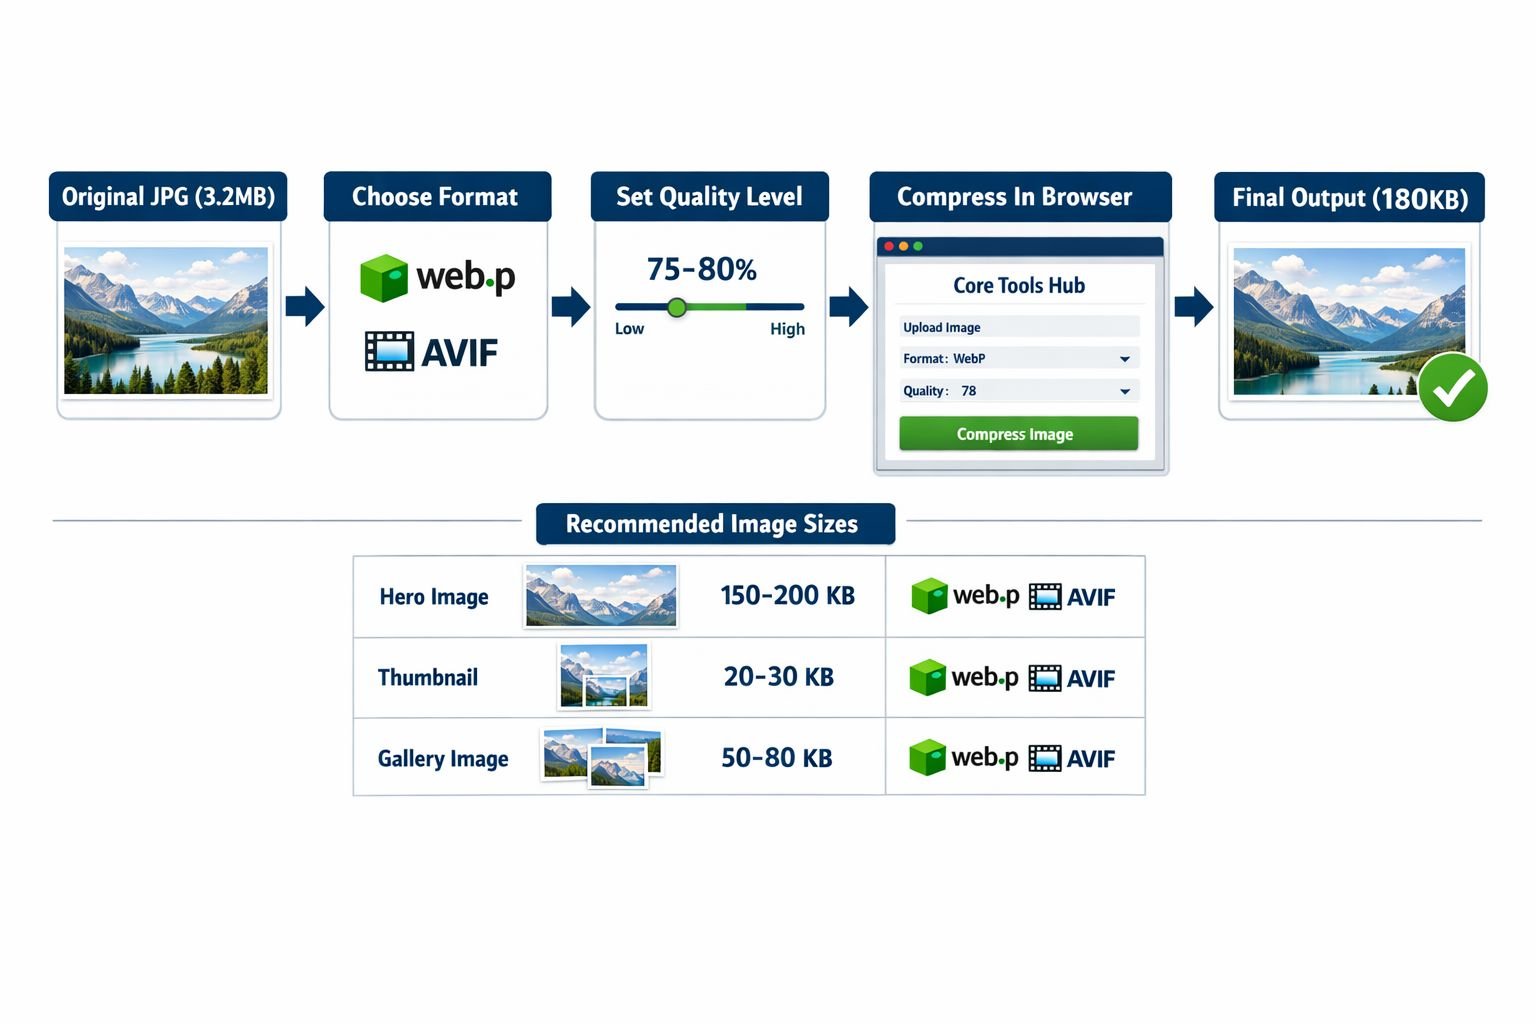
To reduce image size for the web without losing visible quality: convert to WebP or AVIF, set the compression quality to 75–85%, and resize to match the largest display size on your page. For most blog images, keep the file size under 100 KB. For hero images, stay under 200 KB. Use a browser-based tool like Core Tools Hub’s Image Compressor to compress PNG, JPG, or WebP files instantly — no installs, no signup required.
Why Image Size Matters for Speed, SEO, and UX
Large images are the single most common reason websites fail Core Web Vitals. A single unoptimized hero image can push your Largest Contentful Paint (LCP) past the new 2.0-second threshold Google set in January 2026, directly affecting your search rankings and bounce rate.
Here’s what’s at stake:
- Search rankings: Google uses Core Web Vitals as a ranking signal. Slow LCP scores hurt visibility, especially on mobile.
- User experience: Studies consistently show that users abandon pages that take more than 3 seconds to load. On a 4G mobile connection, a 2 MB image can take 2–4 seconds to load.
- Mobile users worldwide: Image compression is especially critical in markets where average mobile connection speeds are under 10 Mbps. Even a 200 KB savings per image can meaningfully improve load time on low-end Android devices — and that represents a large share of global web traffic.
- Bandwidth costs: For sites hosted on metered plans or CDNs with transfer limits, smaller images directly reduce operating costs.
The practical reality: A page with five unoptimized 1.5 MB images carries 7.5 MB of image payload. Compress those same images to 150 KB each and the total drops to 750 KB — a 90% reduction with no visible quality difference to most visitors.
Lossy vs. Lossless Compression: What’s the Difference?
The short answer: Lossy compression discards some image data to achieve much smaller files. Lossless compression reduces file size without throwing away any data. For web use, lossy compression at a moderate quality setting is almost always the right choice.
Lossy compression
Lossy formats (JPEG, WebP lossy, AVIF) analyze the image and selectively reduce color detail in areas where the human eye is least sensitive. At quality settings between 75–85%, the visual difference is negligible for photos and most illustrations, but file sizes drop by 40–80%.
Choose lossy if: You’re compressing photos, hero images, blog thumbnails, product shots, or any image where a small quality trade-off is acceptable in exchange for a much smaller file.
Common mistake: Setting quality too low (below 60) to chase a smaller file. At that point, you’ll see blocky artifacts around edges and washed-out gradients — the kind of visual degradation that makes a site look unprofessional.
Lossless compression
Lossless formats (PNG, WebP lossless, GIF) retain every pixel exactly. File sizes are larger, but there’s no loss of quality. This matters for logos, icons, screenshots with text, and any image where sharp edges or transparency must be preserved perfectly.
Choose lossless if: You’re working with logos, UI screenshots, diagrams, or images with large flat-color areas and hard edges.
Format comparison at a glance
| Format | Compression Type | Typical Size vs. JPEG | Best For | Browser Support (2026) |
|---|---|---|---|---|
| JPEG | Lossy | Baseline | Photos, complex images | Universal |
| PNG | Lossless | 20–50% larger | Logos, screenshots, transparency | Universal |
| WebP | Both | 25–35% smaller | Photos and graphics, web use | 95%+ |
| AVIF | Lossy/Lossless | ~60% smaller | High-quality photos, web | 90%+ |
| JPEG XL | Both | Comparable to AVIF | High-fidelity, archival | Growing (2026) |
AVIF has gained strong browser support and is now a practical first choice for photo-heavy sites. WebP remains the safest fallback. JPEG XL gained notable browser traction in early 2026 and is worth watching, though it’s not yet universally supported enough to use without fallbacks.
How to Reduce Image Size Online (No Photoshop Required)
You don’t need Photoshop, a plugin, or a desktop app. Here’s a straightforward workflow using browser-based tools that process everything locally — your files never leave your device.
Step 1: Resize dimensions first
Before compressing, make sure the image is no larger than it needs to be. Serving a 4000×3000 px photo in an 800px-wide blog column wastes significant file size.
Use the Image Resizer at Core Tools Hub to resize to exact dimensions in your browser. No uploads, all processing in browser.
Quick rule: Match the image’s pixel width to the maximum display width on your page, then add a 2x version for retina screens if needed (e.g., 1600px wide for an 800px column on HiDPI displays).
Step 2: Convert to a modern format
If your image is currently a PNG or JPEG, converting to WebP or AVIF before compressing gives you a smaller starting point.
- Convert JPG to WebP: JPG to WebP converter
- Convert PNG to WebP: PNG to WebP converter
- Convert to AVIF: AVIF Converter
Step 3: Compress the image
Open the Image Compressor and upload your resized, converted file. Set quality to 80% as a starting point. Preview the result. If it looks good, download. If you see artifacts, nudge the quality up to 85%.
Step 4: Strip EXIF data
Camera images often carry embedded metadata — GPS coordinates, device model, timestamps — that adds unnecessary file weight and can expose personal information. Use the Image EXIF Remover to clean this out before publishing.
Step 5: Check your result
Open the downloaded file and compare it side by side with the original at 100% zoom. For web viewing distances, quality settings of 75–85% are virtually indistinguishable from the original.
Best Formats and Compression Levels for Common Use Cases
Different image roles on a page have different requirements. Here’s a practical playbook.
Image size and format playbook
| Image Role | Max Dimensions | Target File Size | Recommended Format | Quality Setting |
|---|---|---|---|---|
| Hero / banner | 1600px wide | Under 200 KB | WebP or AVIF | 80–85% |
| Blog inline image | 800–1200px wide | Under 100 KB | WebP | 80% |
| Product thumbnail | 400–600px wide | Under 50 KB | WebP or AVIF | 75–80% |
| Logo / icon | As needed | Under 20 KB | SVG or PNG | Lossless |
| Gallery image | 1200px wide | Under 120 KB | WebP or AVIF | 78–82% |
| Open Graph / social | 1200×630px | Under 150 KB | JPEG or WebP | 85% |
Before vs. after: same image, four formats
To make this concrete, consider a standard 1200×800 px food photography image saved at four different formats with equivalent visual quality:
| Format | File Size | Visual Quality (web viewing) |
|---|---|---|
| JPEG (original) | 420 KB | Reference |
| PNG | 1.1 MB | Identical (lossless) |
| WebP (quality 82%) | 145 KB | Virtually identical |
| AVIF (quality 80%) | 88 KB | Virtually identical |
The AVIF version is 79% smaller than the original JPEG, with no perceptible quality difference at normal web-viewing distances. That’s the kind of saving that moves LCP scores from failing to passing.
Fixing Blurry, Blocky, or Banded Images After Compression
Over-compression creates three common problems. Each has a specific fix.
Problem 1: Blocky artifacts (JPEG/AVIF)
Cause: Quality set too low (typically below 65 for JPEG, below 55 for AVIF). Fix: Re-compress from the original file (never re-compress a compressed file) at quality 78–82%. The blocking disappears.
Problem 2: Blurry edges (WebP/AVIF)
Cause: Aggressive chroma subsampling at very low quality settings. Fix: Increase quality to 80%+ or switch to lossless WebP for images with sharp text or fine line detail.
Problem 3: Color banding in gradients
Cause: Reducing color depth too aggressively, common in PNG optimization tools that reduce to 8-bit. Fix: Keep gradient images in 24-bit PNG or use WebP lossy at 85%+. Avoid PNG-8 for any image with smooth color transitions.
Problem 4: Grainy or noisy appearance
Cause: The original image had noise, and compression amplified it by treating noise as detail to preserve. Fix: Apply a light denoise pass before compressing. Many image editors include a basic noise reduction filter. Alternatively, slightly increase compression (lower quality setting) — counterintuitively, compression can smooth out fine noise at moderate settings.
Common mistake: Re-compressing an already-compressed image. Each round of lossy compression stacks the quality loss. Always keep an uncompressed master and compress fresh from that.
Recommended Image Size Targets for Blogs, Shops, and Portfolios
The right target depends on the context. Here are practical benchmarks for three common site types.
Blogs and content sites
- Hero image: under 200 KB (WebP, 1600px wide)
- Inline body images: under 100 KB (WebP, 800–1200px)
- Author avatar: under 15 KB (WebP or PNG, 96–200px)
- Featured image (used in cards/listings): under 60 KB
E-commerce product pages
- Main product image: under 150 KB (WebP, 1000–1200px)
- Thumbnail grid: under 40 KB each (WebP, 300–400px)
- Zoom-enabled images: under 400 KB (WebP lossless or AVIF at 90%+)
Portfolios and creative sites
Designers on communities like r/graphic_design frequently report PDF portfolios and image-heavy decks weighing 70–100 MB even after exporting at 72 DPI. That’s usually because they’re exporting full-resolution images as PDFs without first compressing them.
The fix: Compress images before adding them to a PDF, or use a browser-based tool to compress the finished PDF. The Core Tools Hub PDF Compressor handles this without requiring any software installation.
- Portfolio gallery images: under 200 KB each (WebP or AVIF)
- Case study hero images: under 250 KB
- PDF portfolios shared as links: target under 5 MB total for a 10–15 page deck
Build a Repeatable Compression Workflow for All Your Content
A one-time compression effort isn’t enough. Every new image you publish needs the same treatment. The goal is to make this fast enough that it doesn’t slow down your publishing process.
Simple 5-step repeatable workflow
- Capture or source the image at full resolution. Keep the original.
- Resize to the maximum display dimensions for your layout using the Image Resizer.
- Convert to WebP (or AVIF for photo-heavy pages) using the appropriate converter.
- Compress at quality 78–82% using the Image Compressor. Check the preview.
- Strip EXIF metadata before uploading to your CMS.
Comparing popular compression tools
| Tool | Free Tier Limits | Format Support | Login Required | Privacy |
|---|---|---|---|---|
| TinyPNG / TinyJPG | 20 images/month | PNG, JPG, WebP | No | Files uploaded to servers |
| Squoosh (Google) | Unlimited | Most formats | No | In-browser |
| ShortPixel | 100 images/month | JPG, PNG, WebP, AVIF | Yes | Files uploaded to servers |
| Kraken.io | 100 MB/month | JPG, PNG, WebP | Yes | Files uploaded to servers |
| Core Tools Hub | Unlimited | PNG, JPG, WebP | No | All processing in browser |
The key difference with browser-based tools: your files never leave your device. For anyone handling client images, personal photos, or proprietary product shots, that’s a meaningful privacy advantage. Core Tools Hub runs entirely in your browser — no installs, no signup required, all processing in browser.
Automation note
If you’re managing a high-volume site, consider adding WebP conversion to your build pipeline (tools like Sharp for Node.js handle this well). For most bloggers and small site owners, though, a consistent manual workflow using browser-based tools is fast, free, and keeps files private.
Frequently Asked Questions
Q: What is the best image format to reduce file size for websites in 2026?
WebP is the safest choice for broad compatibility (95%+ browser support) with 25–35% smaller files than JPEG. AVIF is roughly 60% smaller than JPEG and has reached 90%+ support, making it a strong first choice for photo-heavy pages with a WebP fallback via <picture> tags.
Q: How much can I reduce image size without losing quality? For most web photos, you can reduce file size by 60–80% using lossy compression at quality 78–85% with no perceptible quality difference at normal screen viewing distances. Logos and images with sharp text need lossless compression to avoid edge artifacts.
Q: What’s the ideal image size for a blog post? Inline blog images should be under 100 KB, 800–1200px wide, and in WebP format. Hero images should stay under 200 KB at 1600px wide. These targets keep LCP scores within Google’s updated 2.0-second threshold.
Q: Does compressing images affect SEO? Yes, positively. Smaller images load faster, which improves Core Web Vitals scores (especially LCP). Google uses Core Web Vitals as a ranking signal. Properly compressed images with correct width and height Attributes also prevent layout shifts, improving your CLS score.
Q: Can I reduce image size without Photoshop? Yes. Browser-based tools handle compression, resizing, and format conversion entirely in the browser with no software to install. The Core Tools Hub Image Compressor and Image Resizer cover both steps with no account required.
Q: Should I use AVIF or WebP for my website?
Use AVIF as your primary format if your audience is mostly on modern browsers (Chrome, Firefox, Safari 16+). Provide a WebP fallback using the HTML <picture> element for the remaining 5–10% of legacy browsers. This gives you maximum compression without breaking compatibility.
Q: What causes blocky artifacts after compression? Setting quality too low — typically below 65 for JPEG or below 55 for AVIF. Always compress from the original file, not a previously compressed version, and keep quality at 78% or above for web images.
Q: How do I reduce image size for email attachments? Resize to 800–1200px wide, convert to JPEG or WebP at quality 80%, and strip EXIF data. Most email clients display images at screen resolution, so anything wider than 1200px is wasted file size.
Q: Is it safe to use online image compressors? It depends on the tool. Tools that upload files to a server expose your images to third-party storage. Browser-based tools that process files locally (like Core Tools Hub) keep your images entirely on your device — nothing is transmitted or stored.
Q: What’s the difference between resizing and compressing an image? Resizing changes the pixel dimensions (e.g., from 4000px to 1200px). Compressing reduces the file size at the same dimensions by encoding the image data more efficiently. Both steps together produce the smallest possible file. Resize first, then compress.
Q: Why is my PNG so much larger than the same image as a JPEG? PNG uses lossless compression, which preserves every pixel exactly. JPEG uses lossy compression, which discards subtle detail to achieve much smaller files. For photos, JPEG (or WebP/AVIF) is almost always the right choice. PNG is best for graphics with transparency, flat colors, or sharp text.
Q: How do I check if my images are hurting my Core Web Vitals? Run a PageSpeed Insights test (pagespeed.web.dev) on your URL. The “Opportunities” section will flag oversized images, unoptimized formats, and images without explicit dimensions. These are the three most common image-related LCP and CLS issues.
Key Takeaways
- Resize before compressing. Serving a 4000px image in an 800px column wastes file size regardless of compression settings. Match pixel dimensions to your layout first.
- WebP is the reliable default. It offers files 25–35% smaller than JPEG, with 95%+ browser support. AVIF goes further (up to 60% smaller than JPEG) and is now viable for most audiences with a WebP fallback.
- Quality 78–85% is the sweet spot for lossy compression. Below 65%, artifacts become visible. Above 90%, file sizes climb without meaningful quality gains.
- Never re-compress a compressed file. Always work from the original. Each lossy pass stacks quality degradation.
- Strip EXIF metadata before publishing. It adds file weight and can expose location or device data.
- Core Web Vitals thresholds tightened in January 2026. LCP must now be under 2.0 seconds (down from 2.5s). Image optimization is one of the most direct levers for hitting that target.
- Browser-based tools keep files private. For client work or sensitive images, tools that run entirely in the browser — with no uploads and no accounts — are the privacy-conscious choice.
- Use a consistent workflow. Resize → Convert → Compress → Strip EXIF → Publish. Running this every time takes under two minutes and prevents performance regressions as your site grows.
Conclusion
Reducing image size for the web doesn’t require expensive software, technical expertise, or compromising on visual quality. The combination of choosing the right format (WebP or AVIF), resizing to the actual display dimensions, and compressing at 78–85% quality consistently delivers files that are 60–80% smaller than unoptimized originals — with no visible difference to visitors.
With Core Web Vitals thresholds now stricter than ever, there’s a direct line between image optimization and search visibility. Every hero image over 200 KB, every uncompressed PNG in a blog post, and every JPEG that could have been a WebP is a small drag on your LCP score.
The workflow is straightforward. Resize with the Image Resizer, convert to WebP or AVIF using the PNG to WebP converter or AVIF Converter, then finalize file size with the Image Compressor. All three tools run entirely in your browser — no installs, no signup required, all processing in the browser.
Start with your highest-traffic pages. Run a PageSpeed Insights test, identify the largest image offenders, and work through the playbook above. Most sites can pass Core Web Vitals image checks in an afternoon with nothing more than a consistent process and the right tools.
For more file tools that work the same way — fast, private, and browser-based — explore the full suite at Core Tools Hub.