Last updated: June 15, 2026
Quick Answer: Photo blur serves two very different purposes — hiding sensitive information in screenshots and creating professional depth-of-field effects in photos. The right approach depends on your goal: aesthetic blur uses soft Gaussian or lens effects for visual appeal, while privacy blur requires a more careful workflow (blur + crop + compress) to make sensitive regions genuinely hard to recover. Browser-based tools let you do both without installing software or creating an account.
Key Takeaways
- Photo blur has two distinct uses: aesthetic (background softening, focus effects) and privacy (hiding faces, text, account numbers).
- Blur alone is not a guaranteed method of redaction. Light blur over text can sometimes be partially reversed using image sharpening or AI upscaling tools.
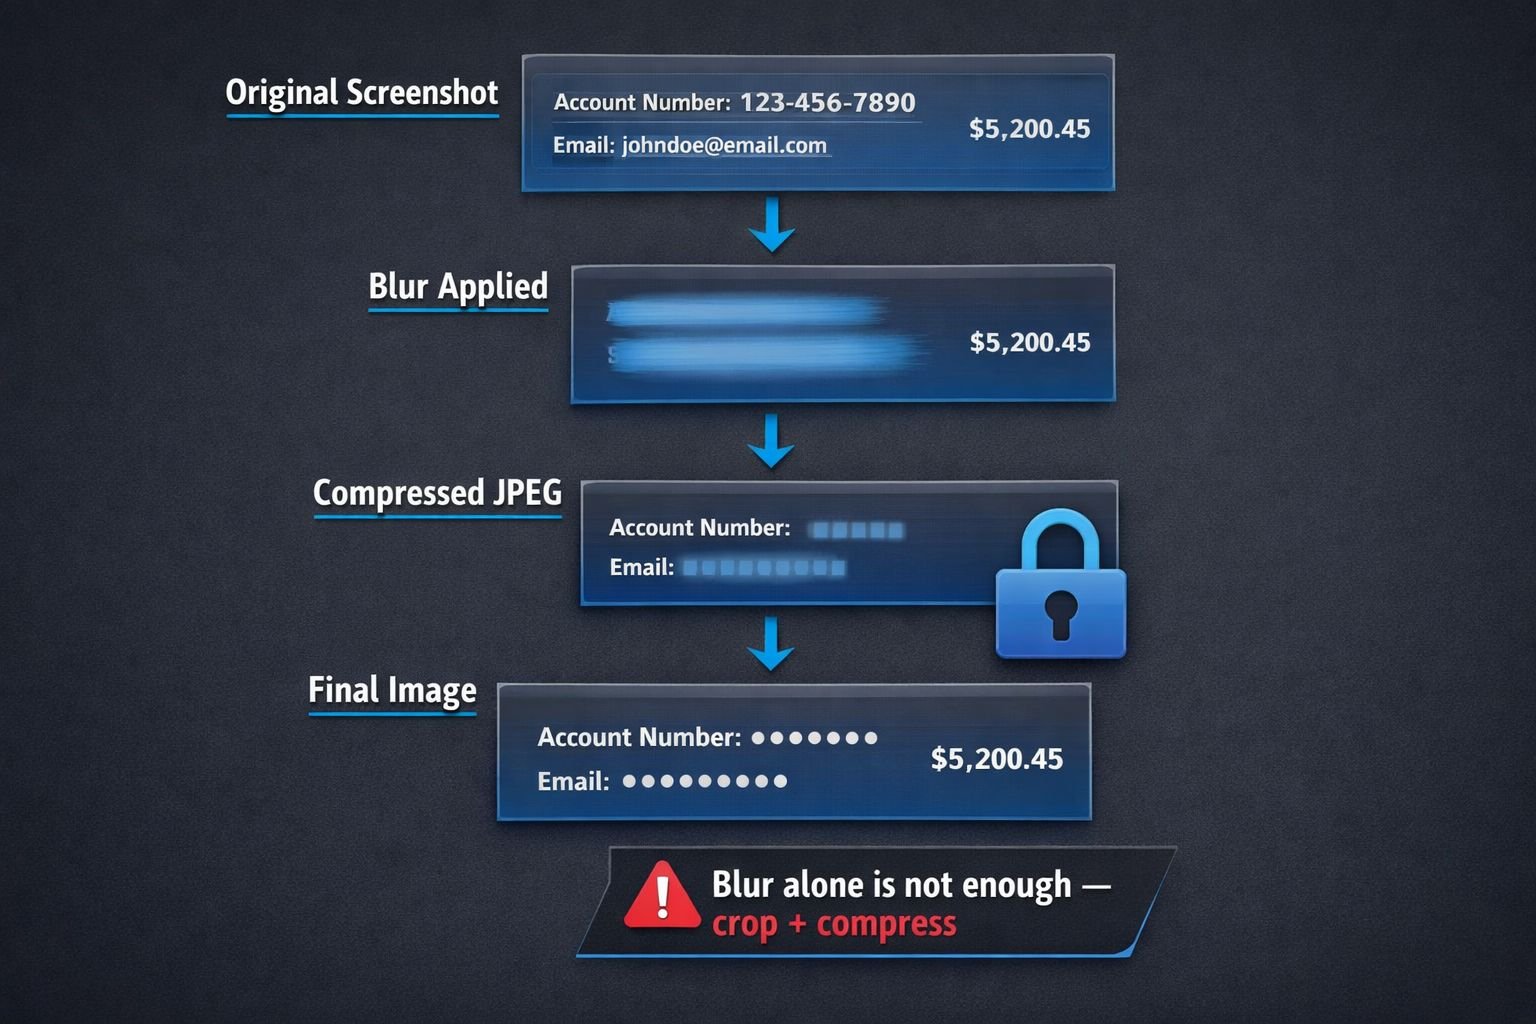
- The safest privacy workflow combines blur + crop + lossy compression to make sensitive regions much harder to reconstruct.
- Gaussian blur is the most common type for privacy; lens blur and tilt-shift are better for aesthetic depth-of-field effects.
- Browser-based tools process files locally — your image never leaves your device — making this the safest option for sensitive screenshots.
- Pixelation works better than blur for text redaction because it destroys character shapes more completely.
- Always export as JPEG (not PNG) after blurring for privacy use — lossy compression adds another layer of data destruction.
- Cropping out sensitive regions entirely is always safer than blurring them when cropping is an option.
- EXIF metadata can reveal location and device info even after blurring — strip it before sharing.
- Tools like Fotor, Pixlr, and Adobe Express offer free browser-based blur with no signup required for most basic tasks.
When to Use Photo Blur for Privacy vs. Aesthetics
Photo blur means very different things depending on why you’re reaching for it. Understanding that difference upfront saves a lot of frustration — and prevents accidental data leaks.
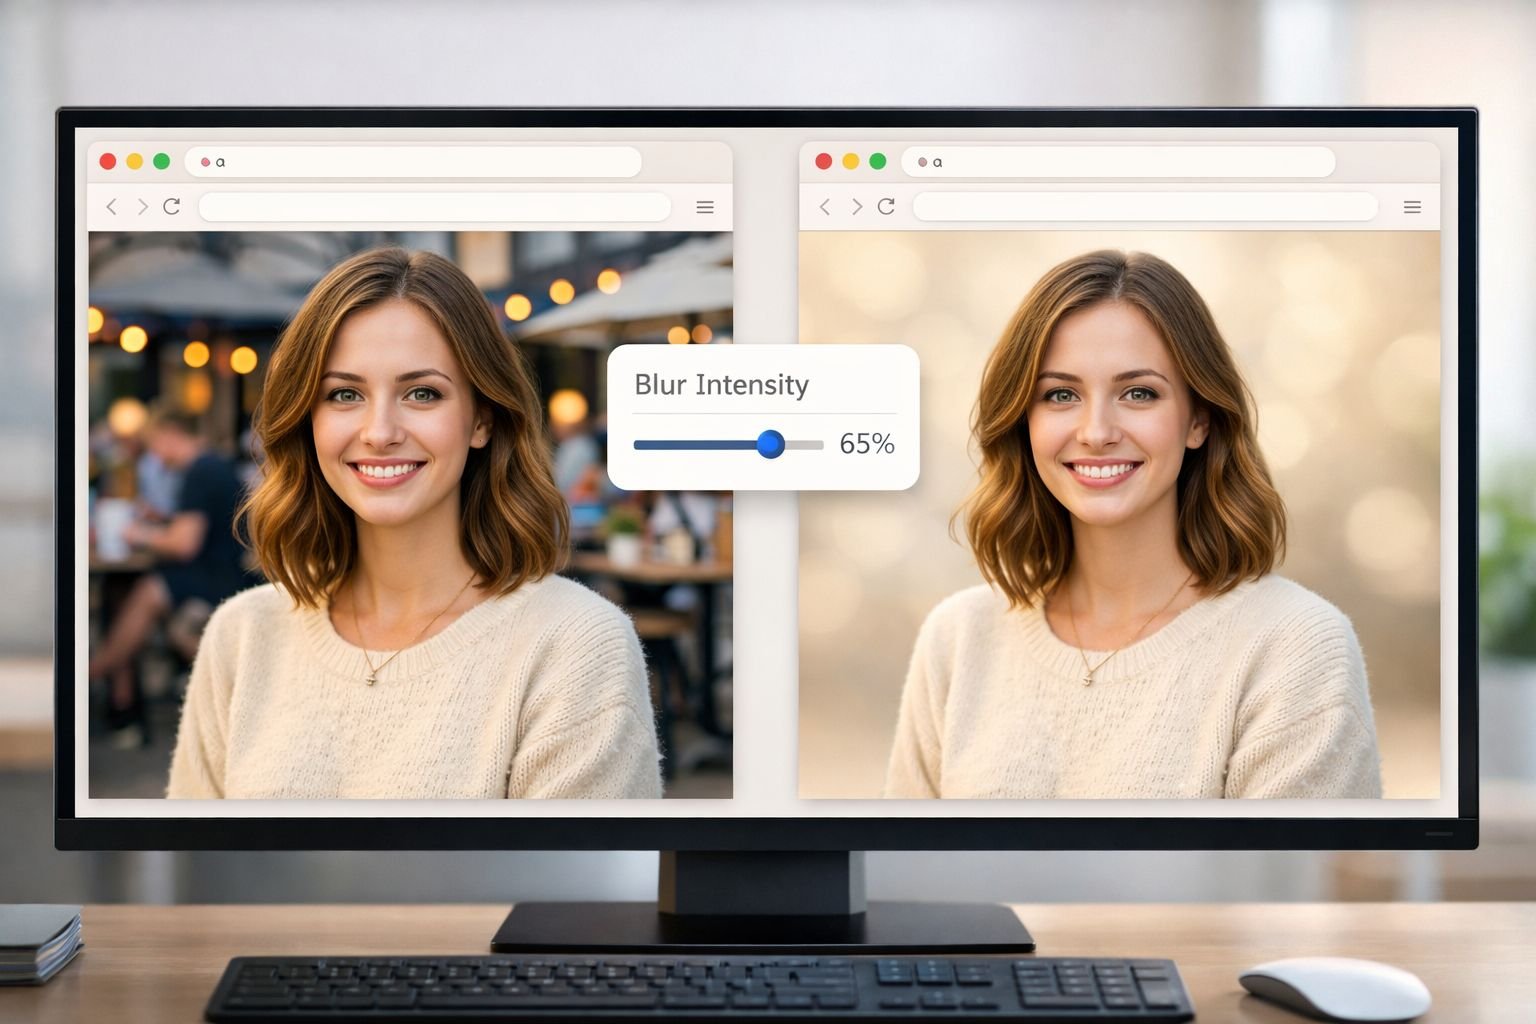
For aesthetics, blur creates visual depth. A softened background makes a portrait subject pop. A tilt-shift effect makes a cityscape look miniature. These effects are purely visual and reversibility doesn’t matter at all.
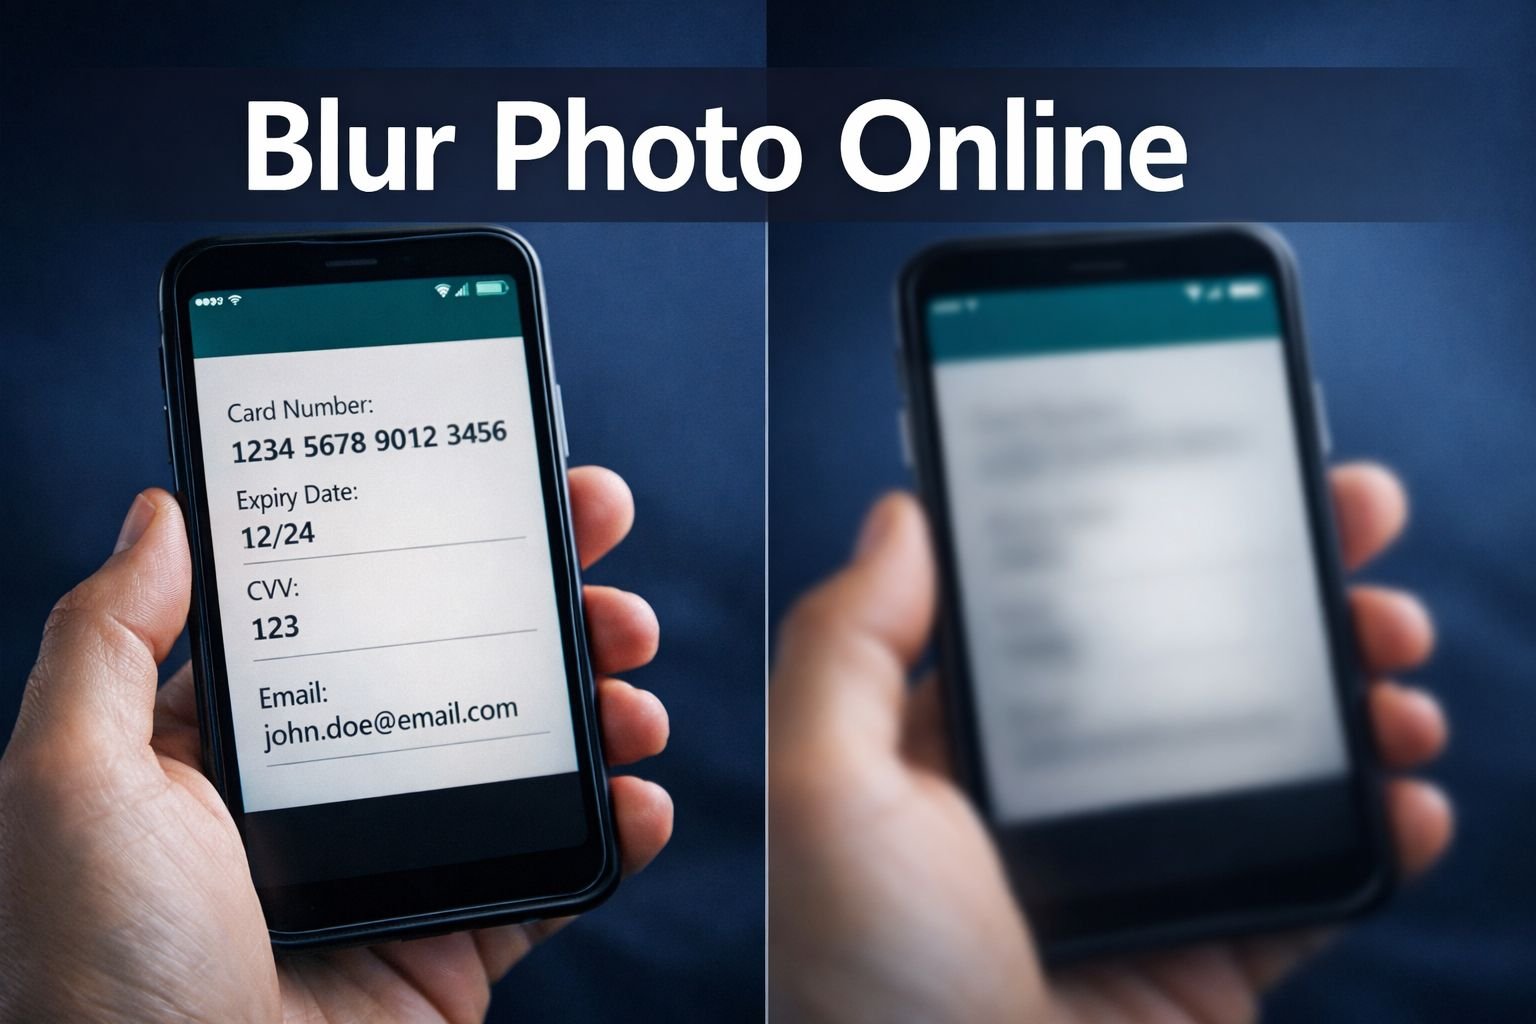
For privacy, blur is a protective layer over information you don’t want visible — a face in a crowd, an email address in a screenshot, a bank account number in a photo of a document. Here, the strength and method of blur matter enormously.
The core difference at a glance
| Goal | Blur Type | Export Format | Reversibility Risk |
|---|---|---|---|
| Aesthetic (bokeh, depth) | Gaussian, lens, tilt-shift | PNG or JPEG | Not relevant |
| Privacy (faces, text) | Gaussian, pixelation | JPEG (lossy) | Low to medium |
| Text redaction | Pixelation or solid fill | JPEG (lossy) | Low (pixelation) |
| Background removal | Blur + subject isolation | PNG (transparent) | Not relevant |
Choose blur for faces and photos. Choose pixelation or a solid color fill for text, numbers, and codes. Blur softens edges and looks natural on organic shapes. Pixelation destroys character structure, making text harder to reconstruct.
Common mistake: Applying a light blur (radius under 20px) over text and assuming it’s unreadable. At low intensities, AI sharpening tools can sometimes recover enough structure to make text legible again. Use heavy blur, pixelation, or a solid black box for anything truly sensitive.
How to Blur Backgrounds, Faces, and Text in Online Tools
Most free browser-based blur tools follow the same basic workflow. No installs, no signup required for basic use — just upload, edit, and download.
Step-by-step: Blur a region in a screenshot
- Open your chosen tool (Fotor, Pixlr, or Adobe Express work well for this).
- Upload your image — drag and drop or click to browse.
- Select the blur brush or region tool. For a specific area (face, text), use a rectangular selection or brush tool. For a background, use the subject-isolation or background blur feature.
- Set blur intensity. For privacy, use a high radius (40–80px Gaussian). For aesthetics, 10–30px is usually enough.
- Apply and review. Zoom in to confirm sensitive regions are fully covered with no readable edges.
- Export as JPEG at 80–85% quality for privacy use. This adds lossy compression on top of the blur, making reconstruction harder.
Best settings mini-table
| Use Case | Blur Radius | Export Format | Quality Setting |
|---|---|---|---|
| Face privacy | 50–80px Gaussian | JPEG | 75–85% |
| Text/numbers | Pixelation (10–15px blocks) | JPEG | 75–85% |
| Background bokeh | 15–30px Gaussian | JPEG or PNG | 90%+ |
| Full background blur | 20–40px | PNG (if transparent) | Lossless |
Tools worth knowing in 2026:
- Fotor — Updated in April 2026 with AI subject detection; automatically finds edges for clean background blur without manual masking.
- Pixlr — Offers multiple blur modes (Gaussian, tilt-shift, focal zoom) with brush-based control; strong choice for multi-mode flexibility.
- Adobe Express — Clean interface, no installation needed, good for quick privacy edits and aesthetic effects in one place.
- Kapwing — Useful for blurring video frames and screenshots from video content.
Quick fix for over-blurred images: If you’ve accidentally blurred too much of a photo, most tools include an “erase” or “restore” brush to bring back sharp areas. Work on a duplicate layer if the tool supports it.
Why Some Photo Blur Methods Are Easier to Reverse Than Others
Not all blur is equally protective. This is the part most guides skip — and it’s where people get into trouble.
Gaussian blur works by averaging pixel values across a radius. At low intensities, enough of the original pixel structure remains that sharpening algorithms (including AI-powered ones built into tools like Windows 11 Photos) can partially reconstruct the original. This is especially true for high-contrast content like black text on white backgrounds.
What makes blur harder to reverse:
- Higher blur radius — More averaging means less recoverable structure.
- Lossy compression after blurring — JPEG compression introduces artifacts that further destroy any remaining signal. Exporting as PNG preserves too much data.
- Stacking methods — Blur + pixelation + JPEG compression together are significantly harder to reverse than any single method.
- Cropping the region entirely — The most reliable option. If you can crop out the sensitive area, do that instead of blurring it.
Purdue University researchers working on privacy-preserving AI photo tools have highlighted device-local processing as a key safeguard — the idea being that sensitive image data should never leave your device during editing. Browser-based tools that process everything locally align with this principle directly.
Edge case: Screenshots of documents (PDFs, bank statements) often have very high contrast text. Even heavy blur may leave enough pixel variance for AI reconstruction tools to work with. For these, use a solid black rectangle fill instead of blur — most image editors support this, and it’s the approach used in formal PDF redaction workflows. See our guide on editing PDFs online without Adobe or Canva limits for redaction-specific techniques.
How to Combine Blurring with Cropping, Redaction, and Compression
A single blur filter is a starting point, not a complete privacy workflow. Layering techniques makes the result far more secure.
The safe screenshot sharing workflow
Step 1 — Crop first. Remove any sensitive regions that don’t need to appear in the image at all. Cropping is irreversible and leaves nothing to reconstruct. Use our image resizer to crop and resize in one step.
Step 2 — Apply blur or pixelation to anything sensitive that must remain visible in context (for example, a partially visible username that explains the screenshot’s purpose).
Step 3 — Strip EXIF metadata. Photos taken on phones contain GPS coordinates, device model, and timestamps in their EXIF headers. Blurring the image doesn’t remove this. Use a dedicated EXIF remover tool before sharing.
Step 4 — Compress as JPEG. Export at 75–85% JPEG quality. This introduces lossy compression that degrades any remaining recoverable structure in blurred regions. Our image compressor handles this without uploading your file to a server — all processing in the browser.
Step 5 — Convert to PDF if needed. If you’re sharing a document screenshot, converting to PDF adds another format layer and allows you to use PDF-native redaction tools. Use Images to PDF to bundle your blurred images into a clean, shareable document.
Common mistakes in privacy blurring
- ❌ Blurring over a PNG and saving as PNG — preserves too much recoverable data; always export as JPEG for privacy use.
- ❌ Using a thin blur brush that leaves edges readable — zoom to 200% and check that no character shapes are visible at the blur boundary.
- ❌ Forgetting EXIF data — location metadata survives the blur process entirely.
- ❌ Sharing the original alongside the blurred version — happens more often than you’d think in email threads and Slack channels.
- ❌ Assuming crop is enough — if the original file is still on your device and gets shared accidentally, the uncropped version is still accessible.
How to Prepare Blurred Images and Screenshots for Web and PDF
Once blurring is done, file format and size matter — both for privacy and for practical sharing.
For web use: JPEG at 80–85% quality hits the sweet spot between file size and visual quality. Blurred regions compress especially well because they contain less high-frequency detail. Run the image through a compression tool after blurring to reduce file size for email or web upload without visible quality loss.
For PDF sharing: Convert your blurred image to PDF using a browser-based tool. This keeps the workflow private — no server uploads, no account needed. Once in PDF format, you can also use PDF-specific redaction if your tool supports it, which overwrites pixel data rather than just covering it visually.
For social media: Platform re-compression can sometimes affect blurred regions unpredictably. Export at slightly higher quality (85–90% JPEG) before uploading, and check the final post to confirm blur is still intact. See our guide on resizing images for social media for platform-specific dimension recommendations.
For printing: If a blurred image is going to print (for example, a redacted document), use PNG at full resolution for the blurred version — print quality requires higher DPI than web, and JPEG artifacts can look poor at 300 DPI. The privacy tradeoff is lower here since printed documents aren’t digitally recoverable in the same way.
Format decision guide
| Destination | Recommended Format | Quality | Notes |
|---|---|---|---|
| Email / web sharing | JPEG | 80–85% | Compress after blurring |
| PDF document | JPEG inside PDF | 80–85% | Use Images to PDF tool |
| Social media | JPEG | 85–90% | Check post output |
| Print / archive | PNG | Lossless | Higher DPI required |
Recommended Photo Blur Tools and Privacy Workflows
The right tool depends on what you’re blurring and why. Here’s a practical breakdown for 2026.
For privacy-first, browser-based editing:
- CoreToolsHub Image Tools — compress, resize, convert, and strip EXIF data without uploading files to a server. Pair with a dedicated blur tool for a complete workflow.
- Fotor — AI-powered subject detection makes background blur precise; good for portrait privacy edits where you want clean subject edges.
- Pixlr — Best for users who want manual control; multiple blur modes, brush-based application, and layer support.
For aesthetic blur (depth of field, focus effects):
- Canva — Simple slider-based blur for backgrounds; updated interface in 2026 makes it faster to apply. Good for social graphics and presentations.
- Fotor — Also strong here; AI edge preservation keeps subjects sharp while backgrounds soften naturally.
- Adobe Express — Clean, no-install option for quick aesthetic edits; praised for user-friendliness in recent 2026 tool comparisons.
For document and screenshot redaction:
- Use pixelation or solid fill (not just blur) for text and numbers.
- Follow the crop → blur/pixelate → strip EXIF → compress → PDF workflow above.
- Check our online PDF tools for PDF-specific redaction and compression after converting.
Privacy-conscious power users should also read our guide on browser-based file conversion vs. cloud upload tools to understand exactly what happens to files when you use online editors — and why local processing matters for sensitive content.
Frequently Asked Questions
Can blurred text in a screenshot be recovered? Yes, in some cases. Light Gaussian blur over high-contrast text (black on white) can be partially reversed using AI sharpening tools. For reliable text redaction, use pixelation with large block sizes (10–15px), a solid fill rectangle, or crop the text out entirely. Always export as JPEG afterward to add lossy compression.
What’s the difference between Gaussian blur and pixelation for privacy? Gaussian blur averages pixel values smoothly, which can leave recoverable structure in high-contrast areas. Pixelation replaces regions with large uniform color blocks, destroying character shapes more completely. Pixelation is generally more reliable for text; blur looks more natural on faces and organic shapes.
Does blurring a photo remove EXIF metadata? No. EXIF data (GPS location, device model, timestamp) is stored separately from pixel data and survives most blur operations. Strip EXIF metadata explicitly using a dedicated tool before sharing any photo that contains location or device information.
Is it safe to use an online blur tool for sensitive screenshots? It depends on the tool. Tools that process files locally in your browser (no server upload) are the safest option. Always check the tool’s privacy policy before uploading screenshots containing personal or financial data. Browser-based tools that explicitly state “all processing in browser” are the privacy-first choice.
What blur radius should I use for privacy? For faces, use a Gaussian blur radius of at least 50px on a standard 1080p image. For text and numbers, use pixelation with 10–15px blocks rather than Gaussian blur. Scale the radius up proportionally for higher-resolution images.
Should I save a blurred image as PNG or JPEG? For privacy use, always save as JPEG at 75–85% quality. JPEG’s lossy compression adds an extra layer of data destruction on top of the blur, making reconstruction harder. PNG is lossless and preserves more recoverable data — it’s the wrong choice for privacy-sensitive exports.
Can I blur a PDF directly? Most PDF editors don’t offer a native blur tool for page content. The standard workflow is: convert PDF pages to images, apply blur to the images, then convert back to PDF. Use a PDF to Images tool to extract pages, edit them, then reassemble with Images to PDF.
What’s the fastest way to blur a background online for free? Upload your photo to Fotor or Adobe Express, select the background blur or depth-of-field effect, adjust the intensity slider, and download. Both tools run in your browser with no install required. The AI subject detection in Fotor’s 2026 update makes edge selection fast and accurate for portrait photos.
Is blur or crop better for hiding sensitive information? Cropping is always more reliable than blurring for information you don’t need in the image at all. Cropping removes the data entirely; blurring obscures it but leaves pixel data in the file. Use cropping first, then blur anything that must remain partially visible.
Why does my blurred image look pixelated after uploading to social media? Social media platforms re-compress uploaded images, which can make blur transitions look blocky. Export at a slightly higher JPEG quality (85–90%) before uploading, and avoid very subtle blur gradients that don’t compress well.
Conclusion
Photo blur is more than a one-click filter. Used for aesthetics, it creates professional depth and visual focus. Used for privacy, it needs to be part of a layered workflow — blur, then crop, then strip metadata, then compress — to actually protect the information you’re covering.
The biggest risk isn’t using the wrong tool. It’s trusting a light blur to do a job that needs a solid fill, a crop, or a combination of techniques. Before sharing any screenshot with sensitive content, run through the five-step workflow: crop what you can, blur or pixelate what you can’t, remove EXIF data, compress as JPEG, and convert to PDF if needed.
Next steps:
- Use the CoreToolsHub Image Compressor to compress blurred images before sharing — all processing in browser, no signup required.
- Strip location and device metadata with the EXIF Remover tool before any public share.
- Convert blurred screenshots to PDF using Images to PDF for clean, shareable documents.
- Explore all available image tools for a complete privacy-first editing workflow.
Fast, clean results — and your files stay on your device the whole time.