Last updated: May 1, 2026
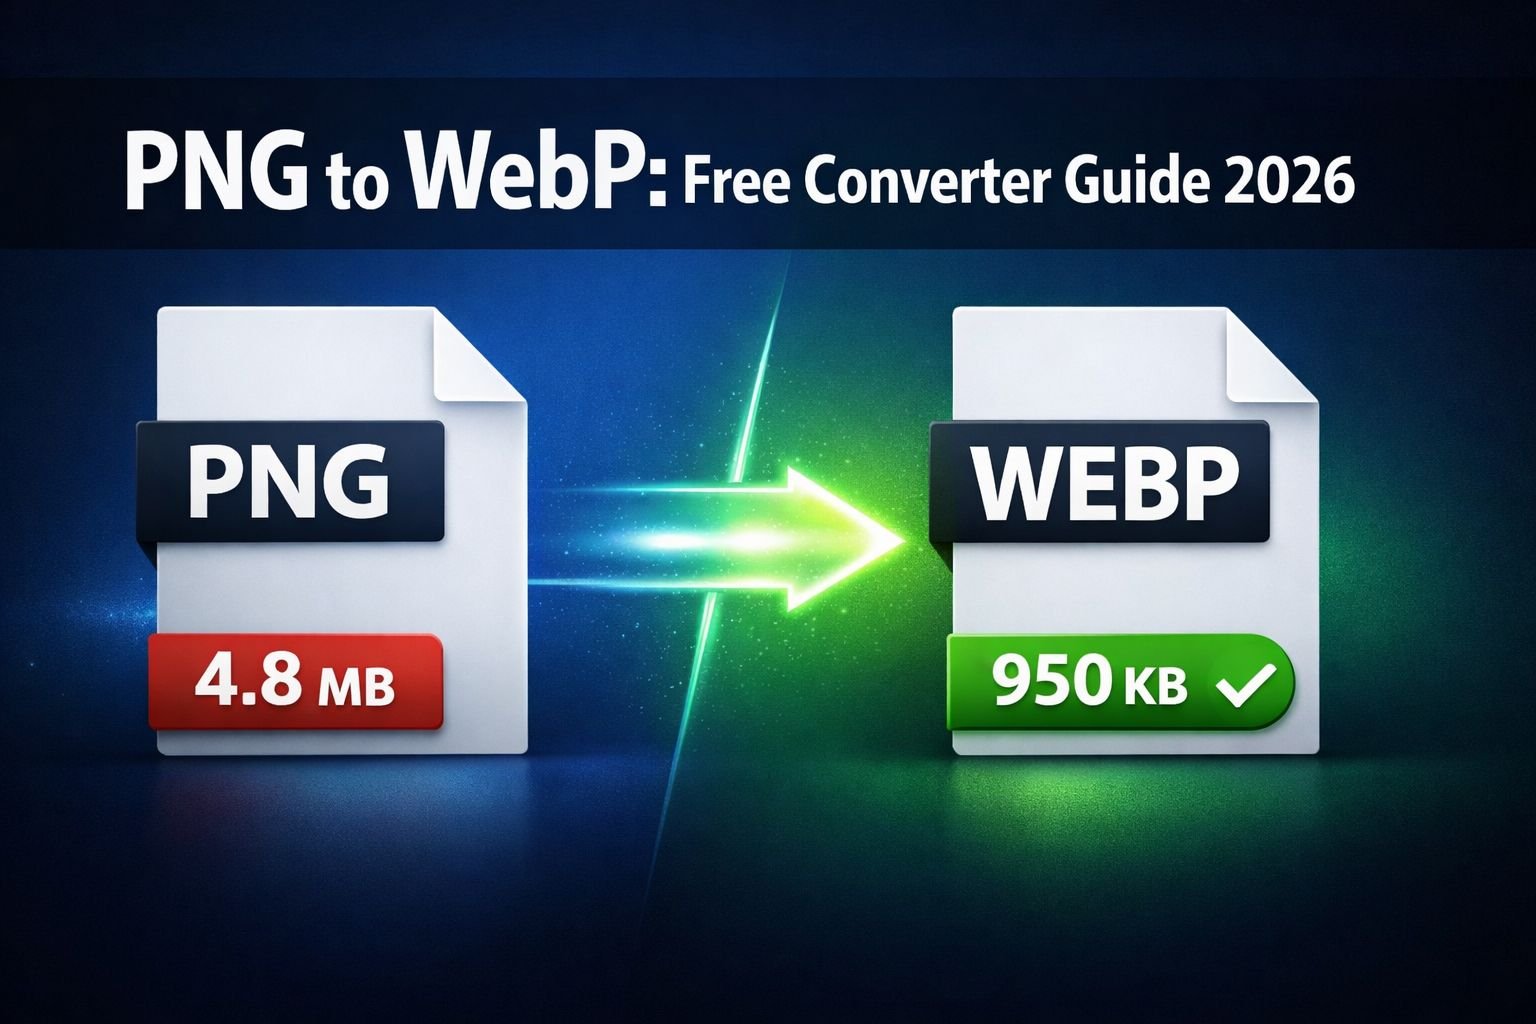
Quick Answer: A PNG to WebP converter free tool lets you reduce image file sizes by 26% or more — without losing transparency or visible quality. WebP is now supported by 97% of browsers globally, making it a safe, direct replacement for PNG on any website. Convert your images once, and every page load gets faster.
Key Takeaways
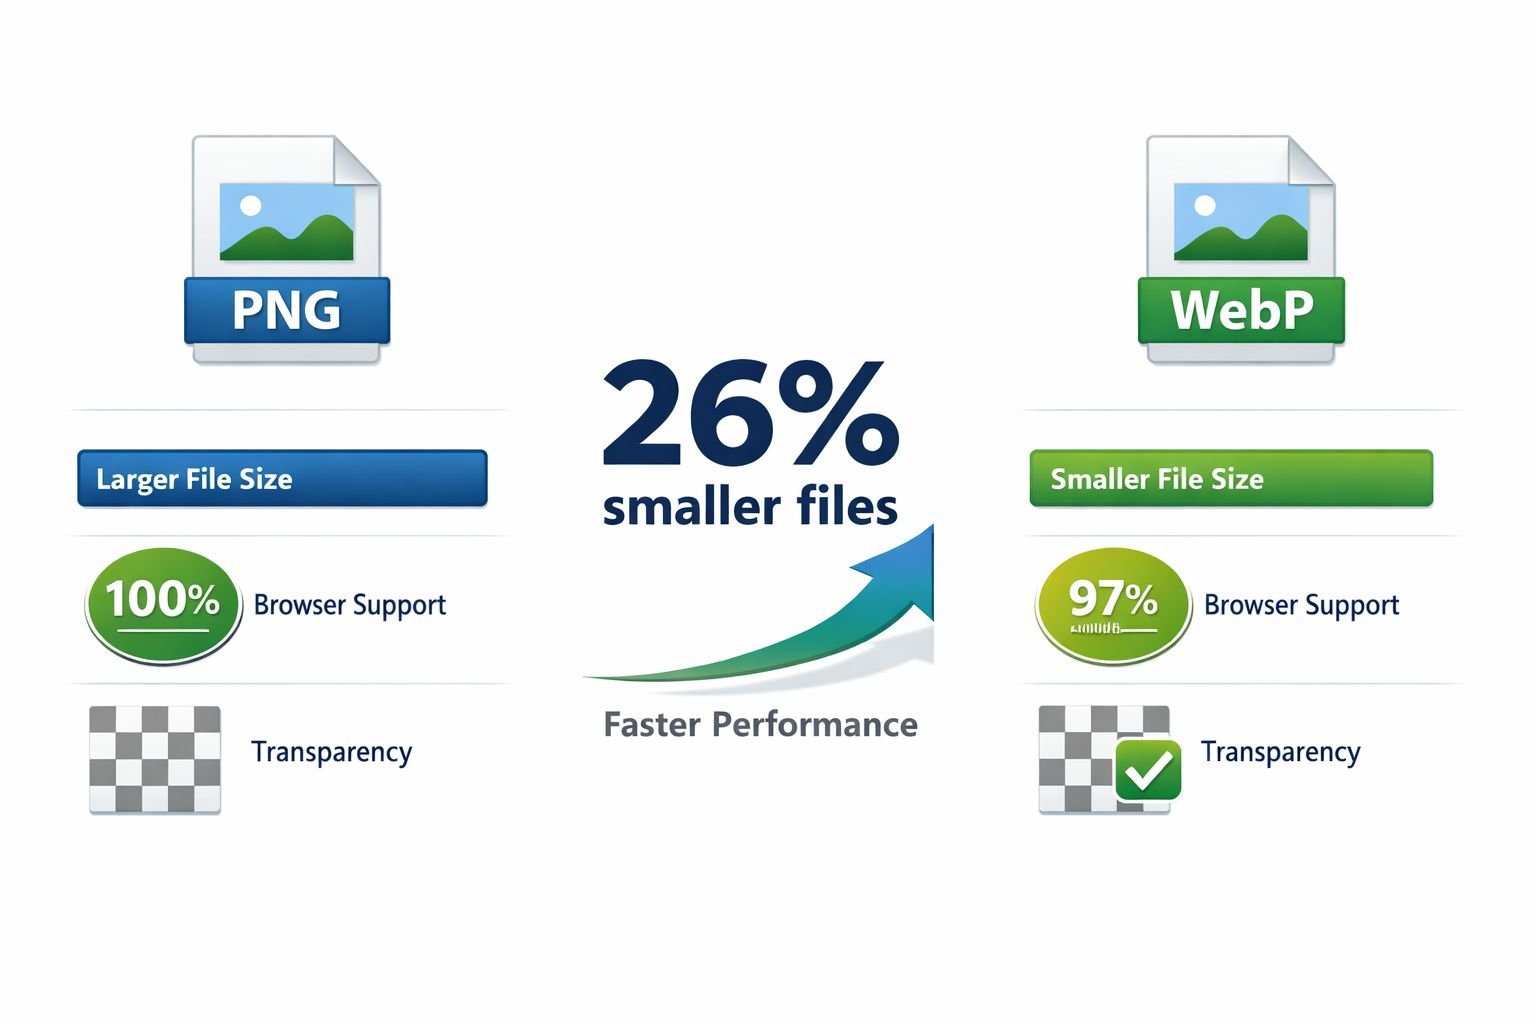
- WebP achieves 26% better lossless compression than PNG, meaning smaller files with identical visual quality.
- 97% of browsers support WebP as of 2026, including Chrome, Firefox, Safari, and Edge — no fallback needed for most sites.
- WebP supports full transparency (an alpha channel), so it can replace PNG directly without workarounds.
- Switching from PNG to WebP can reduce individual image file sizes by 25–35% in lossy mode, with near-invisible quality differences at quality settings of 80 or above.
- 68% of the world’s top 10,000 websites now serve WebP images (HTTP Archive, 2025) — yet millions of WordPress sites still use PNG.
- Faster images directly improve LCP (Largest Contentful Paint), one of Google’s Core Web Vitals signals used in search ranking.
- The fastest workflow: use a browser-based PNG to WebP converter free tool — no installs, no signup required, all processing in browser.
- For most web use cases, quality setting 80–85 hits the sweet spot between file size and visual fidelity.
- After converting, run images through an image compressor for additional savings.
PNG vs. WebP — Why WebP Wins for Web Performance
WebP consistently produces smaller files than PNG while maintaining the same visual quality and transparency support. For web developers and site owners, that translates directly into faster load times, better Core Web Vitals scores, and lower bandwidth costs.
Here’s a side-by-side breakdown:
| Feature | PNG | WebP |
|---|---|---|
| Compression (lossless) | Baseline | ~26% smaller |
| Compression (lossy) | Not supported | 25–34% smaller than JPEG equivalent |
| Transparency (alpha) | ✅ Yes | ✅ Yes |
| Animation support | Limited (APNG) | ✅ Yes (WebP animation) |
| Browser support (2026) | ~100% | ~97% |
| Best for | Print, archiving, editing | Web delivery, performance |
| Average file size | Larger | 30–40% smaller than PNG |
PNG was designed for lossless image storage and editing pipelines — not web delivery. It does its job well, but it carries more data than a browser actually needs to render a crisp image on screen.
WebP, developed by Google, was built specifically for the web. It achieves smaller file sizes through more efficient compression algorithms and supports both lossless and lossy modes. That flexibility is what makes it a direct PNG replacement rather than just an alternative.
One important note: in rare cases — particularly with simple, flat-color graphics — a WebP lossless file can occasionally be larger than its PNG equivalent. If that happens, keep the PNG. For the vast majority of photographs, illustrations, and UI screenshots, WebP wins on file size every time.
Choose WebP if: you’re serving images on a website, WordPress blog, or web app and want faster load times without sacrificing quality or transparency.
Stick with PNG if: you’re editing source files, preparing assets for print, or need guaranteed compatibility with legacy software pipelines.
How to Convert PNG to WebP Free Online (Step-by-Step)
The fastest way to convert PNG to WebP for free is with a browser-based tool — no software to install, no account to create, and your files never leave your device.
CoreToolsHub’s PNG to WebP converter runs entirely in your browser. Here’s how to use it:
- Open the tool at coretoolshub.com/png-to-webp.
- Drag and drop your PNG file into the upload area, or click to browse your files.
- Choose your conversion mode: lossless (same quality, smaller file) or lossy (smaller file, minimal quality reduction).
- Set the quality level if using lossy mode. A setting of 80–85 is the recommended starting point for most web images.
- Click Convert. Processing happens instantly in your browser.
- Download your WebP file. File sizes are typically 25–35% smaller than the original PNG.
That’s it. No signup required. All processing happens in the browser, so your images stay private and secure.

Best Settings for PNG to WebP Conversion
| Use Case | Mode | Quality Setting |
|---|---|---|
| Hero images, photos | Lossy | 80–85 |
| Logos with transparency | Lossless | N/A |
| Product images (e-commerce) | Lossy | 85–90 |
| Icons, UI elements | Lossless | N/A |
| Blog post images | Lossy | 75–80 |
Common mistake: Setting quality too low (below 70) to maximize compression. At that level, artifacts become visible — especially around text and sharp edges. Quality 80 gives you the best balance of file size and crispness for most web images.
If you’re also converting JPG files, the same workflow applies — see the JPG to WebP converter for those assets.
Lossless vs. Lossy WebP — Which Setting Should You Use?
Use lossless WebP for logos, icons, and images with transparency where pixel-perfect accuracy matters. Use lossy WebP for photographs and general web images where a small quality trade-off is acceptable.
Here’s what each mode actually does:
Lossless WebP
- Preserves every pixel exactly — identical output to the source PNG.
- Still produces files roughly 26% smaller than PNG lossless on average.
- Best for: logos, icons, UI screenshots, images with text overlays, anything with sharp edges and flat colors.
Lossy WebP
- Applies compression that slightly reduces image data size while maintaining high visual quality.
- At a quality of 80+, the difference is nearly invisible to the human eye.
- Reduces file sizes by 25–35% compared to a PNG equivalent.
- Best for: photographs, blog post images, product shots, and background images.
For a deeper look at how these compression approaches work across formats, the guide on lossless vs. lossy formats covers the trade-offs clearly.
Edge case to watch: If you convert a PNG that was already saved at reduced quality (for example, a screenshot that was previously compressed as JPEG and then saved as PNG), lossy WebP may show visible artifacts at lower quality settings. In that case, use lossless mode or raise the quality to 90.
How to Batch Convert Multiple PNG Files to WebP Free
Batch conversion lets you process dozens or hundreds of PNG files at once, saving significant time compared to converting images one by one.
For batch PNG to WebP conversion, you have two main options:
Option 1: Browser-Based Batch Converter (Recommended for Privacy)
CoreToolsHub’s image converter supports multiple file uploads. Select all your PNG files at once, set your quality preference, and convert in seconds. All processing runs in the browser — files never touch a server.
Steps:
- Open the image converter tool.
- Select or drag multiple PNG files into the upload zone.
- Choose WebP as the output format.
- Set quality (80–85 for most web images).
- Click Convert and download the ZIP file containing all converted WebP images.
Option 2: Desktop Tool for Unlimited Local Batch Processing
For very large batches (hundreds of images or files over 25MB), a local desktop tool like WaveSpeed Desktop offers unlimited batch conversion with no file size restrictions and no privacy concerns, since everything stays on your machine.
Common mistake with batch conversion: Forgetting to check a few converted files before deploying them. Always spot-check 3–5 images from a batch to confirm quality looks right before replacing PNGs on a live site.
How WebP Improves Your Core Web Vitals and SEO Score
Switching from PNG to WebP directly reduces LCP (Largest Contentful Paint) — one of Google’s three Core Web Vitals metrics — by reducing the time it takes to download and render your page’s largest visible image.
Here’s the connection:
LCP measures how long it takes for the largest content element on a page to become visible. For most pages, that element is an image — often a hero image or a featured product photo. If that image is a large PNG, it takes longer to download, which delays LCP.
When you convert that image to WebP and reduce its file size by 30%, the browser downloads it faster. LCP improves. Google notices.
Real-World Impact
Consider a typical homepage hero image:
| Format | File Size | Estimated LCP Contribution |
|---|---|---|
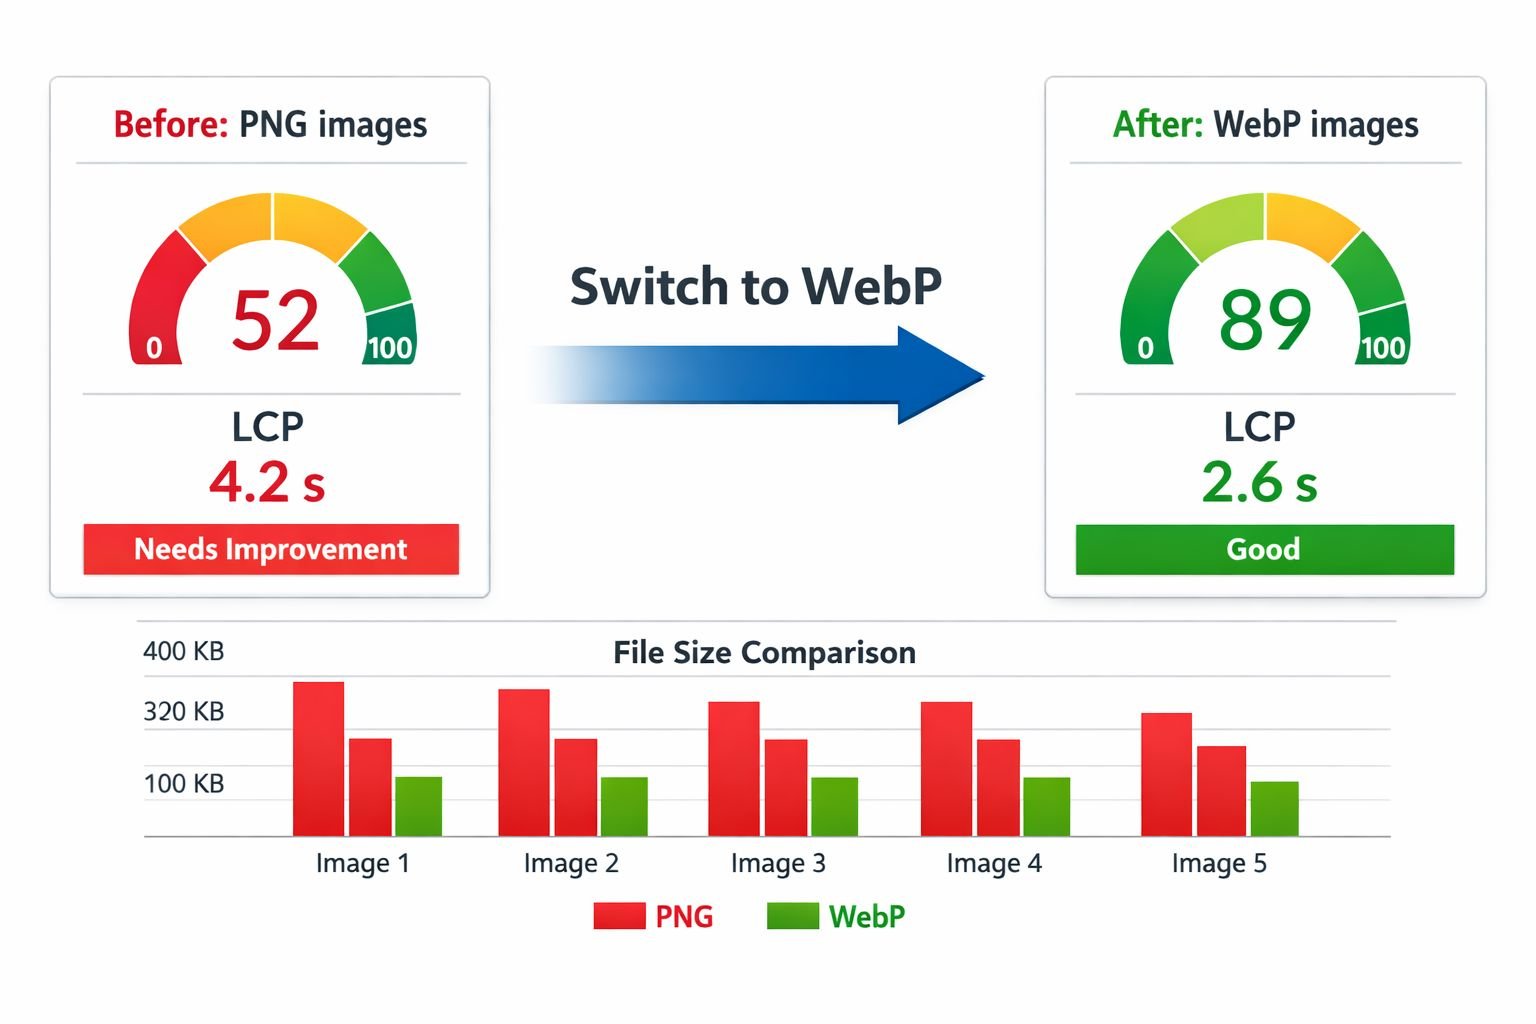
| PNG (original) | 2.4 MB | ~4.2 seconds on 4G |
| WebP (lossless) | ~1.8 MB | ~3.1 seconds on 4G |
| WebP (lossy, quality 82) | ~1.6 MB | ~2.6 seconds on 4G |
A 1.6-second LCP improvement on a single image is significant. Google’s threshold for a “Good” LCP score is under 2.5 seconds. Many sites with large PNG hero images sit in the “Needs Improvement” range — switching to WebP can push them into the green.
Beyond LCP, smaller images also indirectly reduce Total Blocking Time (less network congestion) and contribute to better PageSpeed Insights scores overall.
For a complete look at how WebP affects search rankings and image SEO, see the guide on optimizing WebP for SEO.
What About AVIF?
AVIF is the next-generation format after WebP, offering files that are 20–30% smaller than WebP in many cases. However, WebP’s ~97% browser support still edges out AVIF’s ~94–97% coverage, and WebP encoding is significantly faster. For most sites in 2026, WebP is the practical choice. If you want to explore AVIF as a next step, the AVIF converter and the AVIF vs. WebP vs. JPEG comparison guide are good starting points.
How to Serve WebP Images on WordPress
On WordPress, the easiest way to serve WebP images is to convert your PNG files before uploading them, then upload the WebP versions directly to your media library.
Modern WordPress (version 5.8 and above) accepts WebP uploads natively. Here’s the simplest workflow:
- Convert your PNG files to WebP using the PNG to WebP converter before uploading.
- Upload the
.webpfiles directly to the WordPress Media Library. - Use them in posts, pages, and theme templates exactly as you would PNG files.
For existing PNG images already in your media library: Use a WordPress plugin like Imagify, ShortPixel, or WebP Express to convert and serve WebP versions automatically. These plugins generate WebP copies and serve them to supported browsers via the <picture> element or HTTP headers.
The <picture> element fallback is worth knowing about if you’re hand-coding templates:
<code class="language-html"><picture>
  <source srcset="image.webp" type="image/webp">
  <img src="image.png" alt="Description">
</picture>
</code>
This serves WebP to browsers that support it and falls back to PNG for any that don’t. Given 97% browser support in 2026, the fallback is rarely triggered — but it’s a clean, safe pattern.
Common Mistakes When Converting PNG to WebP
Getting the conversion right is straightforward, but a few mistakes show up repeatedly in developer forums and WordPress communities:
- Using lossy mode for logos or text-heavy images. Lossy compression creates artifacts around sharp edges and text. Always use lossless for logos, icons, and images containing readable text.
- Setting quality below 75. Below this threshold, compression artifacts become visible in photographs, especially in areas with gradients or skin tones.
- Not testing on mobile. WebP renders correctly on all modern mobile browsers, but always verify your converted images look correct on both desktop and mobile before deploying.
- Forgetting to update image references. If you convert PNGs and upload the WebP versions, make sure your HTML, CSS, and WordPress templates reference the new
.webpfilenames. - Skipping further compression. WebP conversion alone is a great first step, but running your WebP files through an image compressor afterward can squeeze out additional savings without visible quality loss.
- Assuming WebP is always smaller. For very simple, flat-color graphics (like a solid-color icon with two colors), PNG lossless can occasionally be smaller. Always compare file sizes after conversion.
FAQ: PNG to WebP Converter Free
Q: Is it safe to convert PNG to WebP in a browser-based tool? Yes — when the tool processes files locally in your browser (client-side), your images never leave your device. CoreToolsHub’s converter uses this approach: all processing in the browser, no server uploads, no data stored.
Q: Does WebP support transparency like PNG? Yes. WebP supports full alpha channel transparency, making it a direct replacement for transparent PNGs. Logos, icons, and cutout images all convert cleanly.
Q: Will converting PNG to WebP reduce image quality? In lossless mode: no, quality is identical to the source. In lossy mode at quality 80+: the difference is near-invisible to most viewers. Below quality 75, some artifacts may appear in photographs.
Q: What’s the average file size reduction when converting PNG to WebP? Lossless conversion averages around 26% smaller than PNG. Lossy conversion (quality 80–85) typically produces files 25–35% smaller than the original PNG.
Q: Can I batch convert PNG files to WebP for free? Yes. CoreToolsHub’s image converter supports multiple file uploads at once. For very large batches, a local desktop tool handles unlimited files with no size restrictions.
Q: Do I need a fallback for browsers that don’t support WebP?
With 97% browser support in 2026, most sites don’t need one. If you want to be thorough, the HTML <picture> element provides a clean PNG fallback for the remaining 3%.
Q: Should I use WebP or AVIF in 2026? WebP is the safer choice for broad compatibility and faster encoding. AVIF produces smaller files but has slightly lower browser support and slower encoding times. See the AVIF vs. WebP comparison for a detailed breakdown.
Q: Can I convert WebP back to PNG if needed? Yes. If you ever need to reverse the conversion — for editing or compatibility reasons — use the WebP to PNG converter to get back to a standard PNG file.
Q: Does WordPress support WebP natively? Yes, since WordPress 5.8. Upload .webp files directly to the Media Library. To convert existing PNG uploads, a plugin like ShortPixel or Imagify can automate the process.
Q: What quality setting should I use for product images? For e-commerce product images where detail matters, use lossy WebP at quality 85–90. This keeps the image sharp while reducing the file size by 20–25% compared to the original PNG.
Conclusion
Switching from PNG to WebP is one of the highest-impact, lowest-effort improvements a web developer or site owner can make in 2026. The numbers are clear: 26% smaller lossless files, 25–35% smaller lossy files, full transparency support, and 97% browser compatibility. Every PNG image on your site is an opportunity to shave load time and improve your Core Web Vitals score — particularly LCP.
The workflow is simple:
- Convert your PNG files using the free PNG to WebP converter — no installs, no signup, all processing in browser.
- Check a few converted files to confirm the quality looks right.
- Deploy the WebP versions to your site or WordPress media library.
- Compress further with the image compressor if you want to push file sizes even lower.
That’s a complete optimization workflow that takes minutes and delivers measurable results. Start with your largest images first — hero images and featured photos have the biggest impact on LCP — then work through the rest of your media library.