Last updated: May 15, 2026
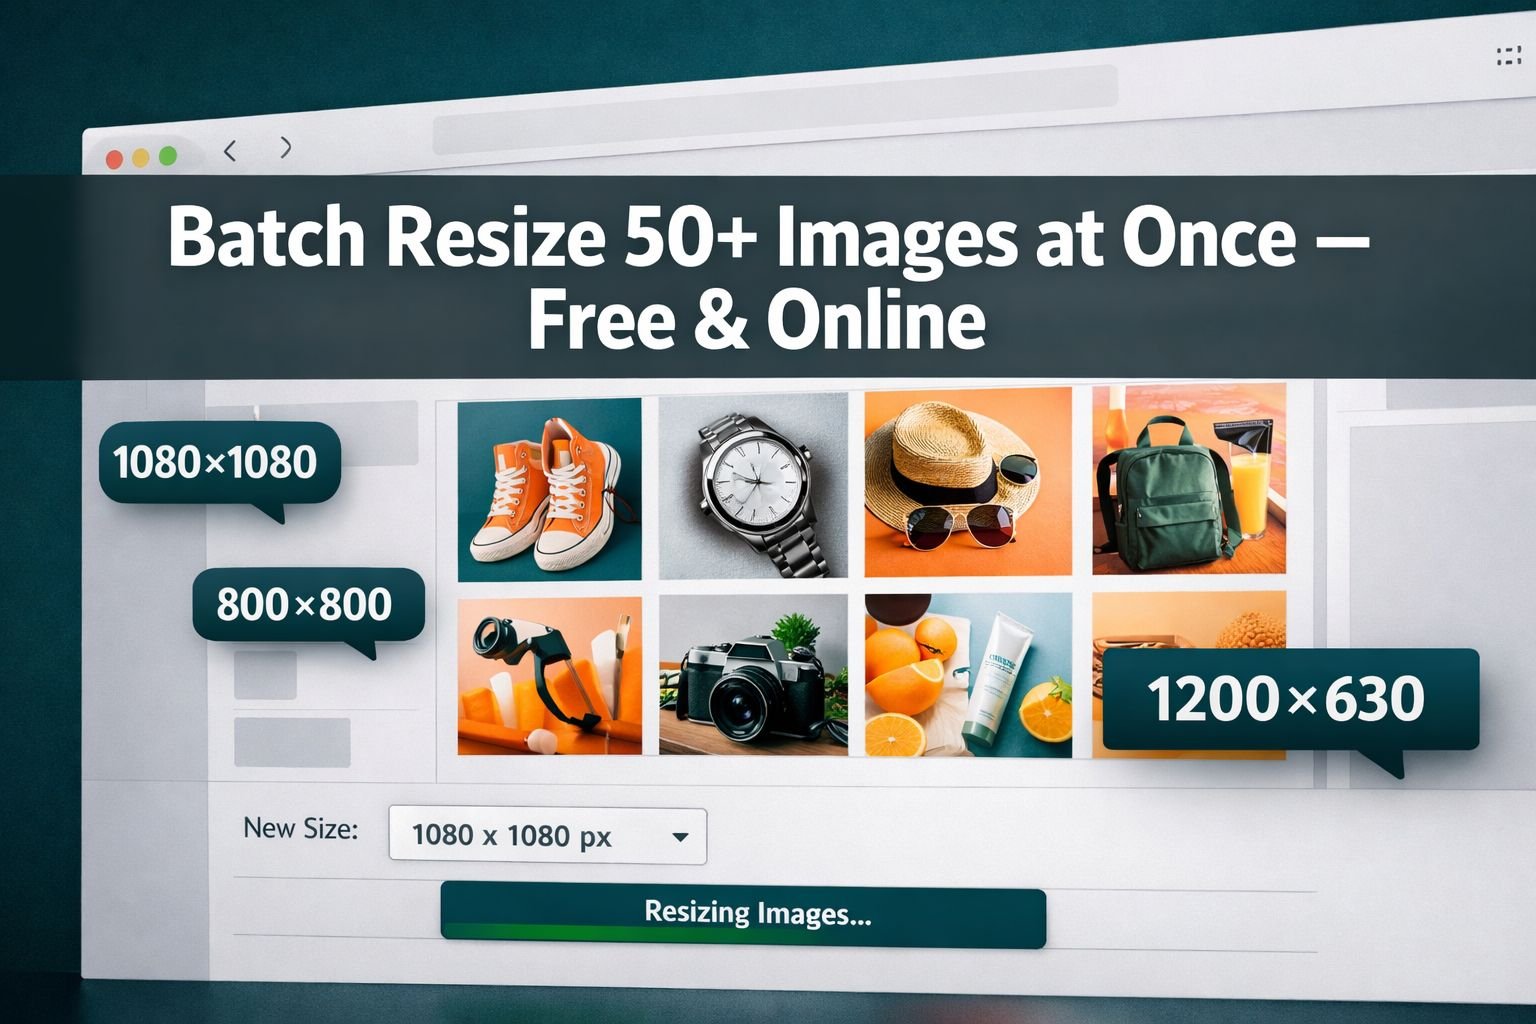
Quick Answer: You can batch resize images online free using browser-based tools like BulkResizePhotos, BIRME, or Fotor — no software installs, no signup required. Upload your photos, set your target dimensions (for example, 1080×1080px for Instagram or 800×800px for Etsy), and download a ZIP file with all resized images in seconds. Most free tools handle 50 images per session; some have no file-count limit at all.
Key Takeaways
- Free browser-based tools let you resize 50+ images at once without installing software or creating an account.
- E-commerce platforms have strict image requirements: Shopify recommends 2048×2048px, Amazon requires at least 1000px on the longest side with a white background, and Etsy works best at 2000px or wider.
- Pixel resizing gives you exact control; percentage resizing scales everything proportionally — use pixels when platforms specify exact dimensions.
- Always lock the aspect ratio unless the platform requires a specific crop (for example, a 1:1 square for Instagram or Amazon).
- Client-side (in-browser) tools process your files locally, so your product photos never leave your device — an important privacy advantage for sellers with unreleased products.
- After resizing, run your images through a free compressor to further reduce file size without visible quality loss.
- Most free tools output JPG, PNG, and WebP; choose WebP for web use if your platform supports it.
- BIRME is the best free option for smart-cropped exact dimensions; BulkResizePhotos is best for privacy-first unlimited batch processing.
When Do You Actually Need Batch Resizing?
Batch resizing saves time whenever you have more than five images that need to share the same dimensions. For e-commerce sellers, bloggers, and social media managers, that situation comes up constantly.
Here are the most common triggers:
- Launching a new product catalog. You’ve photographed 60 products and need every image at 2048×2048px before uploading to Shopify.
- Migrating to a new platform. Your eBay listings used 500px images, but Amazon needs at least 1000px on the longest side.
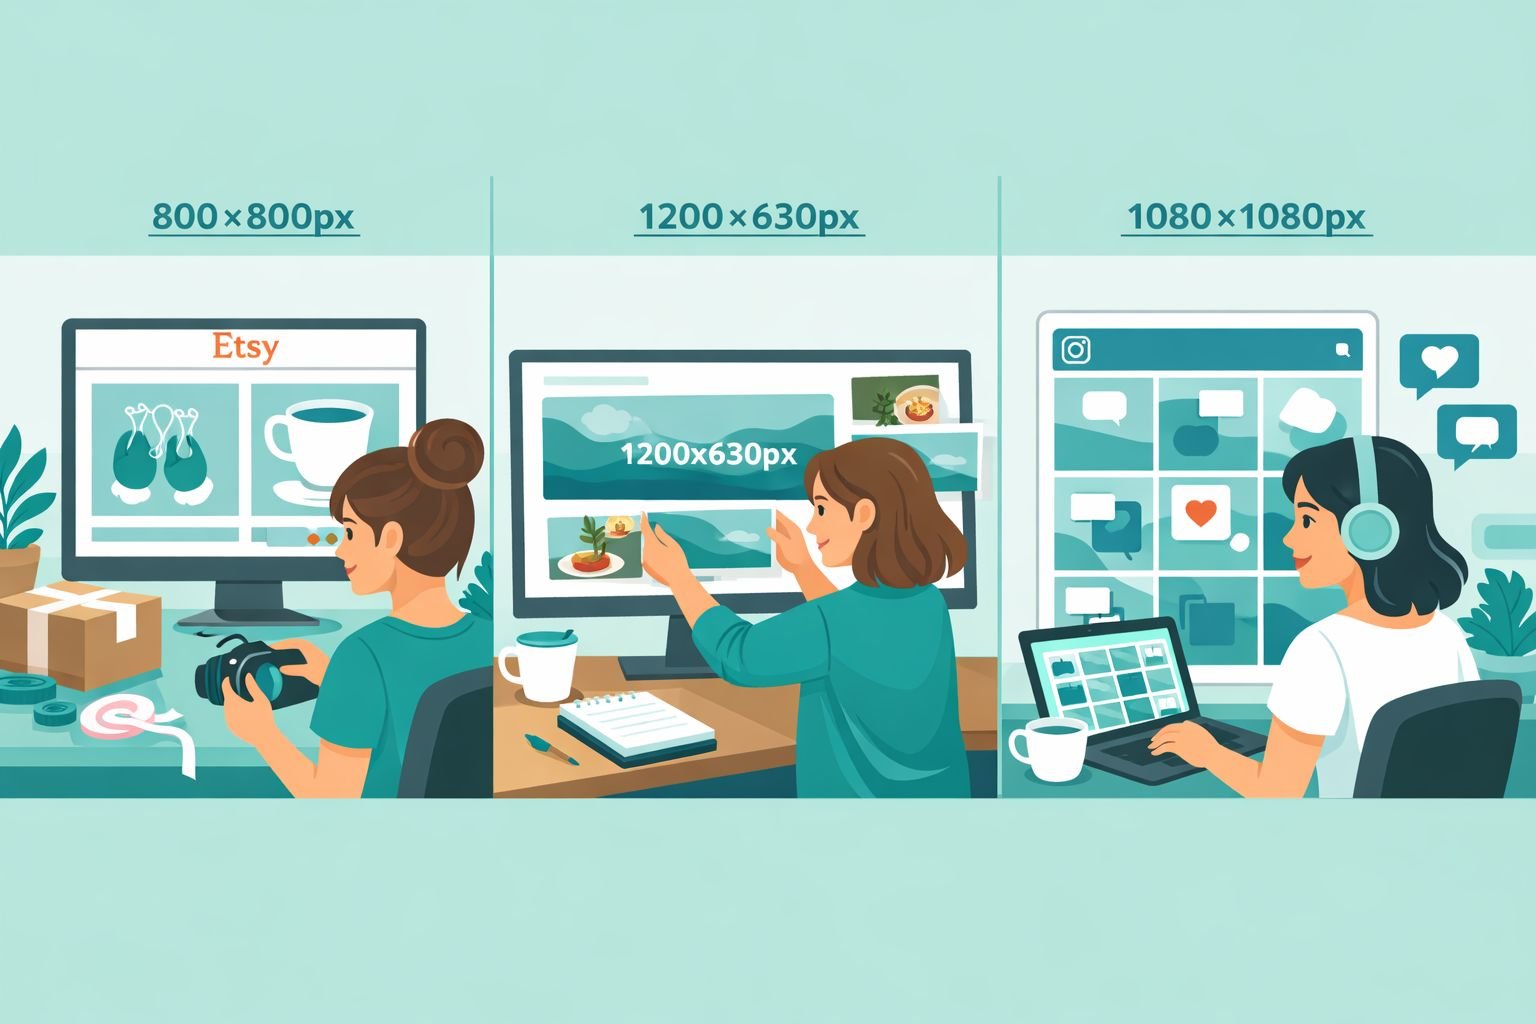
- Scheduling a week of Instagram content. All 21 posts need to be exactly 1080×1080px so the grid looks consistent.
- Publishing a blog post roundup. You have 15 screenshots that need to match your featured image width of 1200px.
- Preparing for a product launch. You want to resize and standardize 80 photos before they go live — without anyone outside your team seeing them first.
That last point matters more than people realize. When you batch resize images online free using a client-side tool, your files never leave your browser. No server upload means no risk of unreleased product photos being stored on someone else’s system.
For a deeper look at why browser-based tools are safer than cloud-upload alternatives, see this breakdown of browser-based file conversion vs. cloud upload tools.
Platform Size Cheat Sheet — Correct Dimensions for Every Channel
Use this table before you open any batch resize tool. Getting the dimensions right the first time means you won’t have to repeat the process.
| Platform | Recommended Size | Format | Notes |
|---|---|---|---|
| Shopify | 2048 × 2048px | JPG or WebP | Square; minimum 800×800px |
| Etsy | 2000px wide minimum | JPG or PNG | Landscape works; 2000×2000px is safe |
| Amazon | 1000px on longest side | JPG | White background required; 2000px+ preferred |
| eBay | 1600px on longest side | JPG | Minimum 500px; larger = zoom feature |
| Instagram Feed | 1080 × 1080px | JPG or PNG | Square; 4:5 portrait also accepted |
| Instagram Stories | 1080 × 1920px | JPG or PNG | 9:16 ratio |
| Facebook Feed | 1200 × 630px | JPG or PNG | Landscape |
| Blog Featured Image | 1200 × 630px | JPG or WebP | Standard OG image size |
| Pinterest Pin | 1000 × 1500px | JPG or PNG | 2:3 ratio |
Quick tip for multi-platform sellers: Resize to the largest required dimension first (Shopify’s 2048×2048px), then create a second batch at the smaller size for Amazon or eBay. You can always scale down from a large file — scaling up degrades quality.
For a complete breakdown of dimensions across every major social platform, the guide to perfect image dimensions for web, email, and social covers everything in one place.
How to Batch Resize Images Online Free — Step-by-Step
You don’t need Photoshop or a paid subscription. Here’s a straightforward process that works for any free browser-based batch resizer.
Step 1: Choose your tool
Pick based on your priority:
- Privacy first, unlimited files: CoreToolsHub Image Resizer — runs entirely in your browser, no uploads, no signup required.
- Smart cropping to exact dimensions: BIRME.net — free, no signup, handles 50+ images with precise crop control.
- Social media presets: Fotor or Picsart — both support up to 50 images per session with platform presets built in.
Step 2: Upload your images
Drag and drop your files or use the file picker. Most tools accept JPG, PNG, WebP, and HEIC. If your photos are in HEIC format (common from iPhones), convert them first using a free HEIC to JPG converter.
Step 3: Set your target dimensions
Choose one of these resize modes:
- Exact pixels (e.g., 1080 × 1080px) — use this when a platform specifies exact dimensions.
- Percentage (e.g., 50%) — use this when you want to proportionally reduce all images by the same amount.
- Longest side (e.g., 2000px) — use this for mixed portrait/landscape batches; the tool scales each image so the longest edge hits your target.
Step 4: Lock the aspect ratio (usually)
Keep aspect ratio lock ON unless you specifically need a forced square crop. Forcing dimensions without locking the ratio stretches images — a common mistake that makes product photos look distorted.
Step 5: Choose your output format
| Goal | Best Format |
|---|---|
| E-commerce listings | JPG (smaller file, wide support) |
| Transparent backgrounds | PNG |
| Web/blog performance | WebP |
| Maximum compatibility | JPG |
Step 6: Download and verify
Download the ZIP file, extract it, and spot-check three to five images at random. Confirm the pixel dimensions match your target and that no images look blurry or stretched.
Common mistake: Resizing JPGs multiple times causes progressive quality loss. Always work from your original high-resolution files, not previously compressed versions.
Percentage vs. Pixel Resizing — Which One Should You Use?
Use pixel resizing when a platform gives you a specific size requirement. Use percentage resizing when you just need to make a batch of images smaller without caring about the exact output size.
Here’s a simple decision rule:
- Choose pixels if: You’re uploading to Shopify, Amazon, Etsy, or any platform with a stated dimension requirement. Exact pixels guarantee compliance.
- Choose percentage if: You’re reducing file size for email attachments or internal use and the exact dimensions don’t matter. Resizing to 50% cuts file size significantly while keeping everything proportional.
- Choose longest side if: Your batch contains a mix of portrait and landscape photos (common with product photography). This mode respects each image’s orientation and prevents cropping.
One thing to watch: percentage resizing applied to a batch of mixed-resolution images produces inconsistent output sizes. A 50% reduction of a 4000px image gives you 2000px; the same reduction of a 1200px image gives you 600px. If consistency matters, use pixel mode.
For more detail on resizing without degrading quality, the guide to resizing images online without losing quality explains exactly what happens to image data at each step.
Best Free Batch Image Resizers in 2026 — Compared
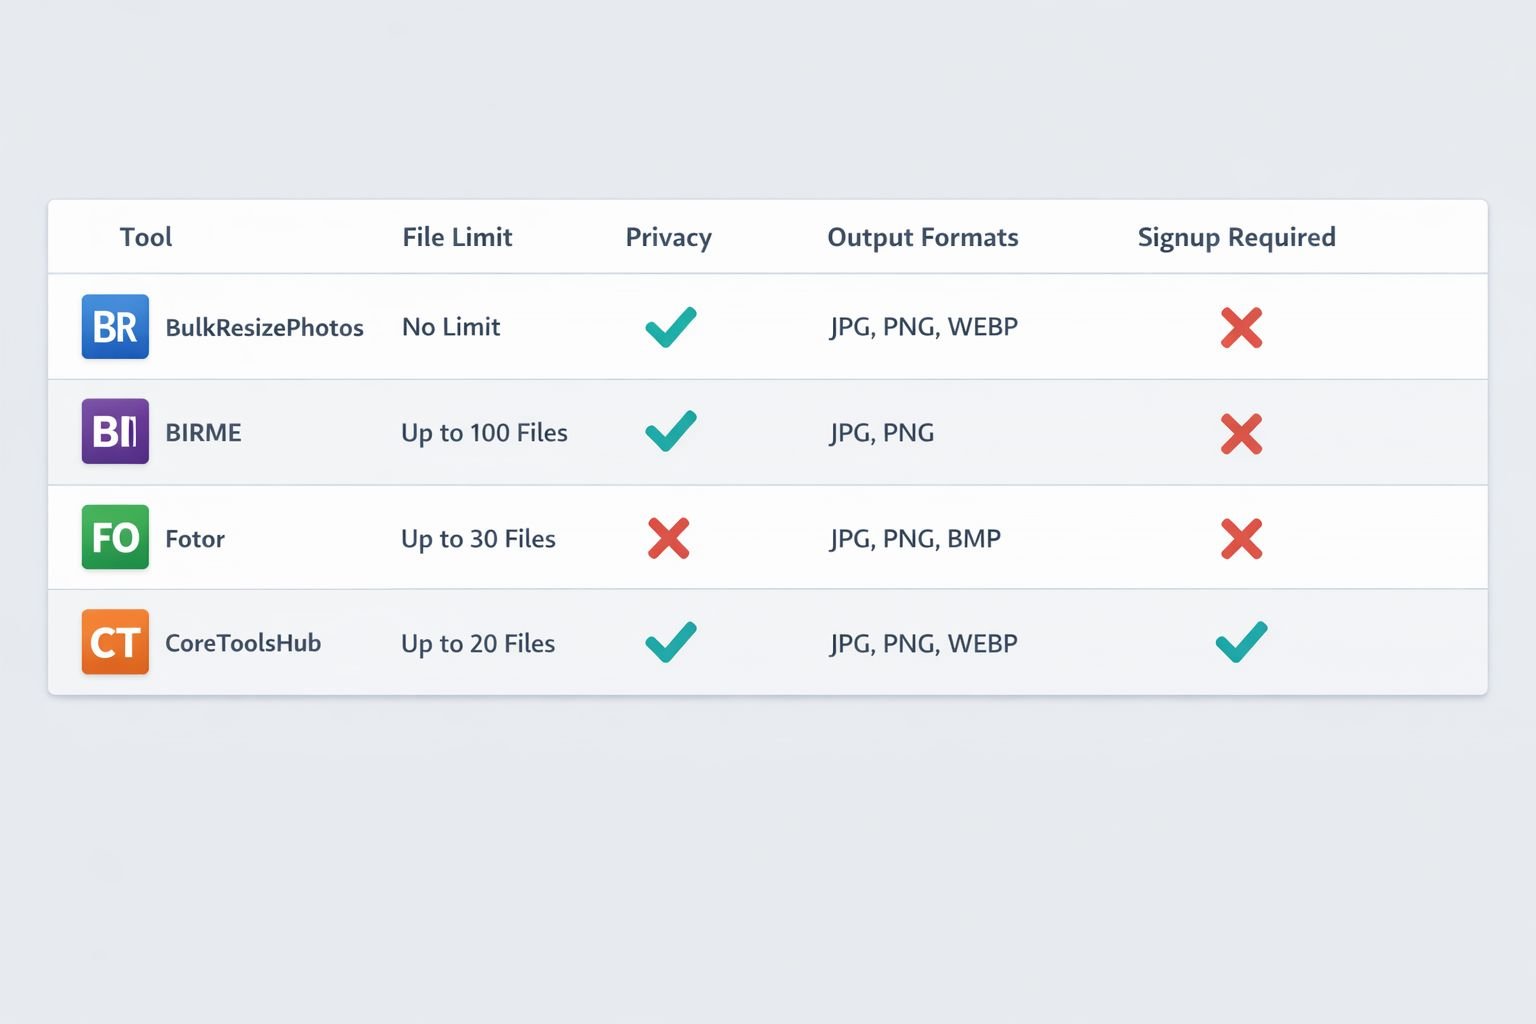
Here’s how the leading free options stack up for the most common use cases.
| Tool | File Limit | Privacy | Output Formats | Signup | Best For |
|---|---|---|---|---|---|
| CoreToolsHub | Unlimited | In-browser, no uploads | JPG, PNG, WebP | None | Privacy-first batch resizing |
| BulkResizePhotos | Unlimited | Client-side | JPG, PNG, WebP, GIF | None | Fast, no-frills bulk resize |
| BIRME | 50+ | Server-side | JPG, PNG | None | Smart crop to exact dimensions |
| Fotor | 50/session | Server-side | JPG, PNG, WebP | Optional | Platform presets, social media |
| Picsart | 50/session | Server-side | JPG, PNG | None | Social media grids |
| BeFunky | Varies | Server-side | JPG, PNG | Optional | Batch editing + watermarks |
A few honest notes:
- BulkResizePhotos is fast and completely private, but its interface is dated and it doesn’t offer ZIP downloads or format conversion — you download files individually.
- BIRME’s smart cropping is genuinely useful for e-commerce sellers who need exact square crops without manual work. It processes files server-side, so avoid using it for unreleased product photos.
- Fotor and Picsart both cap sessions at 50 images, which is fine for most blog or social media workflows but limiting for large catalog uploads.
- CoreToolsHub’s Image Resizer runs entirely in your browser — all processing happens locally, no file size caps on the tool side, and no account needed. That makes it the strongest choice when privacy matters or when you’re processing a large catalog.
“Client-side tools like BulkResizePhotos offer meaningful privacy advantages for batch resizing sensitive product images — your files never leave your device.”
What to Do After Resizing — Reduce File Size for Web
Resizing reduces pixel dimensions, but it doesn’t always shrink file size enough for fast web loading. A 2048×2048px JPG can still be 2MB or larger after resizing, which slows page load times and can hurt SEO.
The fix is simple: run your resized images through a free compressor after resizing.
CoreToolsHub’s Image Compressor works in the browser, handles batches of files, and compresses images without visible quality loss. For most product photos, you can cut file size by 40–70% with no noticeable change in appearance.
If you’re publishing to a blog or e-commerce site, also consider converting JPGs to WebP for better compression at the same visual quality. The PNG to WebP converter and JPG to WebP converter both run in-browser with no uploads required.
For a full walkthrough on reducing image file size for web without quality loss, see the guide to reducing image size for web.
Common Mistakes to Avoid
- Resizing from a compressed copy. Always start from your original RAW or high-resolution file. Compressing an already-compressed JPG results in a quality loss.
- Forgetting to lock the aspect ratio. Forcing non-proportional dimensions stretches images. Distorted product photos reduce buyer trust.
- Using PNG for large product photo batches. PNG files are much larger than JPG for photographic content. Use JPG or WebP unless you need transparency.
- Ignoring platform minimums. Resizing to exactly 1000px for Amazon when you’re starting from a 900px image won’t work — you can’t add pixels that don’t exist. Always shoot or source at the highest resolution possible.
- Not spot-checking the batch. Download and open at least three to five images from every batch before uploading to your store or scheduling posts.
Frequently Asked Questions
Can I batch resize images online free without creating an account?
Yes. Tools like BulkResizePhotos, BIRME, and CoreToolsHub’s Image Resizer require no signup. You can upload, resize, and download immediately.
How many images can I resize at once for free?
It depends on the tool. BulkResizePhotos and CoreToolsHub have no stated file-count limit. Fotor and Picsart cap sessions at 50 images. BIRME handles 50+ images comfortably in a single session.
Is it safe to upload product photos to a free online resizer?
It depends on whether the tool is client-side or server-side. Client-side tools (like CoreToolsHub and BulkResizePhotos) process files in your browser — nothing is uploaded to a server. Server-side tools (like BIRME and Fotor) temporarily upload your files. For unreleased products, use a client-side tool.
What’s the best image size for Shopify product photos?
Shopify recommends at least 2048×2048px for square product images. This enables the zoom feature and ensures quality across all device sizes.
What’s the difference between resizing and compressing?
Resizing changes an image’s pixel dimensions (for example, from 4000×4000px to 1080×1080px). Compressing reduces the file size in megabytes without necessarily changing dimensions. For web use, you typically want to do both.
Can I batch resize images on my phone?
Yes. Browser-based tools like CoreToolsHub and Fotor work on mobile browsers. The upload and download experience is slightly slower on mobile, but the resizing itself works the same way.
Will resizing reduce image quality?
Scaling down (reducing pixel count) has minimal visible impact when done once from a high-resolution source. Scaling up (increasing pixel count) always reduces sharpness because the tool has to invent pixel data that doesn’t exist.
What format should I use for batch-resized e-commerce images?
JPG for most listings — it’s universally supported and keeps file sizes manageable. Use PNG only if you need a transparent background. WebP is a good choice for blog or website images where you control the platform.
Does batch resizing work for HEIC files from an iPhone?
Most batch resizers don’t accept HEIC directly. Convert HEIC files to JPG first using a free HEIC to JPG converter, then run the JPGs through your batch resizer.
What’s the fastest way to resize images for an entire Etsy shop?
Sort your product photos into folders by category, then process each folder as a batch at 2000×2000px in JPG format. Use a client-side tool to keep files private, then compress the output before uploading.
Conclusion
Batch resizing doesn’t have to be complicated or expensive. Free browser-based tools handle 50 or more images at once, output in the formats your platforms require, and — when they’re client-side — keep your product photos completely private.
Here’s the short action plan:
- Check the platform size requirements in the cheat sheet above before you start.
- Use CoreToolsHub’s Image Resizer for privacy-first batch resizing with no signup and no file-count limits.
- Choose pixel mode for platform-specific sizes; use longest-side mode for mixed portrait/landscape batches.
- After resizing, compress your images with the CoreToolsHub Image Compressor to reduce file size without visible loss of quality.
- Spot-check five images from every batch before publishing.
That’s the full workflow — from raw product photos to web-ready images, entirely in your browser, entirely free.