Last updated: June 22, 2026
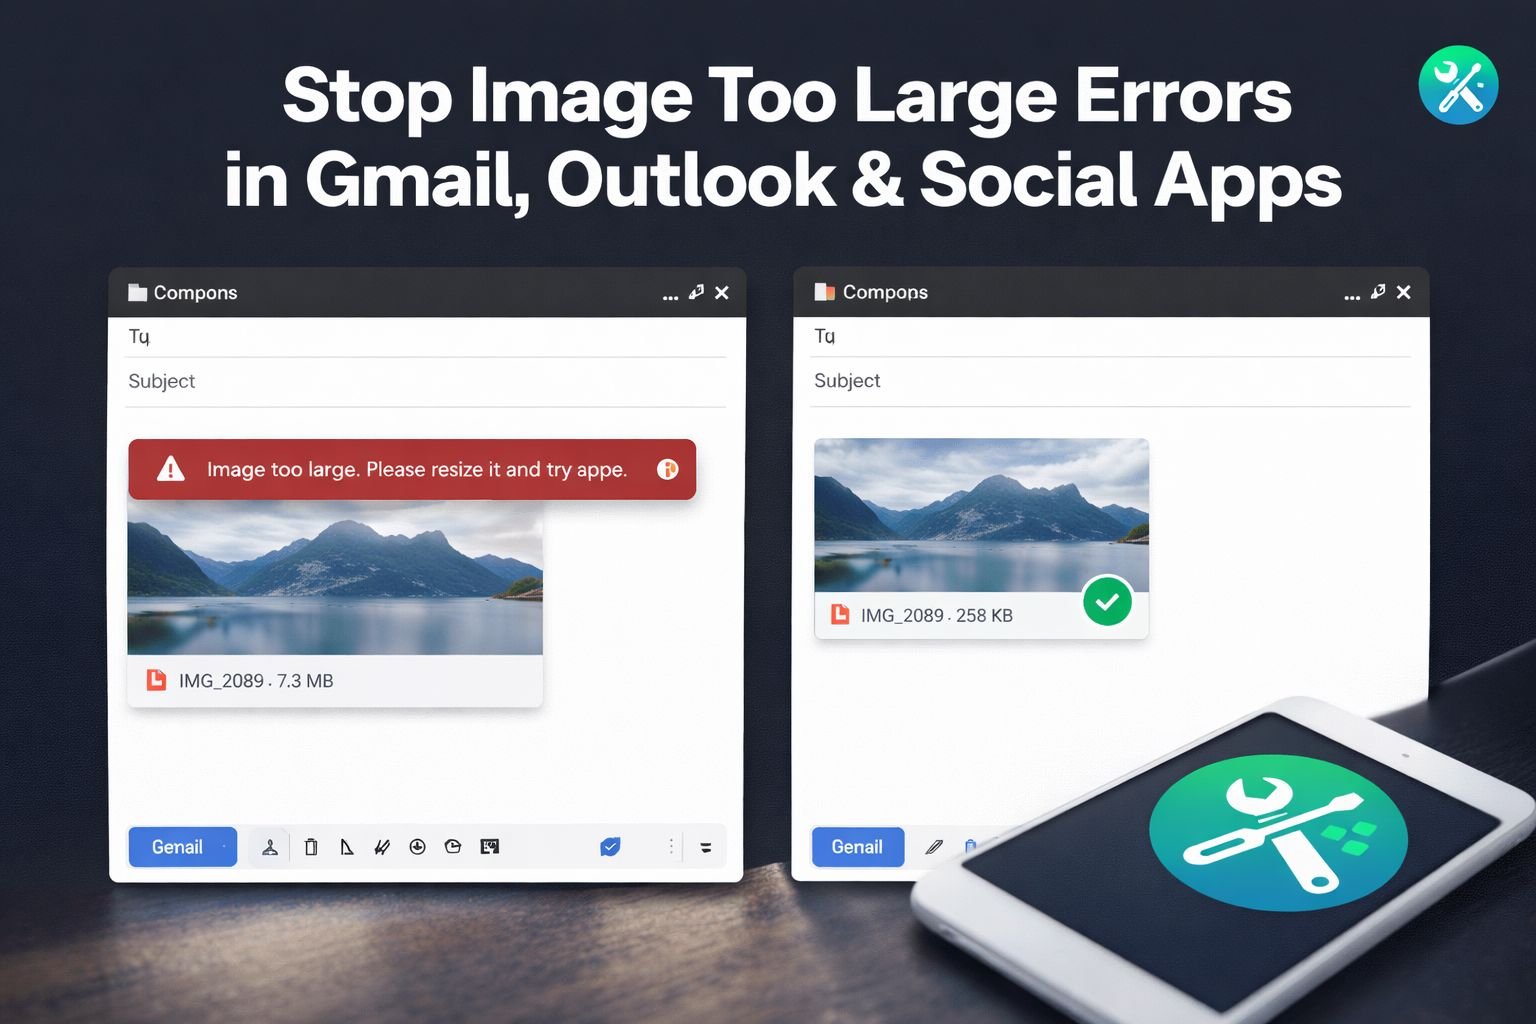
Quick Answer: When you hit an “image too large to send email” error, the fastest fix is to compress your photo to 60–75% quality and resize it to under 1,920 pixels wide. This typically brings a 6–8 MB phone photo down to under 1 MB — well within Gmail’s 25 MB and Outlook’s 20 MB attachment limits — without making the image look noticeably worse.
Key Takeaways
- Modern smartphones produce photos that are 4–10 MB each, which means just two or three attachments can trigger an “image too large” error.
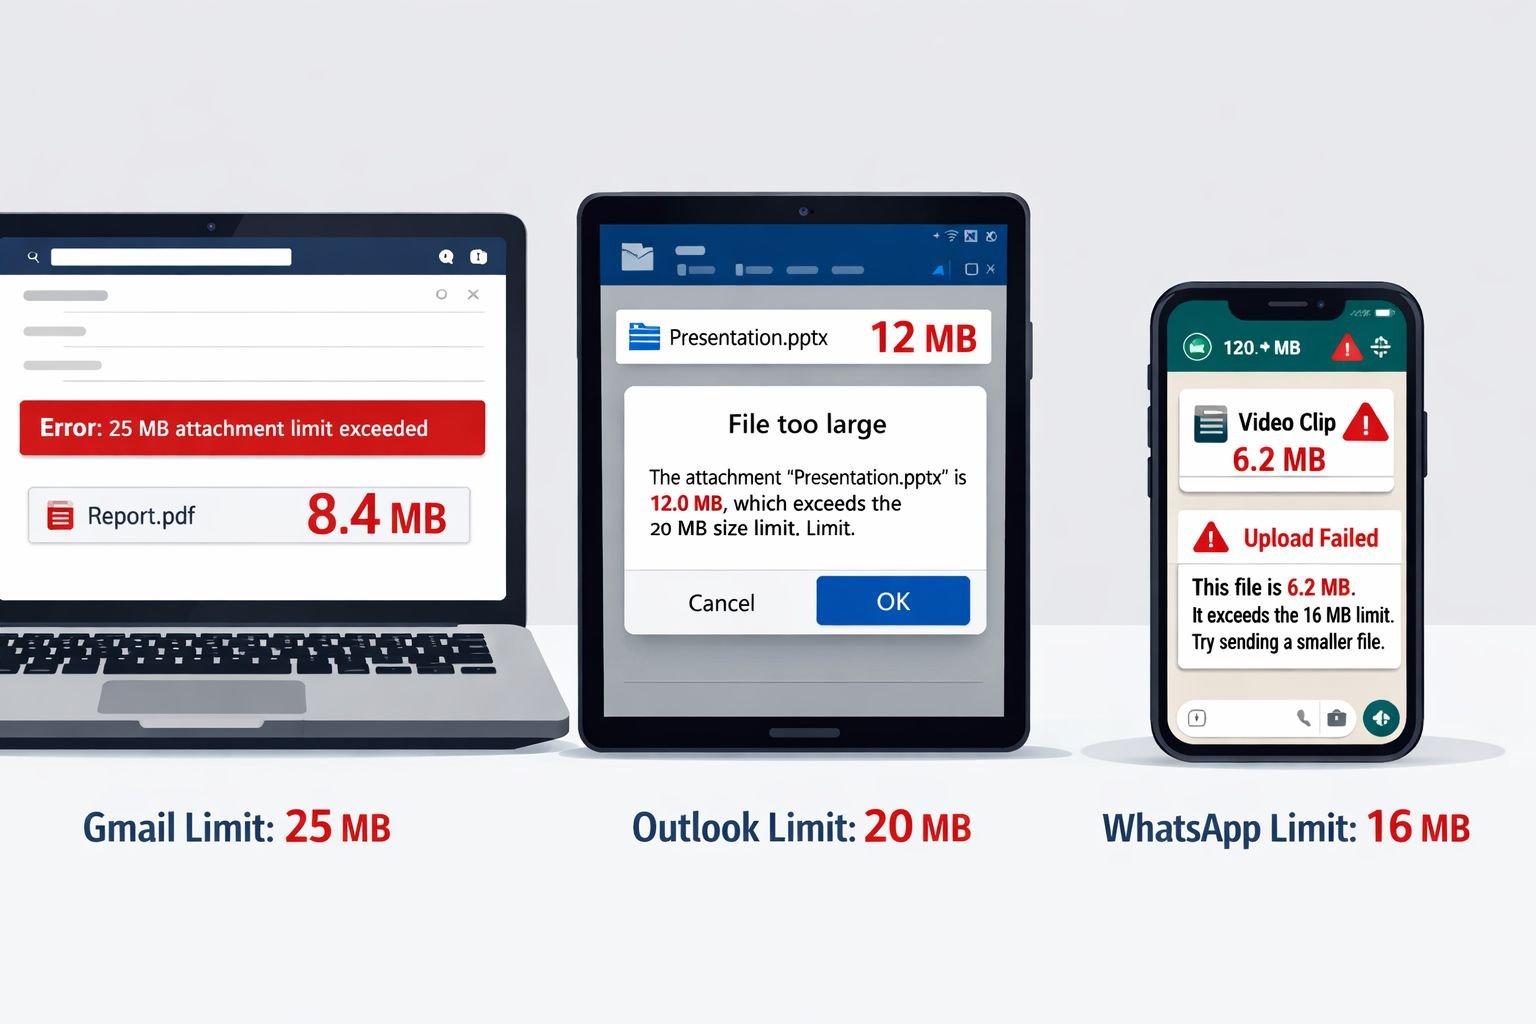
- Gmail allows roughly 25 MB per message; Outlook caps attachments at around 20 MB. Social apps like WhatsApp and Instagram have their own, often stricter, limits.
- Compressing to 60–80% quality removes file weight without obvious visual degradation for most photos and screenshots.
- Resizing to a maximum width of 1,920px (or 1,280px for email thumbnails) cuts file size dramatically before compression even begins.
- JPG is the best format for photos; PNG is better for screenshots with text. WebP is smaller than both, but not always accepted by older email clients.
- Bundling multiple images into a single PDF is often smaller and easier to manage than sending five separate attachments.
- Core Tools Hub’s image compressor and resizer run entirely in your browser — no install needed, no signup required, and your files never leave your device.
Why Email and Apps Reject “Image Too Large” Attachments
The core problem is a mismatch between what modern cameras produce and what email servers accept. A photo taken on a recent iPhone or Android flagship can easily be 8–12 MB. Send three of those in one email and you’ve already hit or exceeded most providers’ limits.
Here’s how common platforms stack up:
| Platform | Attachment Limit | Notes |
|---|---|---|
| Gmail | ~25 MB per message | Files over 25 MB must use Google Drive link |
| Outlook.com | ~20 MB per message | Microsoft 365 accounts may differ |
| Yahoo Mail | ~25 MB per message | — |
| ~16 MB for images | Videos have a separate cap | |
| Instagram DM | ~8 MB | Feed uploads are resized automatically |
| ~5 MB for profile images | Post images vary | |
| Facebook Messenger | ~25 MB | — |
A single 4K photo from a modern phone can be 10–15 MB. Two of those and you’ve already exceeded Outlook’s limit. That’s why the “image too large to send email” error shows up so often — it’s not a bug, it’s just math.
Common mistake: Many people try to send screenshots of documents or spreadsheets as PNG files. PNG is lossless, which is great for quality, but those files can be surprisingly large — sometimes 3–5 MB for a single screenshot. Switching to JPG at 75–80% quality or compressing the PNG can cut that down to under 500 KB with no visible loss in text sharpness.
Choose the Right Format: JPG vs PNG vs WebP for Email
Format choice alone can halve your file size before you touch any quality settings. The right format depends on what’s in the image.
- JPG (JPEG): Best for photos, product images, and anything with gradients or lots of color. Compresses very well at 70–80% quality. Use this for 90% of email attachments.
- PNG: Best for screenshots, logos, diagrams, and images with text. Lossless by default, so files are larger — but PNG compression (reducing color depth or using a PNG optimizer) can still shrink them significantly.
- WebP: Smaller than both JPG and PNG at equivalent quality. Great for web use, but some older email clients and form upload portals don’t accept it. Check before sending.
- HEIC: The default format on iPhones. Most email clients and Windows PCs can’t open HEIC files natively. Convert to JPG first — the HEIC to JPG converter at Core Tools Hub handles this in seconds, with no uploads needed.
Choose JPG if the image is a photo or has smooth color transitions. Choose PNG if the image has text, sharp lines, or a transparent background. Choose WebP if you’re uploading to a website or modern platform that accepts it.
For a deeper look at when each format makes sense, the lossless vs lossy formats guide covers the tradeoffs clearly.
How to Quickly Compress Images Online — Fix “Image Too Large to Send Email” in Seconds
The fastest fix for an image too large to send by email is to run it through a browser-based compressor, set quality to 70–80%, and download the result. No software to install, no account to create.
Here’s the step-by-step using the Core Tools Hub Image Compressor:
- Open the tool at coretoolshub.com/image-compressor/ — it runs in your browser, works on desktop and mobile.
- Drag and drop your image (JPG, PNG, or WebP) onto the upload area, or click to browse.
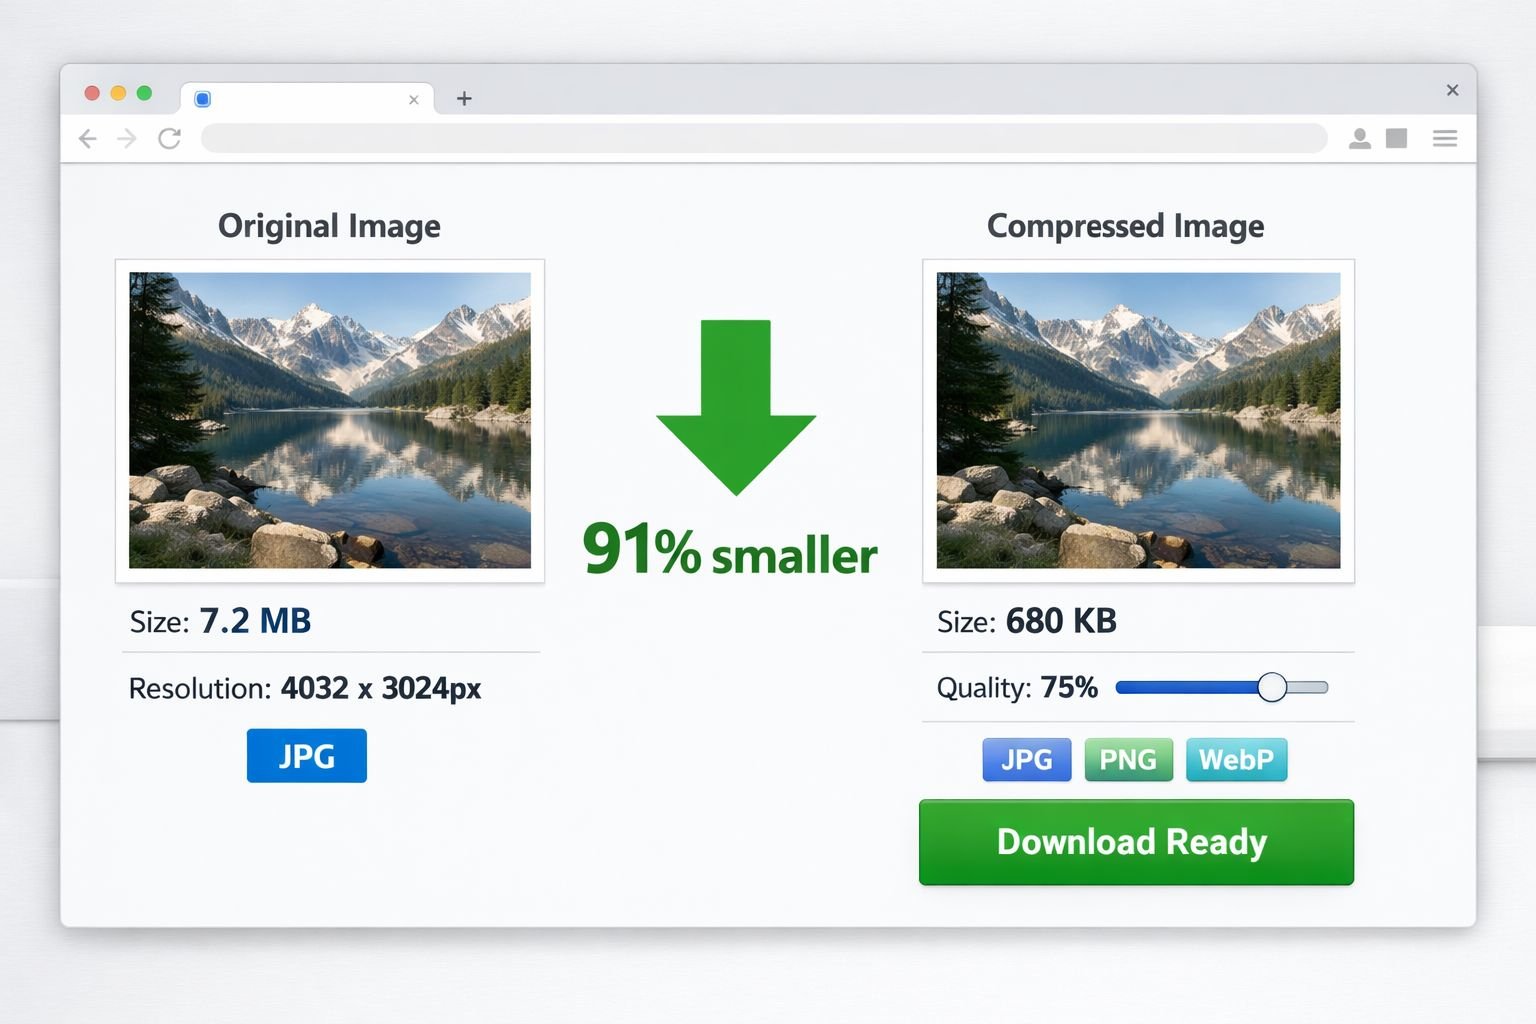
- Set the quality slider to 75% for photos. For screenshots with text, try 80–85% to keep text legible.
- Check the output size shown in the preview panel. If it’s still over 1 MB, nudge the slider down to 65–70%.
- Click Download to save the compressed file. The result is download-ready in seconds.
Best Settings by Use Case
| Scenario | Recommended Quality | Expected Output Size |
|---|---|---|
| Phone photo for email | 70–75% | 400–900 KB (from ~6 MB) |
| Screenshot with text | 80–85% | 150–400 KB |
| Product image for form upload | 75% | 300–600 KB |
| Image for WhatsApp | 65–70% | Under 500 KB |
These are estimates based on typical inputs. Actual results vary by image content, original resolution, and format. A photo with lots of fine detail will compress less than a simple landscape shot.
For more context on quality tradeoffs, the compress image file size without losing quality guide walks through the reasoning behind these settings in detail.
Resize Screenshots and Photos So Text Stays Crisp
Compressing quality isn’t the only lever — resizing the pixel dimensions first can cut file size by 50–80% before compression even starts. A 4,032 × 3,024px photo from a phone camera contains far more pixels than anyone needs to view an email attachment on a laptop screen.
Use the Core Tools Hub Image Resizer to set exact dimensions:
- Upload your image to the resizer tool.
- Set the width to 1,920px for standard email viewing, or 1,280px if the image is just a supporting visual.
- Keep “maintain aspect ratio” checked — this prevents distortion.
- Download the resized image, then run it through the compressor if you need to go even smaller.
For screenshots specifically: if your screenshot is 2,560px wide (common on high-resolution displays), resizing to 1,280px makes every pixel twice as dense visually, which actually improves perceived sharpness at normal viewing sizes while cutting the file in half.
Common mistake: Resizing too aggressively. If a screenshot contains small text — like a spreadsheet or a form — don’t go below 1,000px wide or the text becomes hard to read. Test by zooming to 100% in your image viewer before sending.
For social media dimensions specifically, the resize images for social media guide has platform-by-platform pixel specs.
Combine Multiple Images into One Lightweight PDF
When you need to send several images at once, bundling them into a single PDF is often smaller than sending each file separately and far easier for the recipient to manage.
A folder of five 1 MB JPGs sent as individual attachments adds up to 5 MB. The same images converted to a PDF and then compressed can come in under 2 MB — and the recipient gets one clean document instead of five loose files.
Here’s how to do it:
- Compress and resize each image first (steps above).
- Open the Images to PDF tool at Core Tools Hub.
- Upload your images and arrange them in order.
- Click Convert — the tool runs in your browser, no uploads to a server.
- Download the PDF. If it’s still larger than needed, run it through the PDF compressor for an extra size reduction.
This approach works especially well for job applications (portfolio samples), school submissions (assignment photos), and insurance claims (damage photos). One PDF attachment looks more professional and is less likely to trigger spam filters than a batch of image files.
Recommended Settings for Gmail, Outlook, and Popular Social Apps
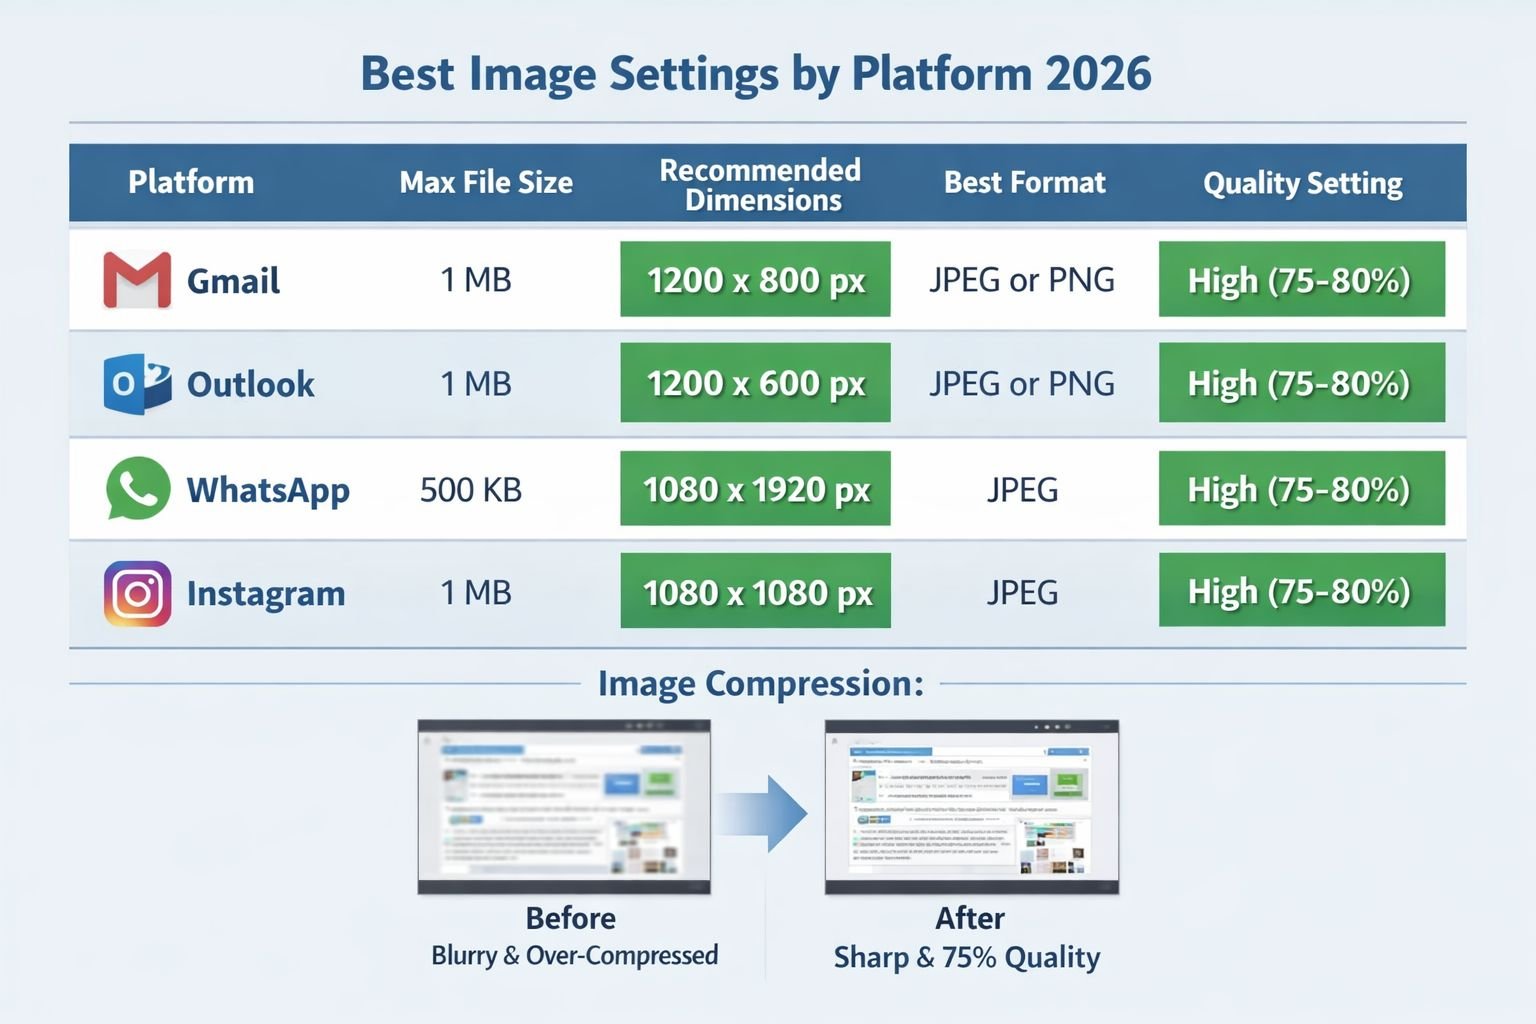
Different platforms have different limits and different tolerance for compression artifacts. Here’s a practical cheat sheet for 2026.
Gmail
- Limit: ~25 MB per message total
- Best format: JPG for photos, PNG for screenshots
- Recommended size: Keep each attachment under 5 MB; keep total under 20 MB to leave room for email headers
- Quick fix: Compress to 75% quality, resize to max 1,920px wide
Outlook (Outlook.com and Microsoft 365)
- Limit: ~20 MB per message (Outlook.com); Microsoft 365 business accounts may allow more
- Best format: JPG
- Recommended size: Under 4 MB per image, total under 15 MB
- Quick fix: Same as Gmail — 75% quality, 1,920px max width
- Limit: ~16 MB for images sent as “Photo”; larger files can be sent as “Document”
- Best format: JPG
- Recommended size: Under 1 MB for fast delivery and no quality auto-reduction by the app
- Quick fix: Compress to 65–70%, resize to 1,280px wide
Instagram (DMs and posts)
- DM limit: ~8 MB
- Feed posts: Instagram recompresses everything anyway — send at 1,080px wide, JPG at 80% quality
- Quick fix: Resize to 1,080px wide before uploading to avoid Instagram’s auto-compression looking worse than your own
- Profile image: Under 8 MB, recommended 400×400px
- Post images: Under 5 MB, 1,200×628px for landscape posts
- Quick fix: Resize to exact dimensions, compress to 80%
Troubleshooting: Blurry Images, Upload Failures, and Strange Colors
Most post-compression problems have a simple cause. Here’s how to diagnose and fix the most common ones.
Problem: Image looks blurry after compression
- Cause: Quality set too low (below 60%) or image resized too small
- Fix: Use 70–80% quality. For screenshots with text, don’t go below 80%. If you need a smaller file, reduce dimensions first, then compress at a higher quality setting.
Problem: Upload still fails after compression
- Cause: The platform may have a format restriction, not just a size limit
- Fix: Convert to JPG using the PNG to JPG converter if you’re sending a PNG. Some portals reject PNG files entirely, regardless of size.
Problem: Colors look washed out or shifted
- Cause: Color profile mismatch — some tools strip the ICC color profile during compression
- Fix: The Core Tools Hub compressor preserves color profiles. If you used another tool and colors shifted, re-export from the original file.
Problem: iPhone photos sent as HEIC files that recipients can’t open
- Cause: iOS saves photos in HEIC format by default, which Windows and many email clients don’t support natively
- Fix: Convert to JPG first. See the HEIC to JPG conversion guide for a step-by-step walkthrough.
Problem: Canva export looks blurry when downloaded
- Cause: Canva’s default PNG download sometimes applies its own compression, or users accidentally download at “low quality”
- Fix: In Canva, choose Download > PNG > uncheck “Compress file” for full quality. Then compress it yourself using the Core Tools Hub compressor to control the output size precisely.
Problem: Sending many images triggers spam filters
- Cause: Multiple image attachments can look like spam to email servers
- Fix: Bundle images into a single PDF using the Images to PDF tool. One clean attachment is less likely to be flagged.
FAQ
Q: What is the maximum image size for Gmail attachments in 2026? Gmail allows approximately 25 MB per message total across all attachments. Files over 25 MB must be shared via Google Drive link instead. Keep individual images under 5 MB and total attachments under 20 MB to stay safely within the limit.
Q: How do I fix an “image too large to send email” error quickly? Open the Core Tools Hub Image Compressor, upload your image, set quality to 75%, and download the result. Most phone photos will drop from 5–10 MB to under 1 MB in seconds. No install needed, no signup required.
Q: Will compressing an image make it look bad? At 70–80% quality, most photos show no visible difference to the human eye. The degradation becomes noticeable below 50–60% quality. For screenshots with text, use 80–85% to keep characters sharp.
Q: Should I use JPG or PNG for email attachments? Use JPG for photos — it compresses much better. Use PNG for screenshots, diagrams, or images with text where sharpness matters. Avoid sending HEIC files; convert them to JPG first.
Q: How do I reduce the image size in KB for a specific form or portal? Use the Image Compressor to set quality, then check the output file size shown in the tool. If you need to hit a specific KB target (like “under 200 KB” for a government form), the reduce image size in KB guide covers exact steps for hitting tight limits.
Q: Is it safe to compress images using an online tool? With Core Tools Hub, yes — the tools run entirely in your browser. Your images are never uploaded to a server, which means no one else can access them. This is what “privacy-first” means in practice.
Q: Can I compress multiple images at once? The Core Tools Hub compressor handles batch processing. Upload multiple files and compress them together for faster results when you have several attachments to prepare.
Q: Why does WhatsApp compress my photos automatically? WhatsApp applies its own compression when you send images as “Photos” to reduce data usage. If you want to send a file at full quality, use the “Document” option in WhatsApp — it bypasses automatic compression.
Q: What’s the best way to send multiple images by email? Compress each image first, then bundle them into a single PDF using the Images to PDF tool. One PDF attachment is easier to open, less likely to trigger spam filters, and often smaller than multiple loose image files.
Q: Does resizing an image reduce its file size? Yes, significantly. Cutting the pixel dimensions in half reduces the file size by roughly 75% (because you’re removing pixels in both dimensions). Resize first, then compress — this combination gives the best quality-to-size ratio.
Q: What if my image is in WebP format and the email client won’t accept it? Convert it to JPG using the WebP to JPG converter. JPG is universally accepted by all email clients and form portals.
Q: How do I know if my compressed image will still look good when printed? For printing, you need at least 150 DPI at the print size (300 DPI for sharp text). If you’re compressing a photo for both email and printing, keep the dimensions large (at least 2,000px wide) and compress to 80% quality. For email-only use, 1,280–1,920px wide is sufficient.
Conclusion
The “image too large to send email” error is one of the most common frustrations in everyday digital life — and one of the most fixable. The solution almost always comes down to two steps: compress the quality to 70–80%, and resize the dimensions to match what the recipient actually needs to see.
Here’s what to do right now:
- Head to the Core Tools Hub Image Compressor and compress your photo to 75% quality.
- If the file is still too large, use the Image Resizer to bring the width down to 1,920px or 1,280px.
- If you’re sending multiple images, bundle them with the Images to PDF tool for a single, clean attachment.
- If your iPhone photos are in HEIC format, convert them first with the HEIC to JPG converter.
All of these tools run in your browser — no install needed, no signup required, and your files stay private. Fast, clean results in seconds.
Related Reading:
- How to compress images without quality loss
- Perfect image dimensions for web, email, and social
- Reduce image size in KB for forms and portals