Last updated: July 1, 2026
Quick Answer
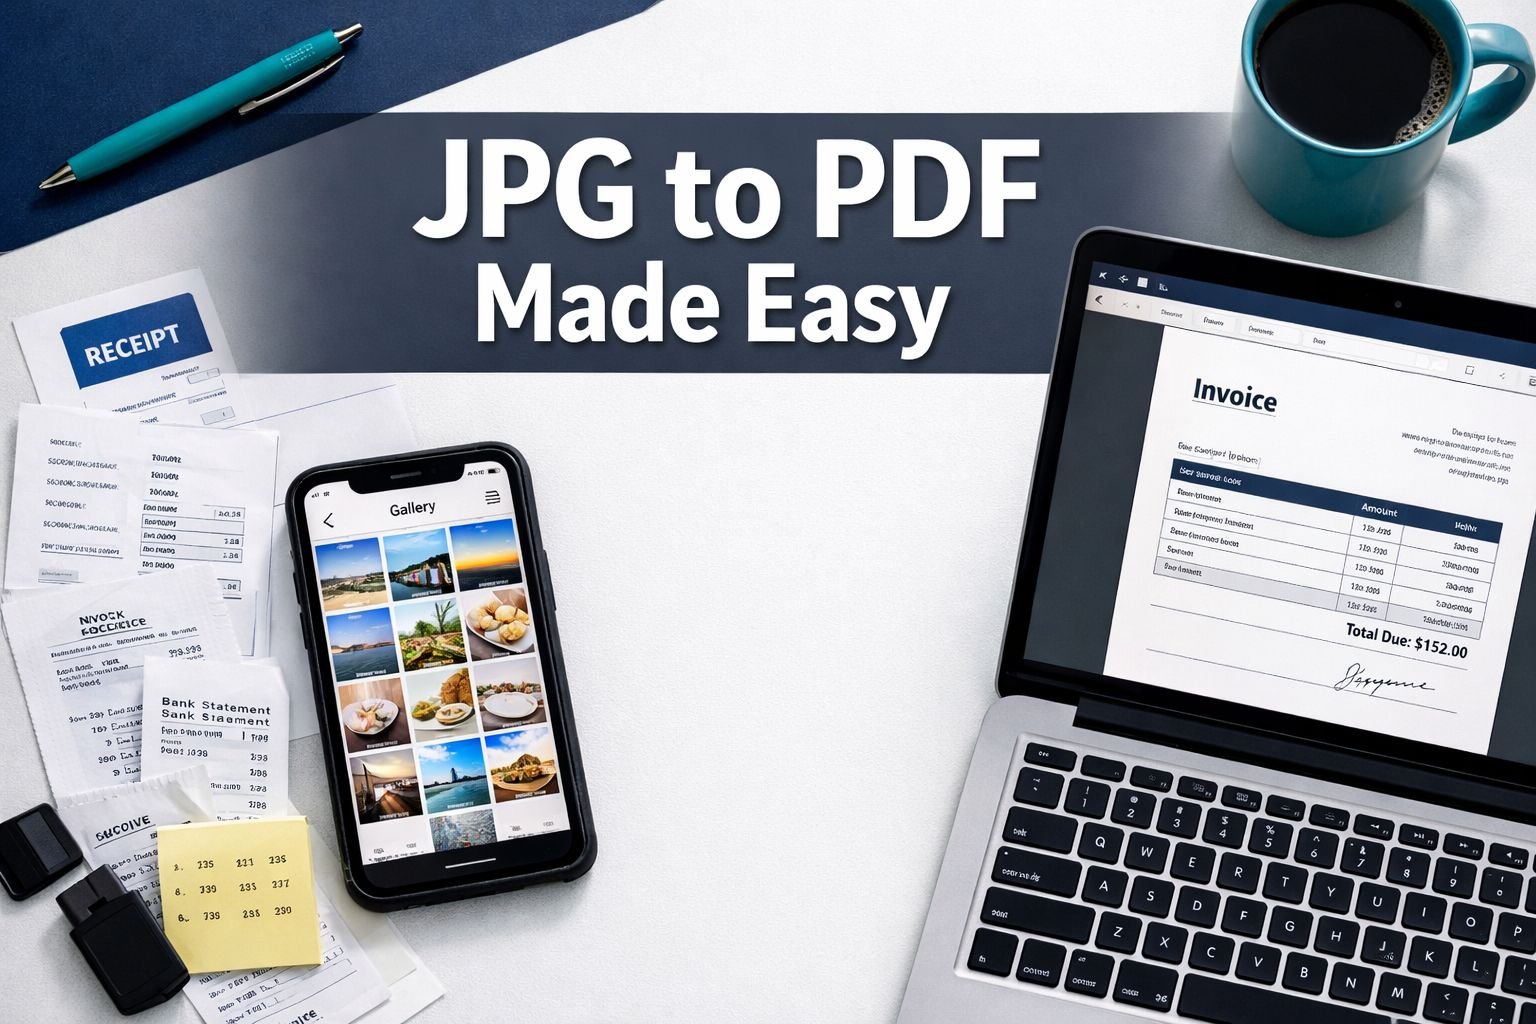
Upload your JPG images to a browser-based converter, arrange them in the right order, choose your quality setting, and download a single PDF — no installs, no signup required. The whole process takes under two minutes for most document sets. The trickiest part isn’t the conversion itself; it’s getting the file size small enough to pass email and portal upload limits.
Key Takeaways
- A browser-based JPG to PDF tool runs entirely in your browser, so your photos never leave your device.
- For most email attachments, keep the final PDF under 10 MB; visa and government portals often cap uploads at 2–5 MB.
- Image resolution (DPI) is the biggest lever for controlling file size — 150 DPI is the sweet spot for readable documents that aren’t oversized.
- Always set your page order before converting; reordering pages afterward requires a separate PDF tool.
- iPhone users shooting in HEIC format need to convert to JPG first, as most PDF tools will not accept HEIC files.
- Removing EXIF metadata from photos before converting protects your location and device data.
- Compressing images before conversion gives you more control than compressing the finished PDF.
When Should You Convert JPG Images to a PDF?
A PDF bundles multiple images into a single, consistently formatted file that opens the same way on every device. That matters more than most people realize until a portal rejects a folder of loose JPGs.
Here are the most common situations where JPG to PDF conversion is the right move:
- Visa and immigration applications — Most embassy portals require supporting documents (bank statements, photos, lease agreements) to be submitted as a single PDF within a specific size limit, often 2–4 MB.
- Job applications and HR onboarding — Employers ask for ID scans, certifications, and reference letters as one attached PDF rather than a zip file of images.
- School and university submissions — Homework photos, lab reports, and signed forms need to arrive as a single document, not a string of image attachments.
- Apartment rental applications — Landlords and property managers typically want pay stubs, ID, and references combined into one file.
- Expense reports and receipts — Finance teams and accounting software expect receipts in PDF format, not individual photos from your camera roll.
- Medical and insurance forms — Scanned paperwork submitted to insurers or clinics almost always needs to be in PDF format.
Choose PDF if you’re sending to a formal portal, submitting to a person who will print the document, or combining more than two images into a single submission.
Stick with JPG if: you’re sharing a single photo casually, posting to social media, or the recipient specifically asks for an image file.
Step-by-Step JPG to PDF Conversion on Desktop, Mobile, and Web
The fastest path for most users is a browser-based tool — no software to install, and it works on Windows, Mac, Linux, Android, and iOS.
Browser-based (recommended for most users)
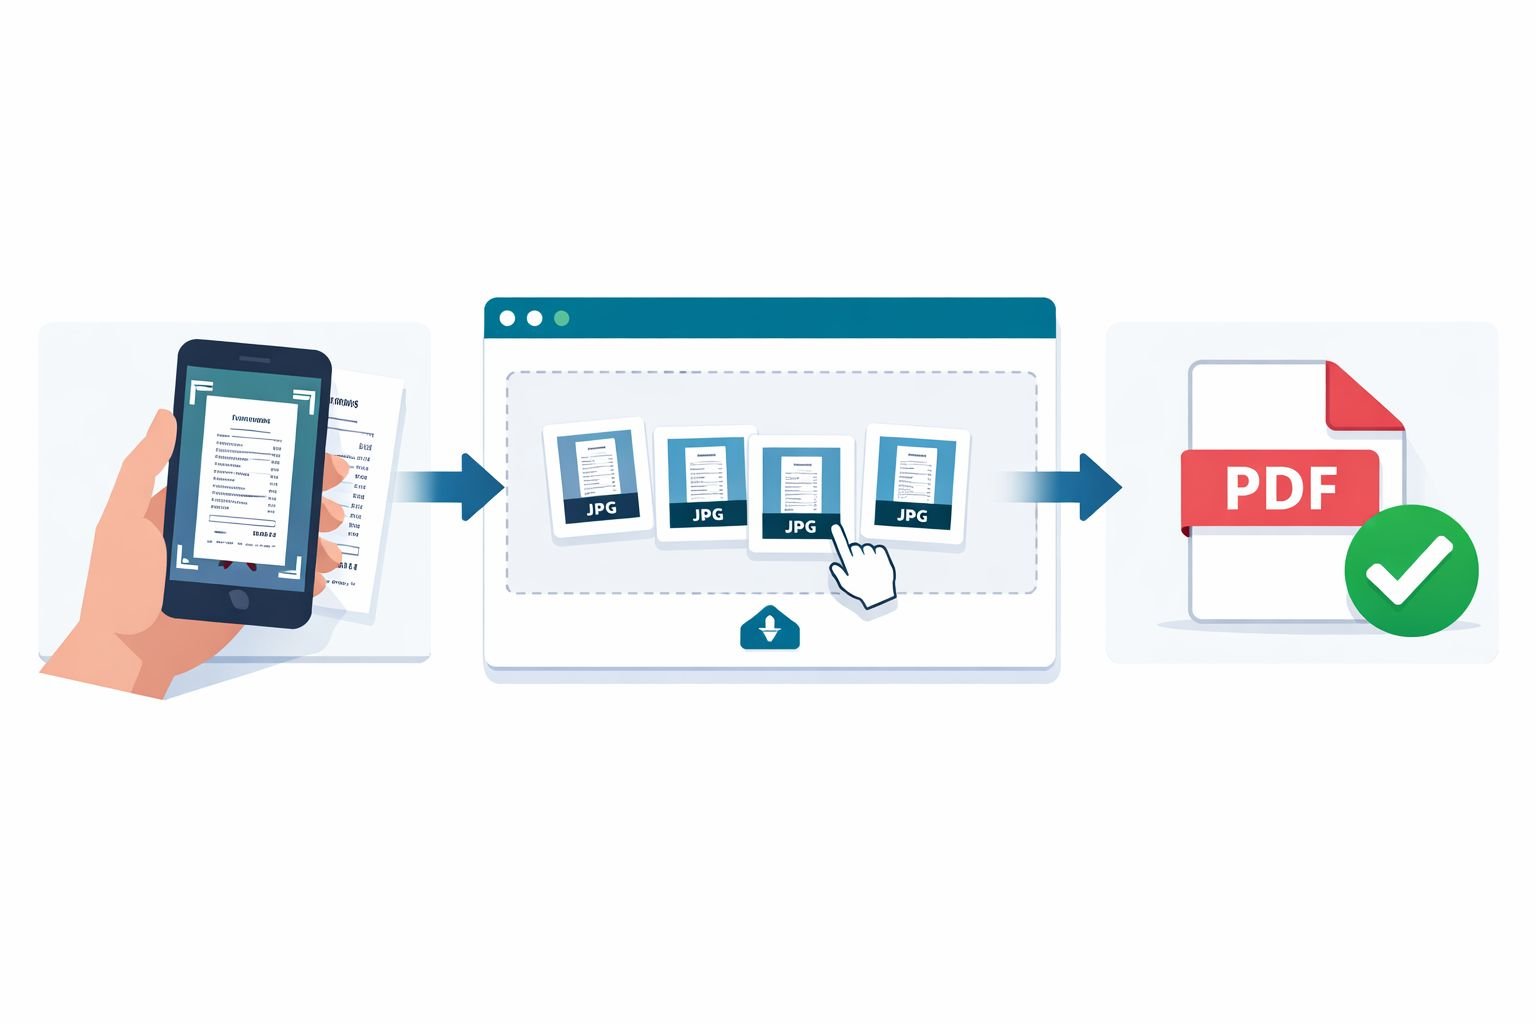
- Open the Core Tools Hub Images to PDF converter in any browser.
- Click Upload or drag your JPG files directly onto the drop zone.
- Arrange the thumbnails into your preferred page order by dragging them.
- Select your page size (A4 is standard for most formal documents; Letter for US submissions).
- Choose your quality setting (see the settings table below).
- Click Convert and download your PDF.
All processing runs in your browser. Your images are never uploaded to a server.
On a smartphone (iOS or Android)
- iOS: Use the Files app — select your JPGs, tap Share, then “Create PDF.” For more control over order and margins, use a browser-based tool from Safari or Chrome instead.
- Android: Google Drive can convert images to PDF: open the app, tap the “+” button, select Scan, then save as PDF. Again, a browser tool gives you better ordering control.
- iPhone users shooting in HEIC format: Convert to JPG first using a free HEIC to JPG converter before uploading to any PDF tool — most converters don’t accept HEIC files directly.
On desktop without a browser tool
- Windows: Open images in the Photos app, select all, right-click, and choose “Print.” Select “Microsoft Print to PDF” as the printer. This works but gives you no control over compression or ordering beyond what the Print dialog offers.
- Mac: Open images in Preview, select all in the sidebar, then File > Export as PDF. Preview handles ordering well but doesn’t compress aggressively.
Common mistake: People using the Windows Print-to-PDF method often end up with a 30–50 MB file because the printer driver defaults to high resolution with no compression. If file size matters, use a browser tool instead.
Control Quality, Orientation, and Order When Merging Images
Getting a clean JPG to PDF result means making three decisions before you hit convert: order, orientation, and quality.
Page order
Set this before converting. Dragging thumbnails in the upload interface is the easiest way. If you’ve already created the PDF and the pages are wrong, use a PDF page reorder tool to fix it without starting over.
Page orientation
Most tools auto-detect whether an image is portrait or landscape and rotate the page to match. If a page comes out sideways in the final PDF, use a rotate PDF tool to fix individual pages.
Quality and file size settings
This is where most users get stuck. Here’s a practical settings guide:
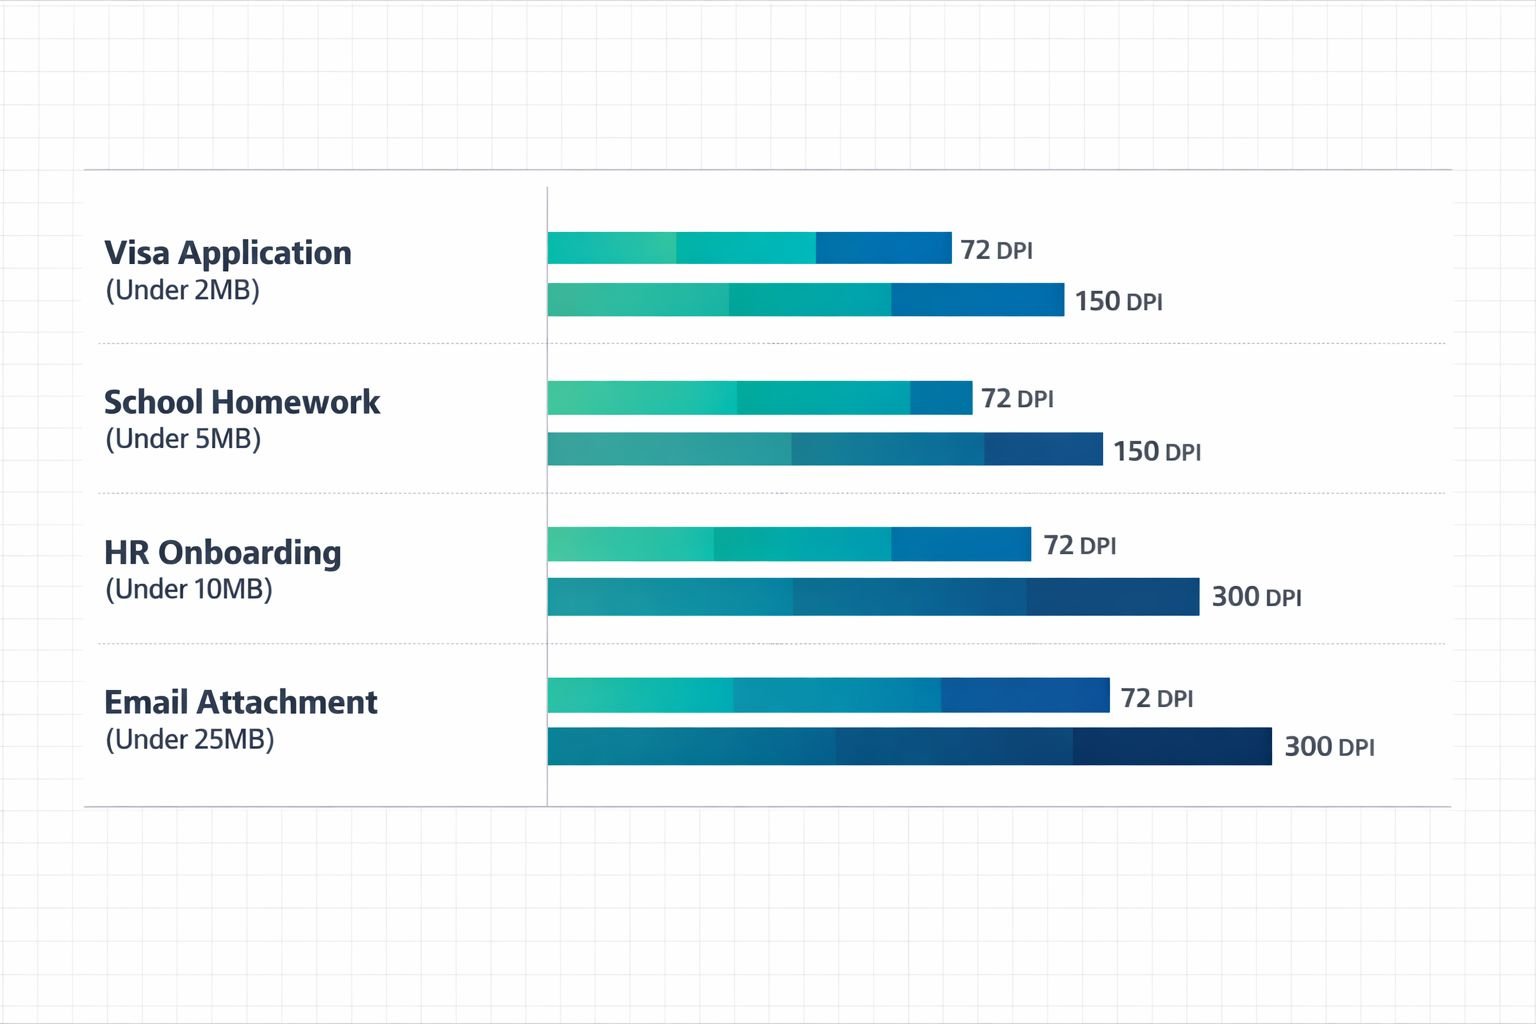
| Use Case | Recommended DPI | Quality Setting | Target File Size |
|---|---|---|---|
| Visa / government portal | 150 DPI | Medium (75–80%) | Under 2–4 MB |
| School / university submission | 150 DPI | Medium-High (80%) | Under 5 MB |
| HR / job application | 150 DPI | Medium-High (80%) | Under 10 MB |
| Email attachment (general) | 96–150 DPI | Medium (75%) | Under 10–20 MB |
| Print-ready archive | 300 DPI | High (90–95%) | Size varies |
Quick rule: 150 DPI at 80% quality produces readable text and clear photos at a fraction of the size of a 300 DPI full-quality export. For anything that will only be read on a screen, 96–150 DPI is plenty.
If your images are already large before conversion, resize them first. The Core Tools Hub Image Resizer lets you set exact pixel dimensions before you build the PDF, which gives you cleaner control than compressing the PDF afterward.
Keep Your JPG to PDF Files Under Common Email and Portal Limits
Most email providers cap attachments at 20–25 MB. Many government and visa portals set lower limits — often 2–5 MB per file. A set of 10 high-resolution phone photos can easily produce a 40–80 MB PDF if you convert without adjusting settings.
How to hit a target file size
Before converting:
- Resize images to no wider than 1800–2000 pixels. Phone cameras often shoot at 4000+ pixels wide, which is far more than any screen or standard print needs.
- Use the Core Tools Hub Image Compressor to reduce each JPG to under 500 KB before building the PDF. Ten 400 KB images will produce a PDF in the 3–6 MB range at medium quality.
After converting:
- If the PDF is still too large, run it through the Core Tools Hub PDF Compressor to reduce size further without visible quality loss on standard documents.
- For a deeper dive on hitting specific size targets, see the guide on compressing a PDF for email without losing quality.
Common mistake: Compressing the finished PDF when the source images are still enormous. Compression works better on the images themselves. Fix the source first, then convert.
Rough size estimates by image count
| Number of JPGs (phone camera) | Uncompressed PDF (est.) | After 150 DPI / 80% quality |
|---|---|---|
| 3 images | 15–25 MB | 1.5–3 MB |
| 6 images | 30–50 MB | 3–6 MB |
| 10 images | 50–80 MB | 5–10 MB |
| 20 images | 100+ MB | 10–20 MB |
Estimates based on typical 12 MP smartphone images. Actual sizes vary by image content and tool.
Protect Privacy When Converting Photos and Documents to PDF
Browser-based tools that process files locally are the safest option for sensitive documents. When a tool runs in your browser, your files never travel to a server — there’s nothing to intercept, store, or leak.
Before converting any document that contains personal information (ID cards, bank statements, medical forms), run through this checklist:
Privacy checklist for JPG to PDF conversion:
- Does the tool process files locally in the browser, or does it upload to a server?
- Have you read the tool’s privacy policy to confirm files aren’t stored?
- Do your images contain EXIF metadata (GPS location, device info)? Strip it first using the Image EXIF Remover before converting.
- Are you on a private network, not public Wi-Fi, when uploading to any cloud-based tool?
- Does the finished PDF need a password? Use a tool that supports PDF password protection for sensitive submissions.
For a detailed comparison of browser-based versus cloud upload tools and what each means for your data, see Browser-Based File Conversion vs Cloud Upload Tools.
Edge case: Some scan apps on iOS and Android automatically upload images to cloud storage (iCloud, Google Photos) before you even open a converter. If privacy is a concern, disable auto-backup before scanning sensitive documents.
Recommended JPG to PDF Tools for Different Use Cases
No single tool is best for every situation. Here’s a practical breakdown:
| Situation | Best Tool Type | Why |
|---|---|---|
| Quick one-off conversion | Browser-based (Core Tools Hub, Smallpdf, PDF24) | Fast, no signup, no install |
| Batch conversion of 20+ images | Desktop app (UPDF, PDFgear) | Faster processing, no file size limits |
| Need OCR (make text searchable) | Adobe Acrobat (paid) or Soda PDF | Only tools with reliable OCR on JPGs |
| Privacy-sensitive documents | Browser-based, local processing only | Files never leave your device |
| Design-heavy documents | Canva (drag-and-drop PDF builder) | Better layout control, though larger output |
| Professional archive / print | Adobe Acrobat or Foxit PDF Editor | Best color accuracy, 300 DPI output |
For most non-technical users who handle receipts, applications, and school documents, a browser-based tool meets 95% of their needs. The Core Tools Hub PDF Tools collection keeps everything — convert, compress, merge, split, rotate — in one place without accounts or installs.
If you’re merging PDFs that already exist rather than starting from images, the guide on best online tools to merge PDFs covers that workflow separately.
Troubleshooting Fuzzy Text or Oversized PDFs After Conversion
Problem: Text in the PDF looks blurry or pixelated
This happens when the source image resolution is too low. A photo taken at 72 DPI that gets stretched to fill an A4 page will look soft. Fix: re-scan or re-photograph the document at a higher resolution (aim for 300 DPI for text-heavy pages), then reconvert.
Problem: The PDF is far larger than expected
The source images are likely high-resolution phone photos. Resize them to 1800px wide and compress each to under 500 KB before converting. See the image compression guide for step-by-step instructions.
Problem: Pages are in the wrong order
Reorder them using the Core Tools Hub PDF page reorder tool — no need to reconvert from scratch.
Problem: One page is sideways
Use the rotate PDF tool to fix individual pages without affecting the rest of the document.
Problem: The tool won’t accept my image files
iPhone users: your photos may be in HEIC format, not JPG. Convert them first using a HEIC to JPG converter, then retry the PDF conversion.
Problem: Colors look washed out in the PDF
This is a color profile mismatch. It’s most common with PNG files converted to JPG before the PDF step. Try converting directly from the original image without intermediate format changes.
Conclusion
Converting JPG images to a single, clean PDF doesn’t need to be complicated. The process comes down to four things: pick the right tool, set your page order before converting, match your resolution to the portal’s size limit, and strip any metadata you don’t want to share.
For most everyday tasks — receipts, school work, job applications, visa documents — a browser-based tool that runs entirely in your browser handles the job in under two minutes with no signup and no software to install.
Your next steps:
- Head to the Core Tools Hub Images to PDF converter and upload your JPGs.
- If your images are large phone photos, run them through the Image Compressor first to hit your target file size.
- If the finished PDF is still too large for a portal, use the PDF Compressor to reduce it further.
- For sensitive documents, use the Image EXIF Remover before converting to keep your location and device data private.
Fast, clean results — and your files stay on your device the whole time.
Frequently Asked Questions
How do I convert a JPG to PDF for free without installing software?
Use a browser-based tool, such as Core Tools Hub’s Images to PDF converter. Upload your JPGs, arrange the order, and download the PDF. No installs, no signup required, and all processing runs in your browser.
Can I combine multiple JPG images into one PDF?
Yes. Any decent JPG to PDF tool lets you upload multiple images and merge them into a single PDF. Drag the thumbnails to set the page order before converting.
Why is my JPG to PDF file so large?
Phone camera photos are typically 3–8 MB each at full resolution. Ten photos can produce a 50+ MB PDF without compression. Resize images to under 2000px wide and compress each to under 500 KB before converting to keep the final PDF under 10 MB.
What DPI should I use for a visa application PDF?
150 DPI at medium quality (75–80%) is the standard recommendation for visa and government portal submissions. It keeps text legible and photos recognizable while staying under typical 2–5 MB upload limits.
Is it safe to convert sensitive documents online?
It depends on the tool. Browser-based tools that process files locally never upload your data to a server, making them safe for sensitive documents. Always check the tool’s privacy policy and strip EXIF metadata from photos before converting.
My JPG images are in HEIC format from my iPhone. What do I do?
Convert them to JPG first using a HEIC to JPG converter, then run the JPG to PDF conversion. Most PDF tools don’t accept HEIC files directly.
How do I fix a sideways page in my converted PDF?
Use a PDF rotation tool to fix individual pages without having to reconvert the entire document. You can rotate one page at a time.
What’s the difference between compressing the images before conversion vs. compressing the PDF after?
Compressing images before conversion gives you more precise control over quality and file size. Compressing the PDF afterward is a useful backup, but it works less efficiently because it reprocesses already-encoded image data.
Can I convert a PDF back to JPG images if I need to? Yes. A PDF to JPG converter extracts each page as a separate image file. This is useful when you need to edit a specific page or reuse an image from an existing PDF.
Do I need to pay for a JPG to PDF converter?
No. Browser-based tools handle standard conversions for free with no watermarks. Paid tools add features like OCR (making text searchable), batch processing of large volumes, and advanced editing — useful for professional workflows but unnecessary for most everyday tasks.